Click Here for my article on the overdrive conversion from the Triumph Stag Club magazine..
June 2016:
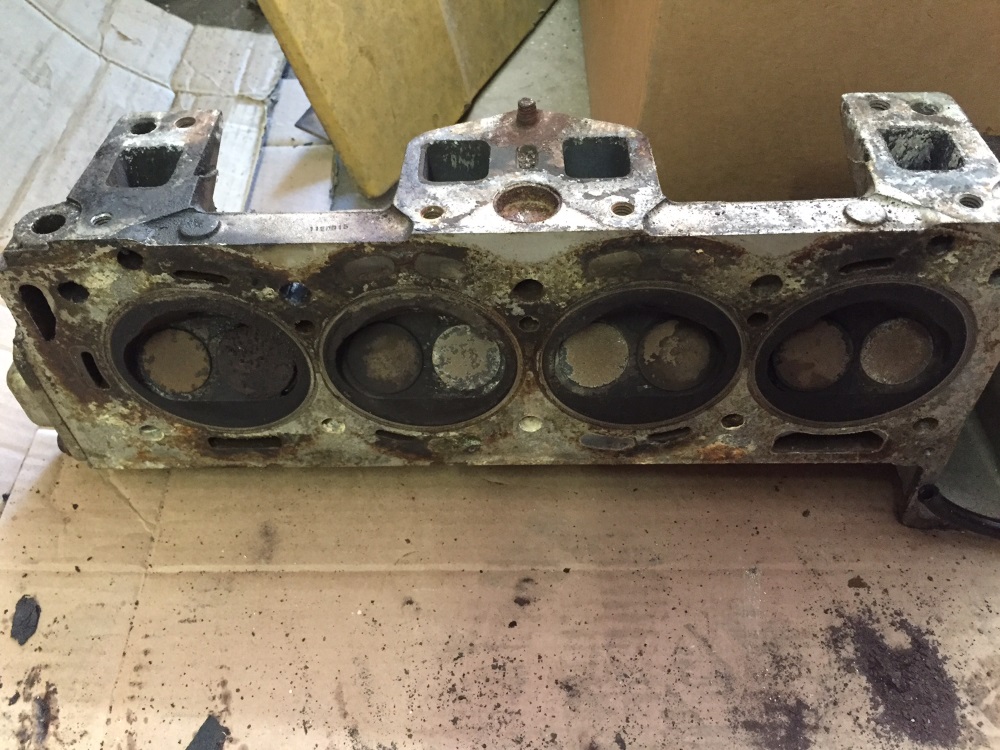
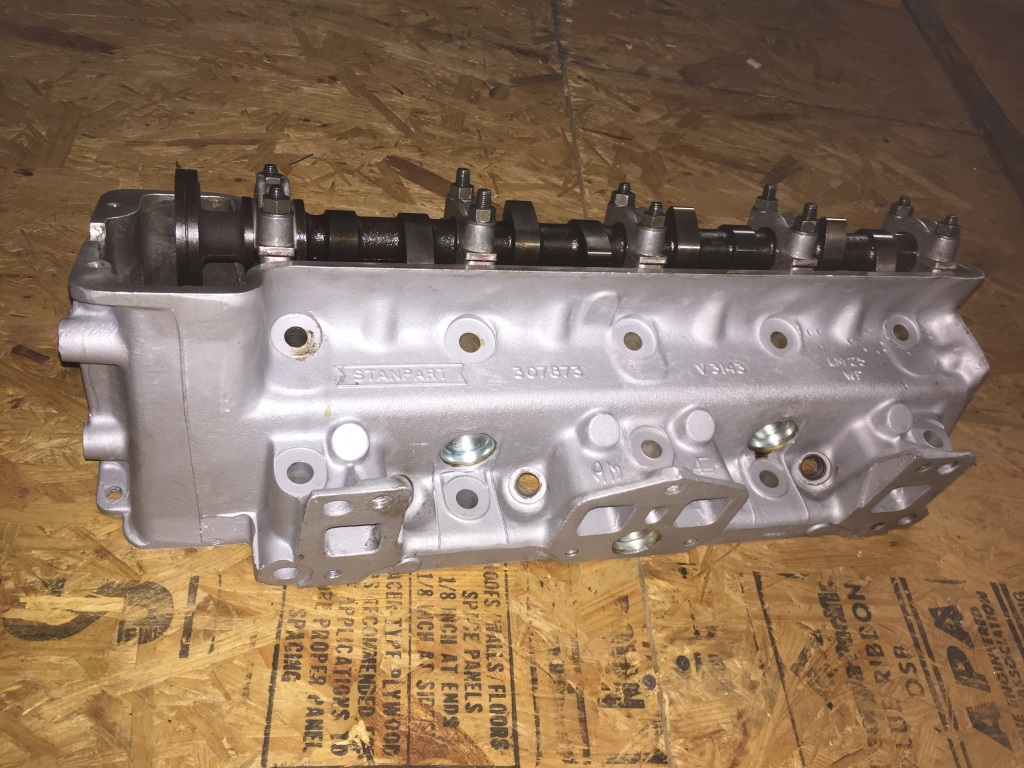
The Mk1 is here and what a sad sight! I was a bit worried about the engine but once it was removed and the heads taken of (after
the required 2 days to remove the single stud that I could not budge) I had a pleasant surprise.. Heads look great.. I just need to work out of they
have been skimmed but it looks like there is still some meat there. In general the engine seems in good condition, and was probably rebuilt before
the cars demise. It turns over fine, The block is OK the crank is great. The timing chains and tensioners look new and best of all the aluminium
around the head waterways has not corroded at all. All engine parts are there and there is not a lot more that will be needed.
*Click on images for bigger version*
Sept 2016:
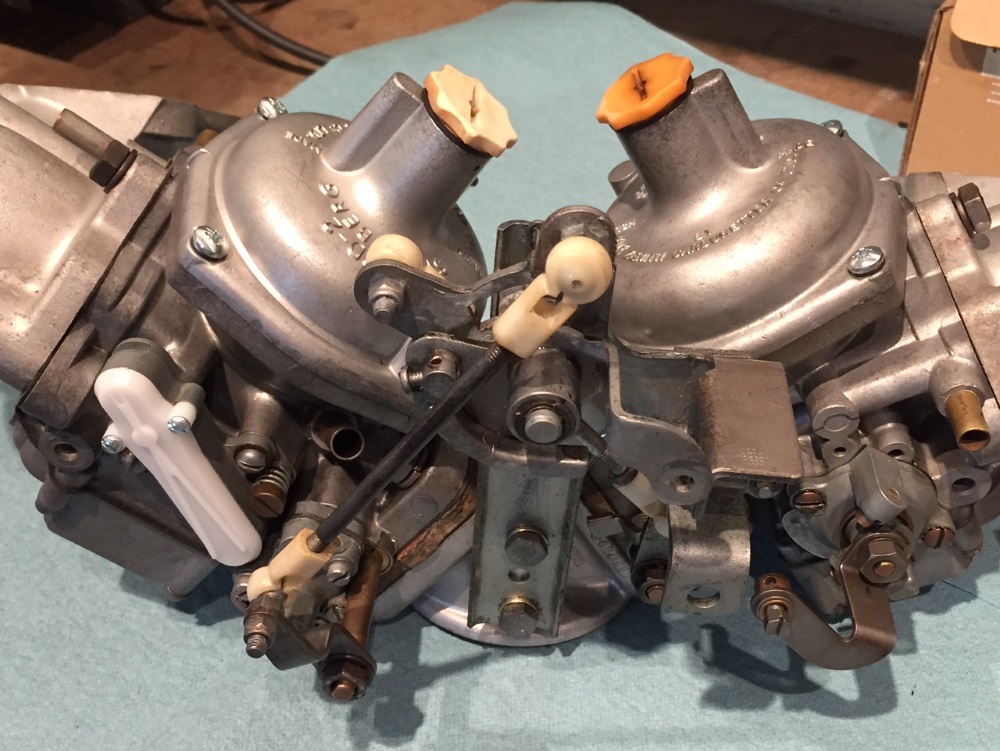
Started on the carbs which were a bit worryingly furry, but they glass beaded up fine. The carb rebuild tech info on the buckeye triumphs webpage
is a wonderful resource. All of the gaskets were replaced, the bypass valves were repaired and the compensators cleaned up and adjusted using hot
water. The needles look fine so they will stay for now and I can make that call once I tune them up, a while away yet!
*Click on images for bigger version*
Sept 2016:
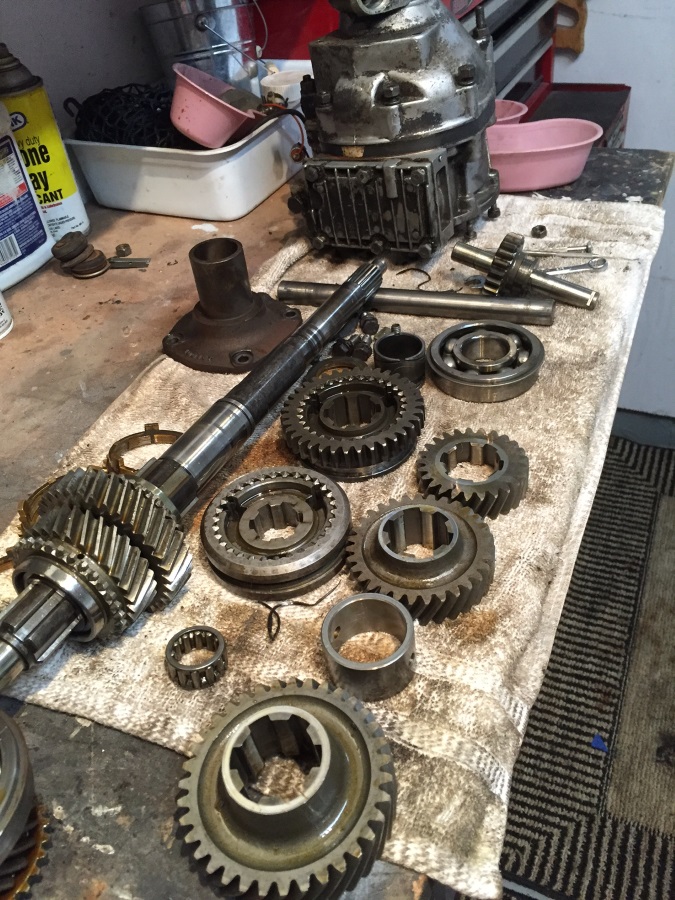
Got my hands on a J type Overdrive. Its from a TR6 but it should provide the parts to rebuild my Stag box. 1st gear was stripped but the rest of
the parts look fine, nothing nasty seems to have got back to the OD unit. I had trouble with the OD being "spline locked" and it would not pull off
the main shaft. A Volvo site provided a way to release the splined by removing the sump and prying the clutch carrier back whilst spinning the
output shaft.. it worked as the OD then popped off easily. I found that to convert to J type I would need a special rear gearbox mount, which I
purchased in the UK, and different exhaust downpipes, which I will worry about later! I worked out the speedo drive gears (then found out it was
stamped on the casing! its 7) and found that with my planned wheel size I just needed an output gear at 21 and it should be within a few percent.
Then found out that a 21 tooth is not available so got a 20, regardless the speedo is accurate.
*Click on images for bigger version*
Nov 2016:
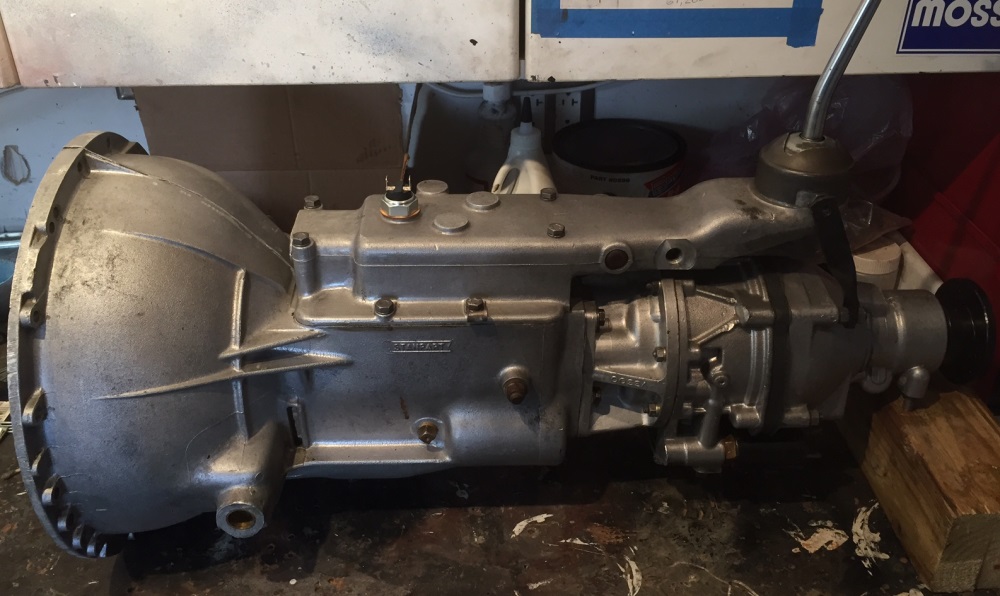
Finished rebuilding the Gearbox, used all of the Stag box components as they are stronger than TR in some areas and just used the Overdrive mainshaft
from The TR6. The OD Cone clutch was a bit worn so ordered a relined one from the UK. All went together well and the Overdrive kicked in fine when
tested. As I did not have the cover with the 3/4 gear switch I had to modify my original one, its just a matter of drilling a hole and cutting a
thread for it in the exact centre of the boss, I then had the machine shop machine the boss down a little to get the switch at the correct height.
*Click on images for bigger version*
May 2017:
Over a year now, some progress but not much to show for it. The heads are back from the Machine shop, they look OK and do not appear to have been
skimmed too much. I redid all of the clearances and needed some extra shims. I found that Lotus and Saab shims work, plus they have some sizes that
are thinner than Triumph ones. I needed to fix the threads on 3 of the spark plugs, they may have been ok but its so much easier to do this now.
I used helicoil brand Spark plug inserts with hi-temp loctite, which went well. I also repaired a few threads with regular helicoils. I also
refurbished the steering column, rebuilt the Power steering pump and with my newly aquired glass beading cabinet prepped and painted everything I
could lay my hands on. My attic is straining -- 1/2 the car must be up there now!
*Click on images for bigger version*
July 2017:
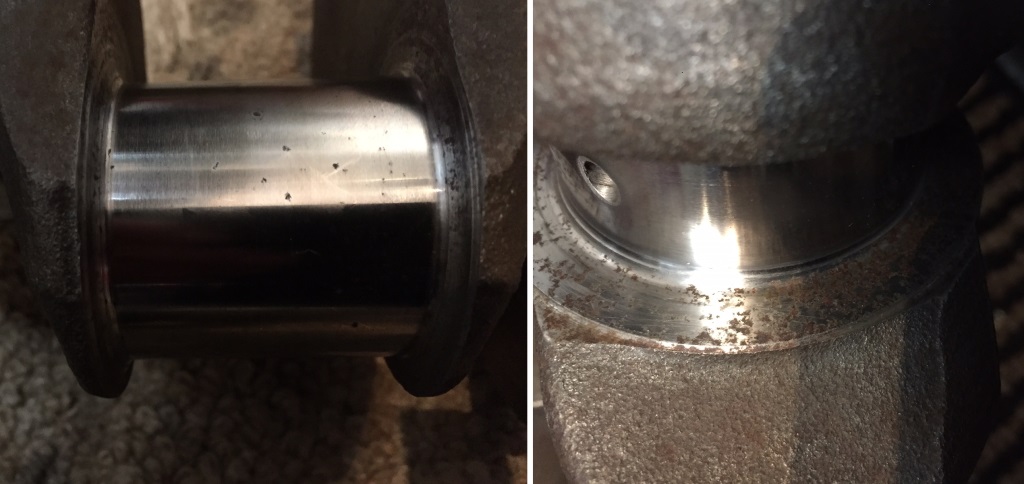
The first block was done and during assembly I found that the main bearing caps were so off centered that torquing any of them down siezed the crank.
I had asked the machine shop to fully check the block over before starting (as I had another) but they apparently did not bother with that, you
could tell by just running a finger over them. I also gave them 2 cranks and asked them to pick the best one to do, For no apparent reason they
picked the rusty one and it came out with quite a few pits in the bearings and the thrust surface was terrible. When confronted The owner gave me a
tirade of abuse, saying that it did not matter.. possibly true, but why not start with the better one?? He also did not think I needed to harden the
crank, even though he had little (No?) Stag experience. Basically his stance was that he had 30 years of experience and I was an A$$^ole. Needeless
to say I will not use or recommend that shop again. That shop is closed now.. good riddance.
Pics below show the crank as received from the shop.
*Click on images for bigger version*
Aug 2017:
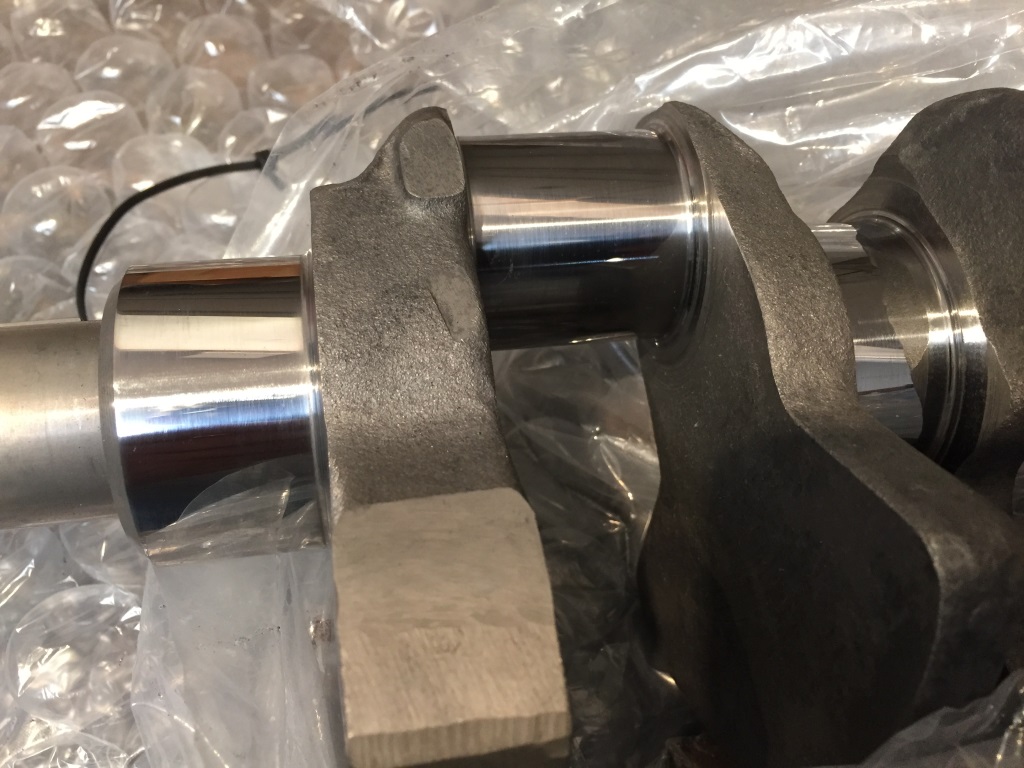
So I started again.. I found another machine shop and they advised that the mains could not be fixed without major work as it was not just a matter
of line honing them. As the crank was balanced for the engine I stayed with it and they fixed the thrust surfaces and repolished and then it was sent
off to Shaftech in Ohio (http:\\www.shaftech.com) who did a fantastic job hardening and re-polishing the crank again, it looks perfect now, no sign
of pits and I would highly recommend them for all your hardening needs. Turnround was great and I thought the cost was reasonable. Meanwhile,the
other block was checked out and rebored to +20, The Original block was +40 and I had the pistons but I was not going right out to +40 on such a good
block so I also needed to buy another set of pistons. This caused quite a bit of extra cost but I am now ready to assemble this engine.
Now the crank looks like this. Clean as a whistle!
*Click on images for bigger version*
Aug 2017:
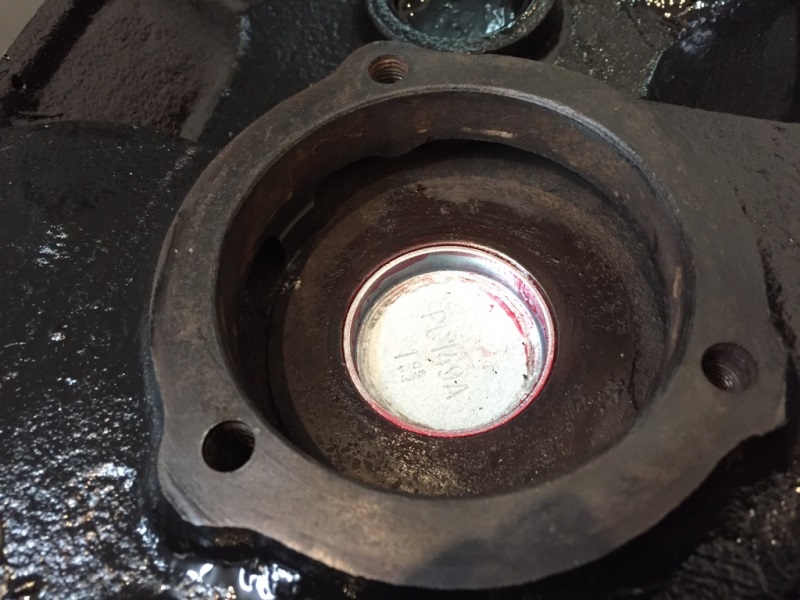
First job was to clean and paint the engine, I used POR engine paint which seems pretty tough, Then soapy water and a hose to clean out anything
left in the block. It was pretty clean and had been shotblasted and cooked. The oil plugs looked fine but I stressed about them so removed the one
near the distributer that looked a bit iffy to find that it was in fact fine, apparently they rarely fail. Inserted the core plugs and as I plan to
use an electric water pump (A Craig Davis pump was secured as a Christmas pressy!) I used core plugs to seal off the old Water pump. A 1-41/64ths
and a 1-45/64ths seem to fit nicely. The new +20 pistons were only 10g lighter than the +40 so I'm not getting into rebalancing the crank, its
within normal tolerences apparently. I spent a long time identifyng some IWIS chains that fit and are available in the USA, and got them for under
$75. they are the G68V-2 type and these are apparently the best IWIS make. Also Found that my donor engine had German SWAG camshaft gears so will
reuse them as well.
*Click on images for bigger version*
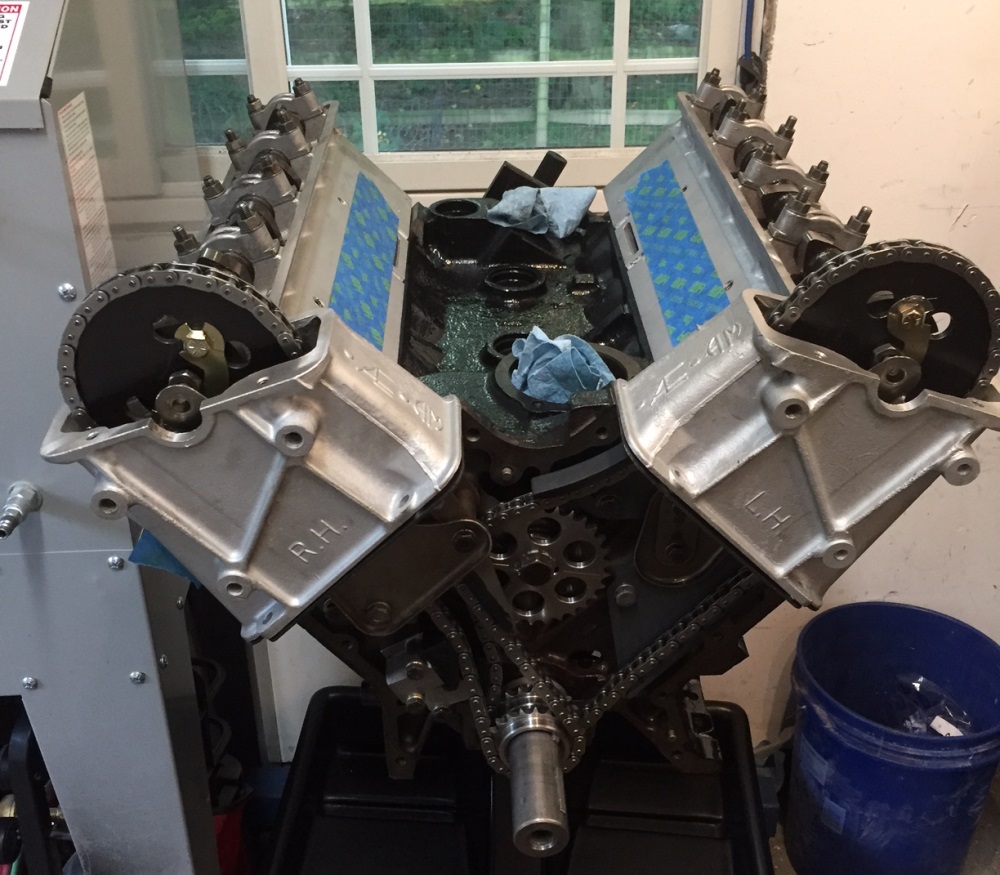
Sep 2017:
Started the engine build, I must say that you need to be on top of your game with this engine, many areas where things can go wrong. Crank was
checked with plastiguage and is fine, Once all the bearing were tightened its spinning freely. I gapped the piston rings, which needed quite a
bit of adjustment. That should have been a clue.. Once I started to install the pistons they were incredibly tight. I did some checks and they
seem much tighter than I have ever seen on a build. Back to the machine shop and they only have 1thou clearance - spec is 2-3. The machine shop
did not really explain how this happened but it may have been the bore guage calibration.. But at least they fixed the problem with no hassle.
Problem was that now I had piston rings that had out of spec gaps, so as I'm determined to get this build right I ordered another set of rings.
I installed the timing chains which were nice and tight, plenty of future adjustment there. Apparently the new style chain adjusters have the
oil outlet that oils the chain in the stem, rather than the shoe as the old one did. This means that they are installed differently, as the stem
needs to be a little further out to ensure the oil hole is exposed. Instead of a 1mm feeler between the shoe and the body of the adjuster as the
original there is a (red) spacer, around 2mm. The rimmer video shows them additionally putting a 1mm feeler between the chain and shoe but I
felt this was not needed, it seems to be a flaky thing to do, and probably only a nod to the original instructions.
*Click on images for bigger version*
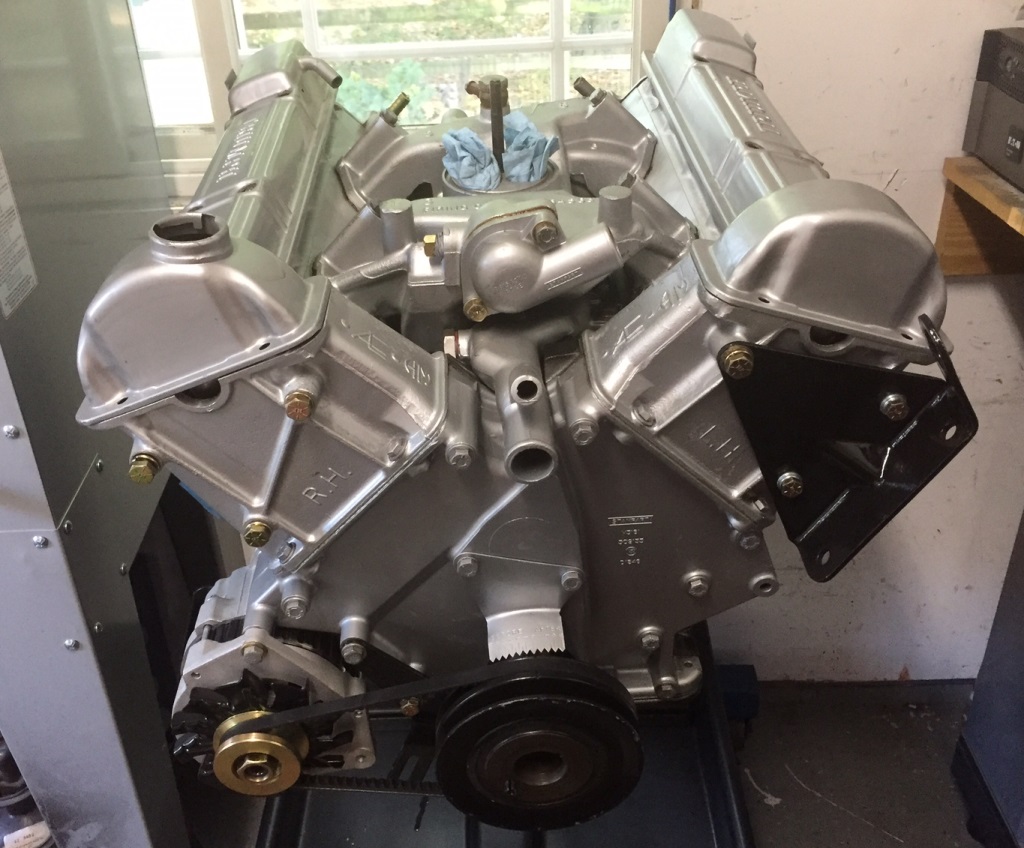
Sep 2017:
Now the pistons were installed I fitted the heads with all new studs and bolts. Again arguments on the torque sequence abound, the book says all
the studs first then the bolts which seems crazy to me. Some trusted people on the Forum said do it the conventional way, spiral pattern and as
that is the pattern that both the TR7 and Dolomite (similar heaads) eventually got changed to a year or so after the Stag was discontinued, I
chose that way. I also did not install the inlet during head tightening, as instructions but chose to adjust it if needed as I felt the stresses
on the manifold would be minimalised. In the end with very little fettling the inlet fitted perfectly with all bolt holes aligned, finally
something went well! A bit of a fiddle to install the timing cover, next time I will ensure they are skimmed along with the deck. Its all together
now, with oil pump, spin on filter and transfer cover installed. I also realised that the PS pump drive pulley was the Mk2 type and my MK1 one was
rusty so I'll need to get one of those as well as I only have a MK1 fan and clutch.
*Click on images for bigger version*
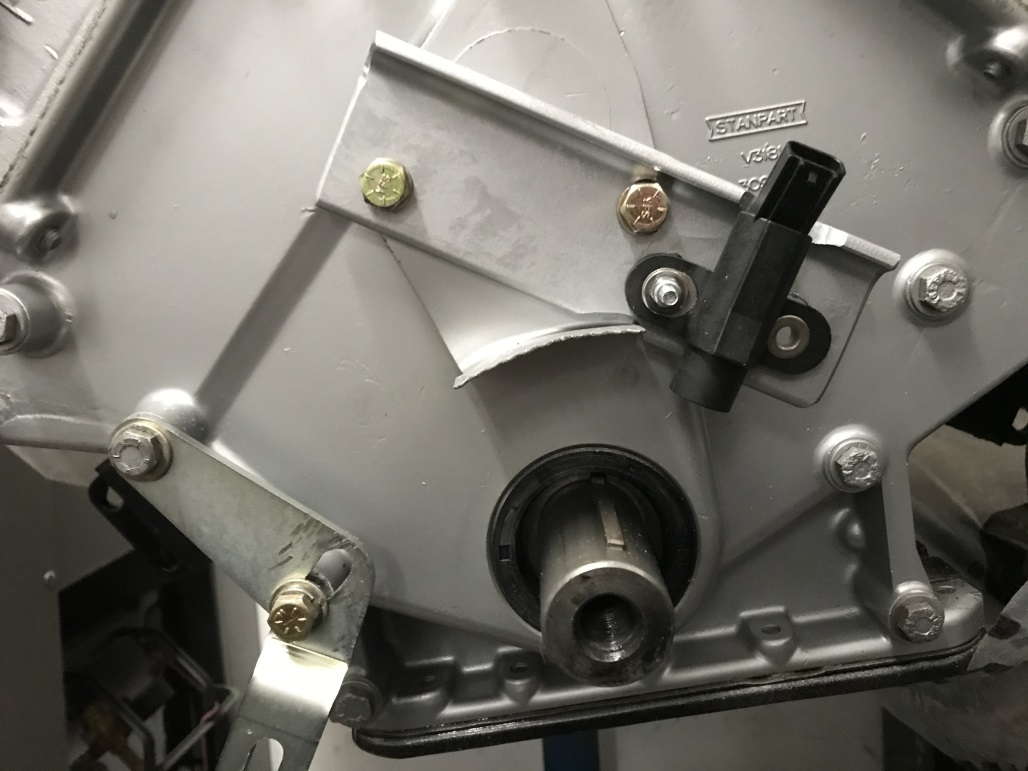
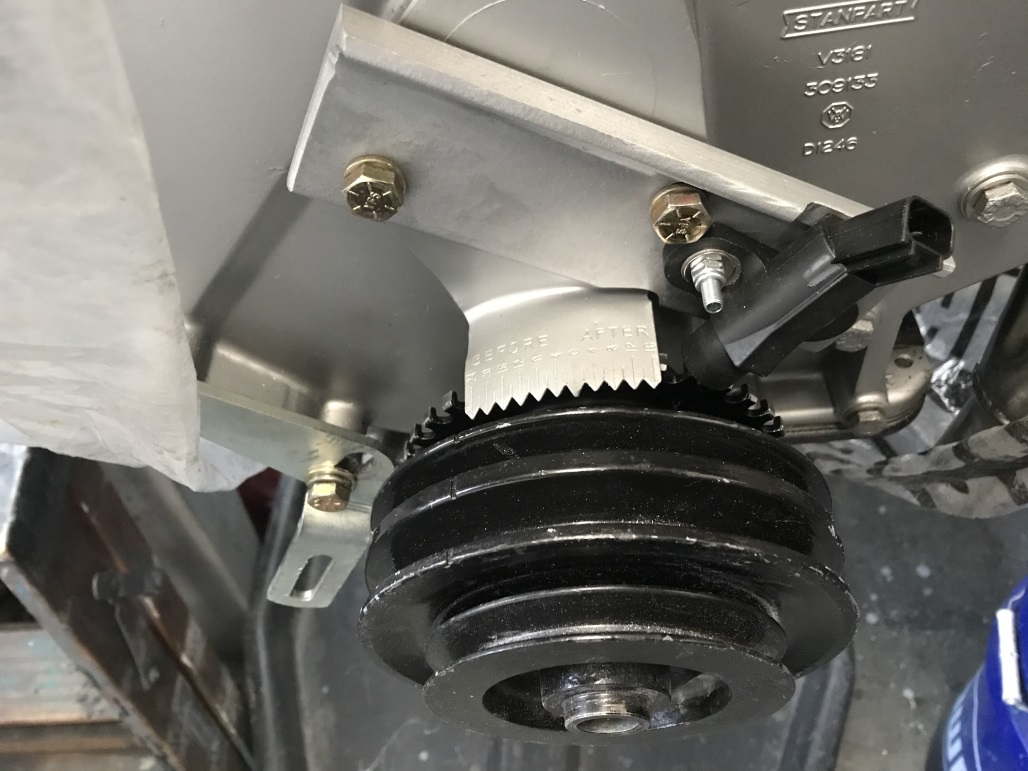
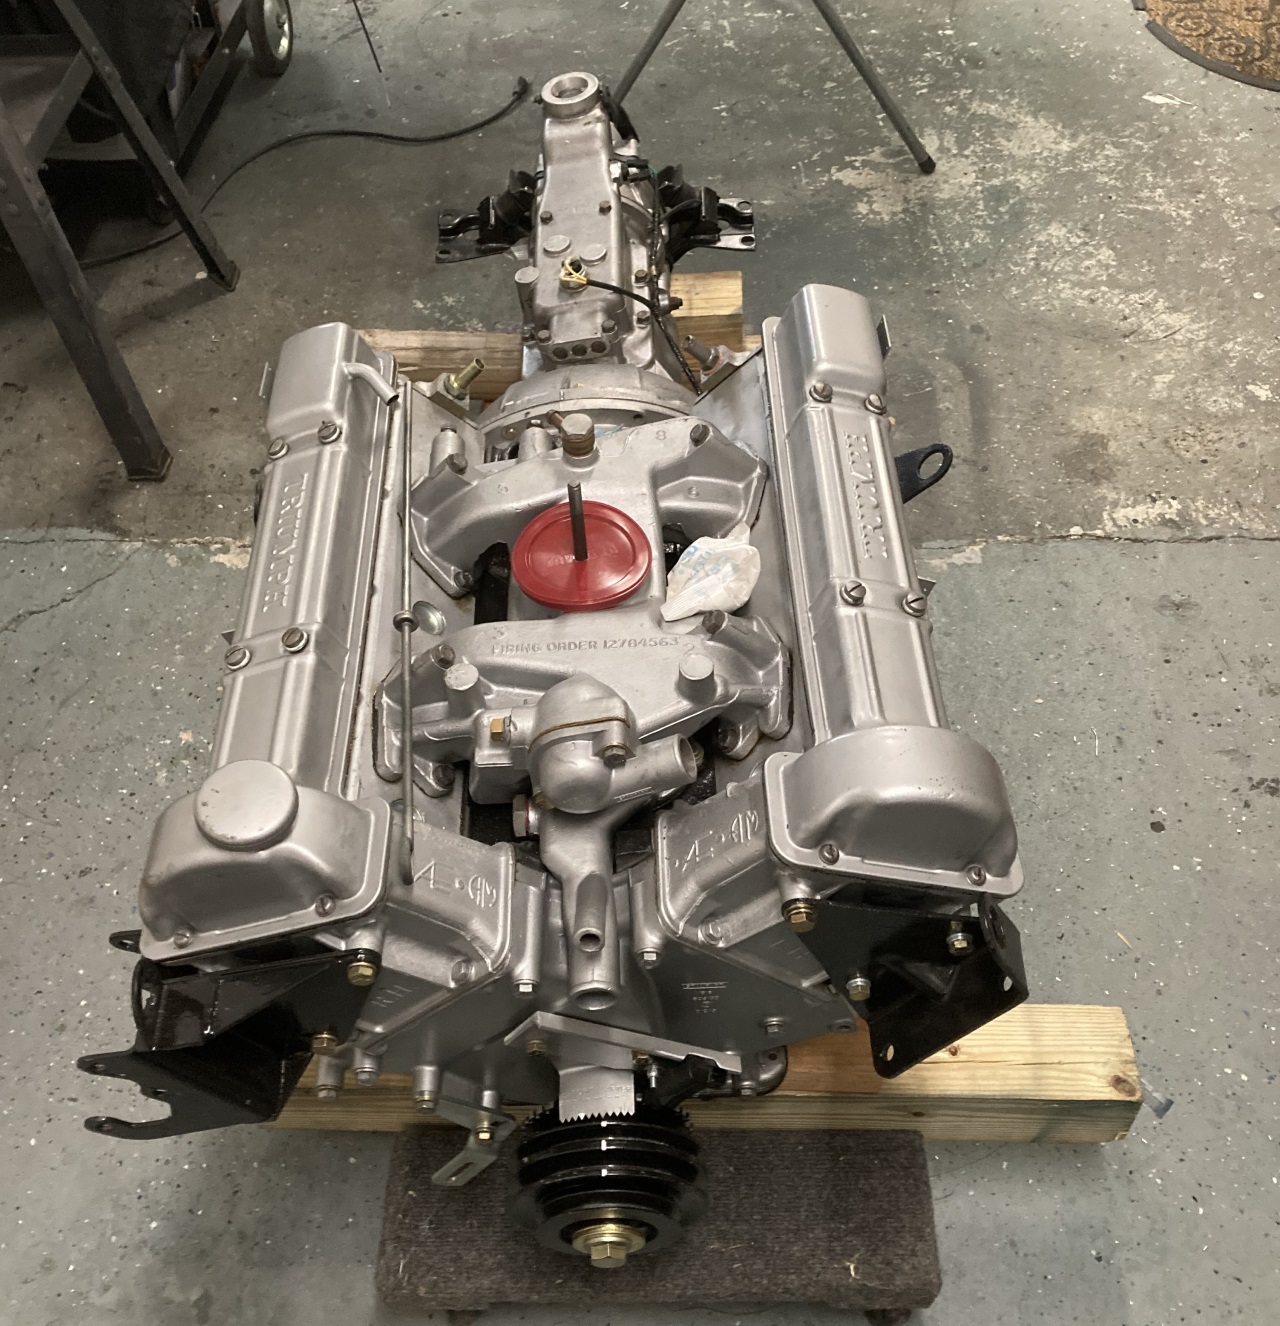
June 2020:
Has it really been almost 3 years? Getting ready to install the engine soon so I am back on it. Drive pulley was obtained but in the end I'm not
going to install the mechanical fan, I may need the space with the Electric water pump, I cannot source a shroud and the electric fan can do the
job and even stay on after shutdown to help prevent heat soak. I decided to install a 36-1 trigger wheel as one day I may go Fuel injection, or
at least Megajolt distributor-less ignition. The pulley was turned down for a 50mm ring and a Mustang trigger wheel mounted to the ring. This
setup allows plenty of adjustment. The sensor was mounted just above and it should work well.
*Click on images for bigger version*

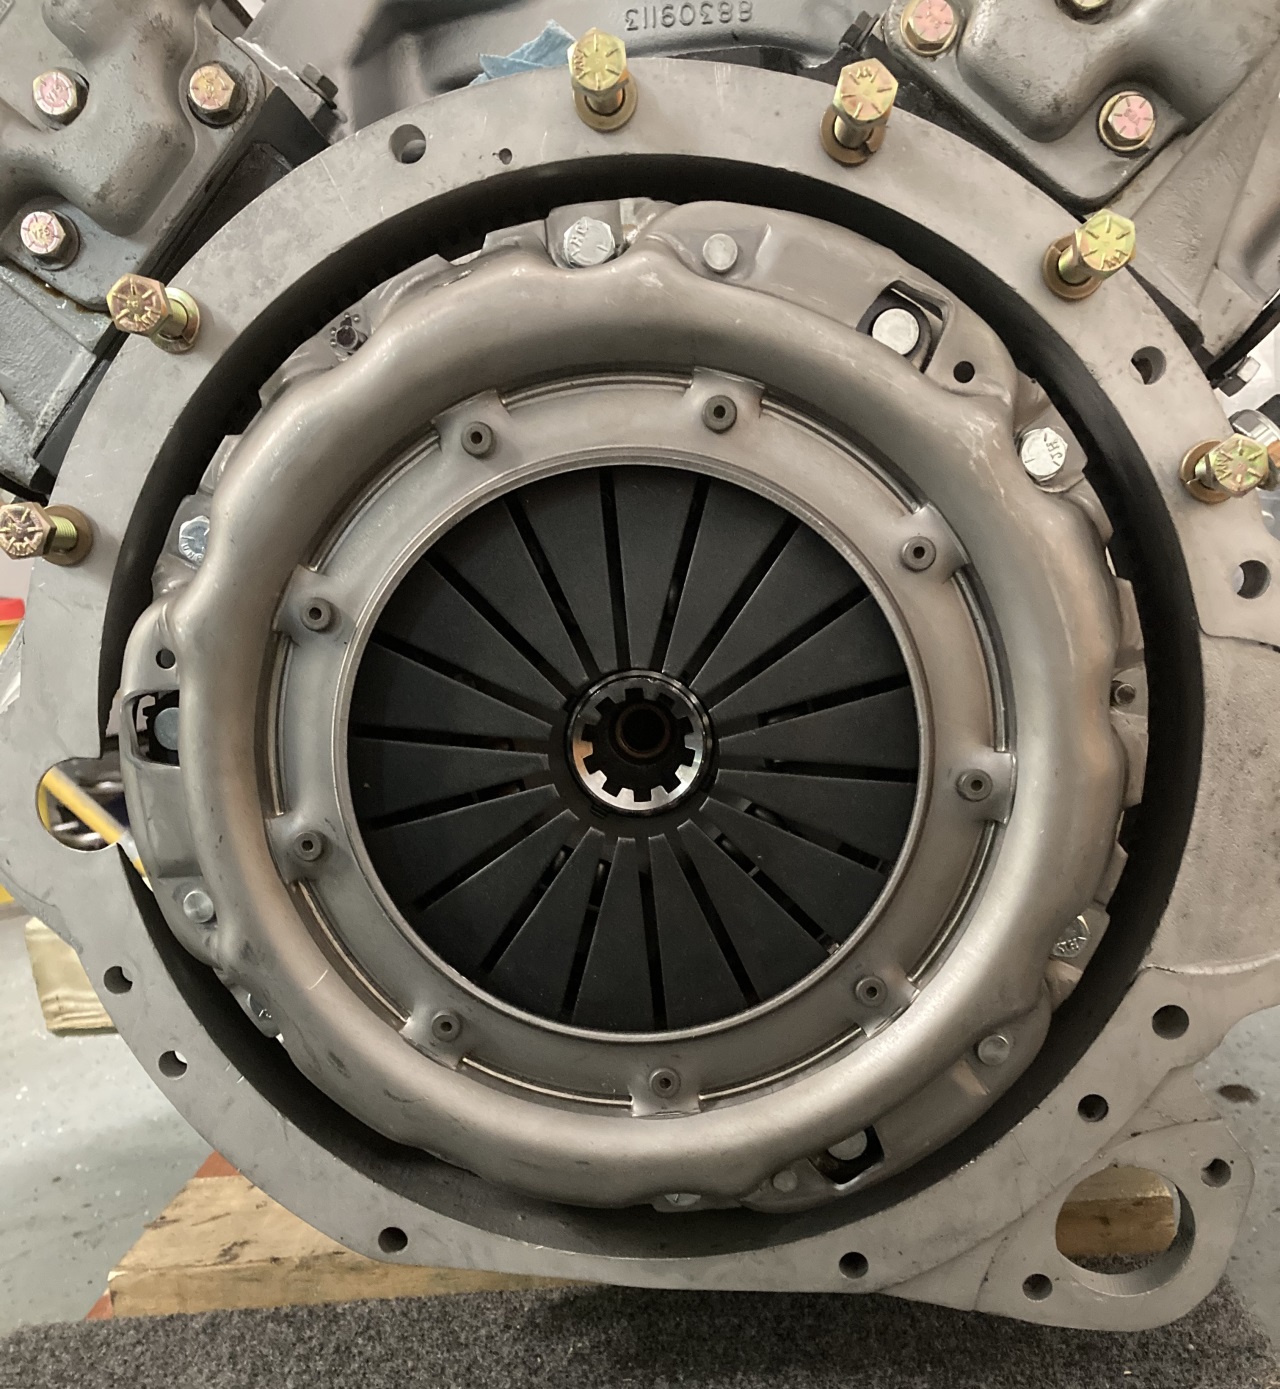
June 2020:
Engine was removed from stand and the clutch installed, then the gearbox was installed, it went on fine. I threaded the engine plate and used bolts
at the top, a trick from the SOC club forum. Apparently these bolts are an absolute bear so it will help should I ever need to split them in the
future. The J type gearbox mount looks all wrong until you realise that the gearbox is tilted by the engine plate, once its all installed it looks
level. the longer hole/mount gap needs to be on the right side.
*Click on images for bigger version*

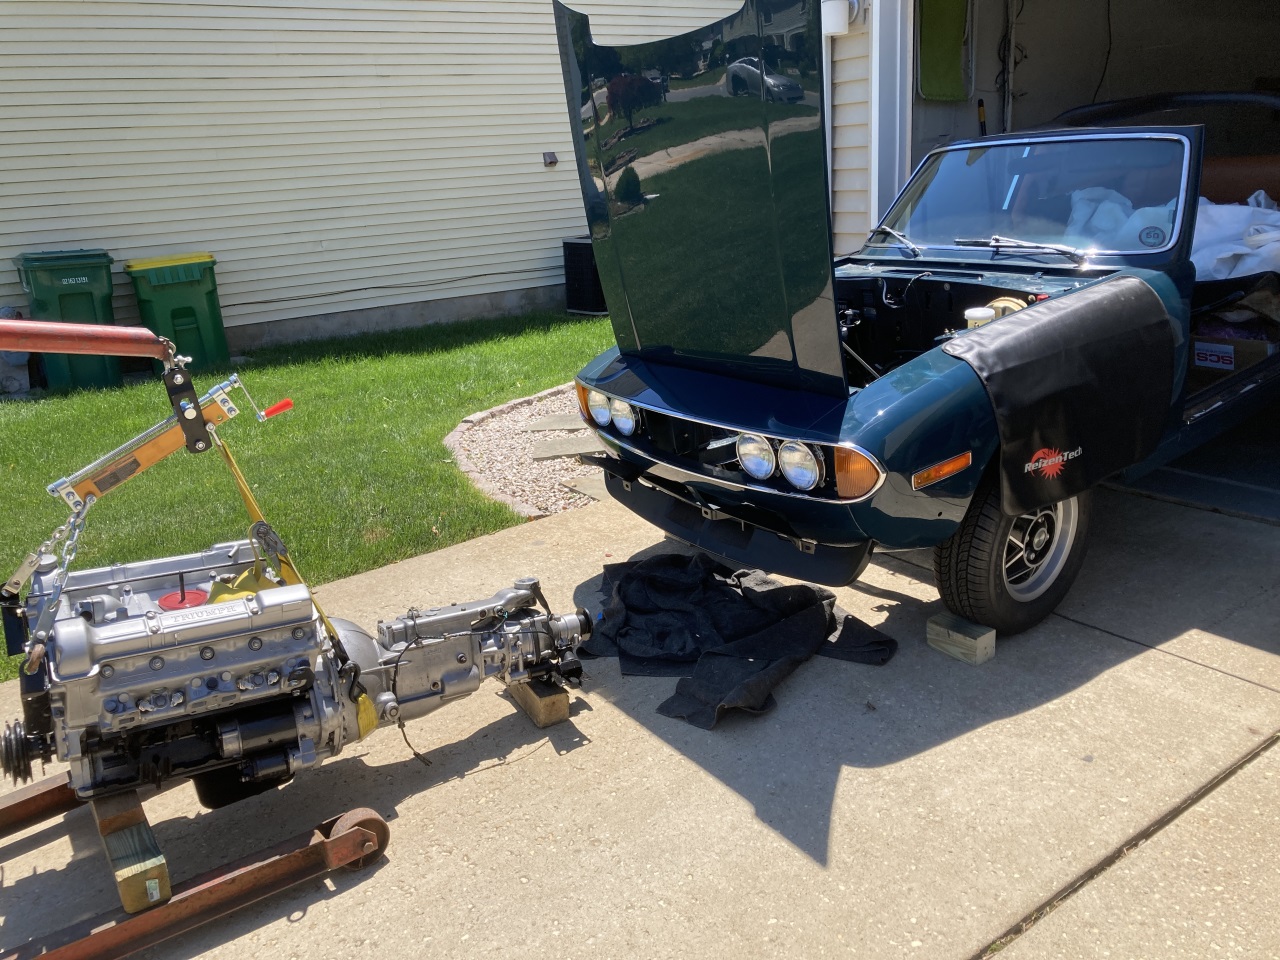
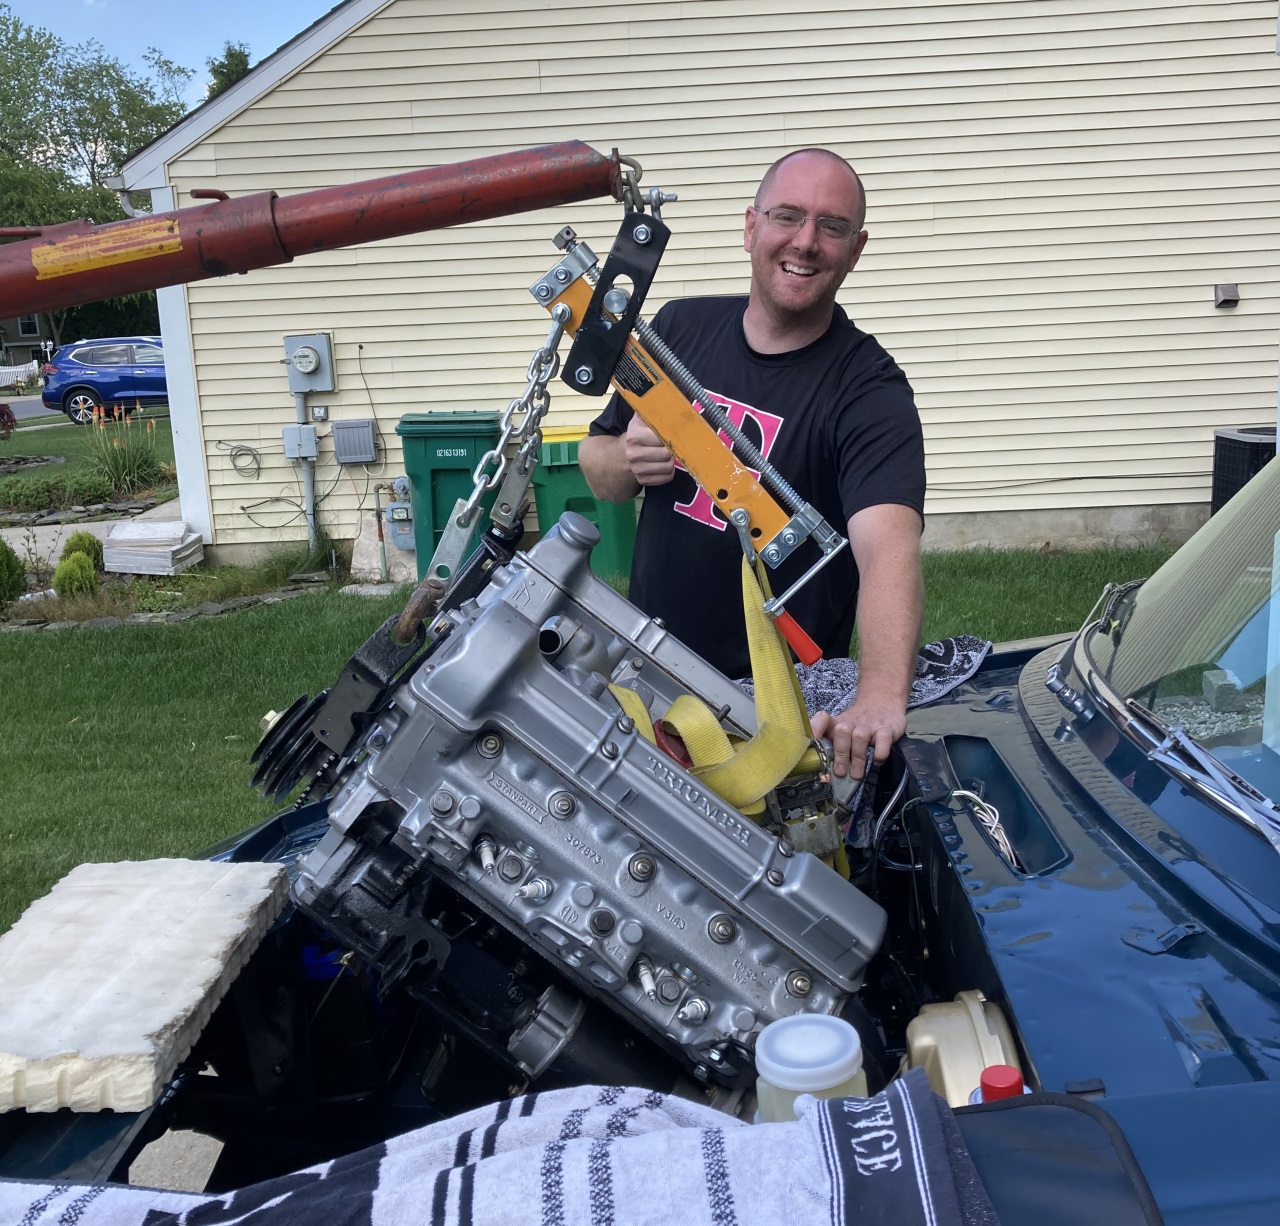
July 2020:
Engine was finally installed into the car, I didn't take many pictures as I was busy! but a couple here showing it before and during the lift where
my son-in-law was assisting. No real problems just took it carefully, and used a tilter to get the engine/box to the needed angles.
*Click on images for bigger version*

August-Nov 2020:
Once the radiator and cooling was sorted the engine was made ready for a start, first crank and she was off! sounds great. No funny noises but a few
leaks. Power steering was seeping, tightening some of the connections cured that (that ended up a marathon..see the suspension page). The freeze
plugs under the manifolds seeped for the first few drives but them mysteriously stopped.. strange..will watch that.. plenty of oil dripping off
the oil pump, What I came to realise is that many types of leak end up there. The first was from the 1/2 moon seals on the RHS cam cover, they
were a little to big and caused a step which the camcover cork gasket could not seal (I glue the gaskets to the covers and grease the head surface
for easy removal and replacement) All of the 1/2 moon seals were trimmed so as to lay flush to the head and they are now dry. Next was some oil
coming from the sump gasket under the rear seal. All of the sump bolts were re-torqued, they were alarmingly loose despite being torqued up
initially. Next the oil pressure sensor and gauge tapping were tightened slightly. The oil pressure was initially around 75psi, hot or cold which
seemed a bit high, and is a known issue with the new county pumps. By installing an original spring and a shim I have it running now around 50psi
which I am happier with, less stress on the chain tensioners.. finally a 2mm seal on that relief valve almost cured the drip, its minimal now and
I have given up! Until the Stag I had been very succesful in building a leak free engine, not this one!
Finally the Overdrive was also dripping a fair amount after a drive. I was aware of some oil making it out of the lower brake ring studs during
storage and had installed copper washers to the bottom 2, now the rest seemed st be leaking during operation so all had copper washers installed,
not an easy task with the top two, I had to go in through the gear lever hole. Sucess, No more drips on the floor. Engine pulls great, sounds
fantastic just needed some carb tuning to finish it off. As I had installed an O2 sensor that was a breeze. I set the needles exactly the same
height and used the sensor to get the mixture correct. A few drives and I checked the plugs, one carb was a little rich so that
was leaned of and the mixture reset. Since then its been stable, mixture and plugs look OK. The only thing that persists is a mild popping on
the overrun, the bypass valves are OK but useless, when adjusted by the book they cause the engine to take forever to settle down to idle so I have
them set almost closed off, a compromise between popping and engine response. I'm beginning to think the exhaust is so open that its could be
causing this. The engine hot flooded a couple of times, a common issue that may be due to the mounting angle of the Strombergs. A Malpassi fuel
regulator and new best quality float valves seems to have cured that.