July 2016:
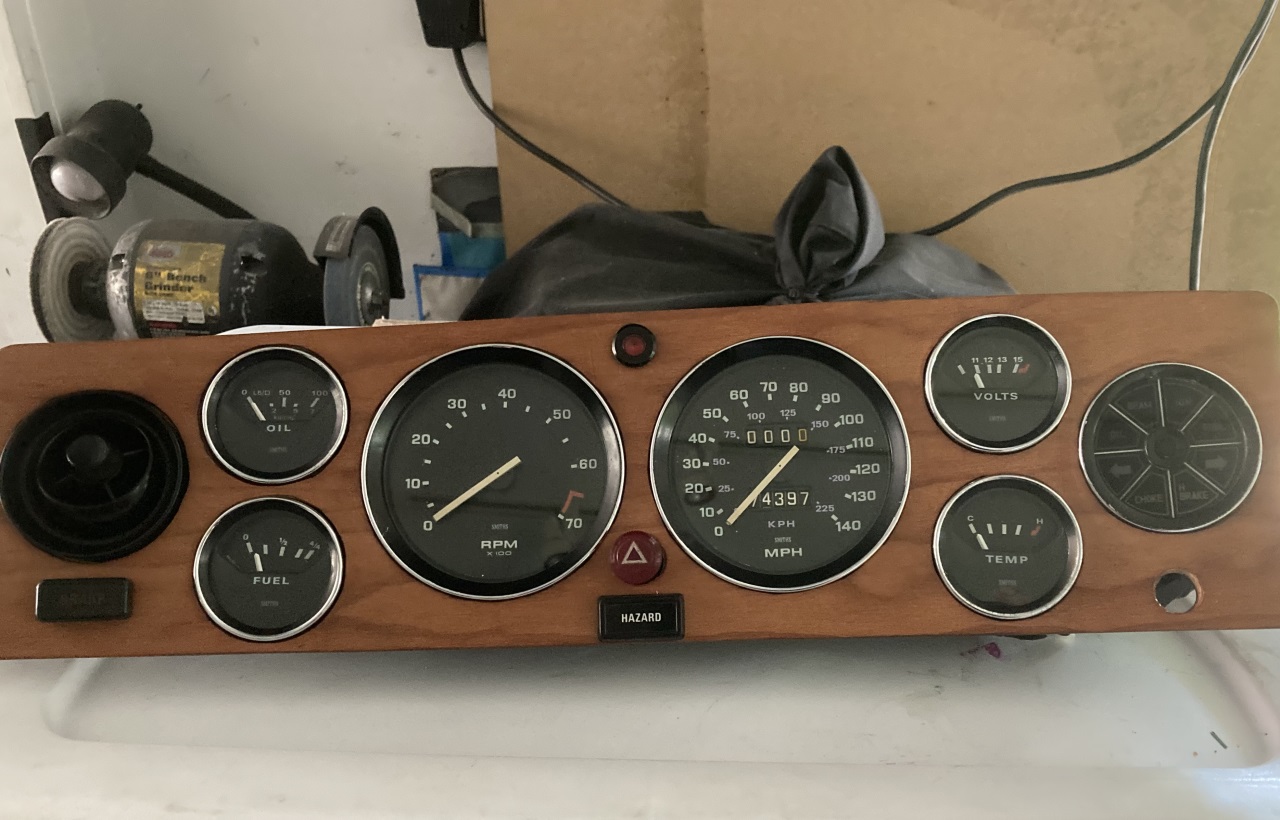
Where to start? Well the instruments looked a bit sad so opened them all up, glass beaded and repainted the interiors and
cleaned the faces as best I could. The speedo and Revcounter are fine but the other 4 are not great. 2 of them are not standard, the Mk1
has different types. I got hold of some from a 73 Truimph TR6 and they are the right type, even included an Oil pressure gauge. The faces
were OK except the oil pressure which I touched up a bit. Nearer the install time I will consider weather to use led bulbs here.

May 2017:
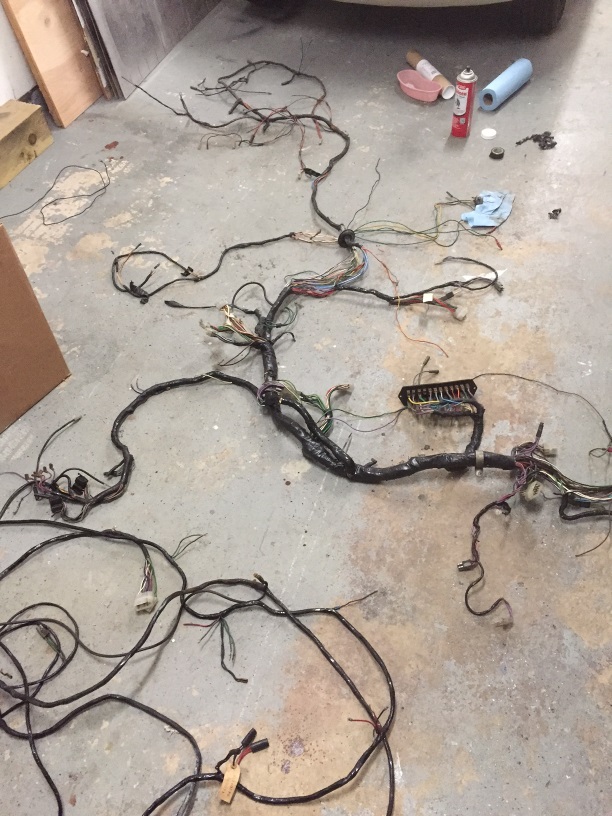
All of the wiring looms were removed from the bodyshell checked out and wires identified. There was a molten wire in the
front left loom, the fog lamp wire for some reason but it had not damaged any others. The whole main loom was unwrapped as just about all of
the wires around the engine were damaged, stained and brittle from the heat and oil so these will be replaced, or at least new wire spliced
in. The starter solenoid wire from the ignition switch takes a convoluted path via the gearbox plug for the auto transmission inhibit switch,
which I don't have, so that was eliminated and wired directly as its a well known source of issues. I also added a 12v wire to the
distributor/coil area as I plan to go with electronic ignition, but left the resistive wire in place anyways.. Many of the wires and
connectors were bought from Autosparks in the UK including the multi plug connector Riste type pins that I may need. I also plan to include
the new electric water pump wiring into the main loom so at this point its really best to leave the re-wrapping of the main loom until I
have a firm idea on just where these things will be positioned. The left and right rear looms were generally OK, I just needed to splice
in new fuel tank wires and re-terminate the rear lamp wires as they had been modified at some time. I also checked and tested all of the
switches and controls and all seemed fine, though I am still looking for a proper A/C type fan switch.
*Click on images for bigger version*
Oct 2017:
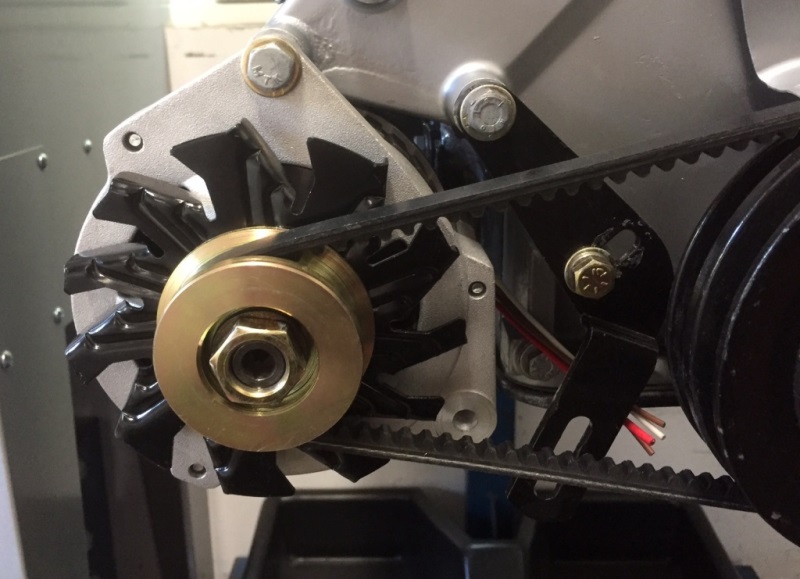
I decided on a 90 Amp Bosch alternator from a Saturn, apparently a common replacement for the ACR18 over here. Once installed I had a bit
of a problem with the Mk1 bracket as shown in the picture, I needed a MK2 version as it will not swing in tight to the engine. Even with the
Mk2 bracket it was still a little tight but this was cured by some light grinding of the alternator body and the timing cover, it should be
Ok now.
**UPDATE** Not happy with this, its difficult to adjust and I fear its just to big for that area. I ended up going for a 55A Fiesta
alternator which is a direct fit for an ACR18 and fits much better. A large capacity AGM battery is installed that should make up for that.
*Click on images for bigger version*
Feb 2018:
Stripped cleaned and rebuilt the wiper motor and both window motors, all were in good condition so they should be fine. I just need to
replace the nylon bearings where they run in the window holder as both were worn.
*Click on images for bigger version*

April 2020:
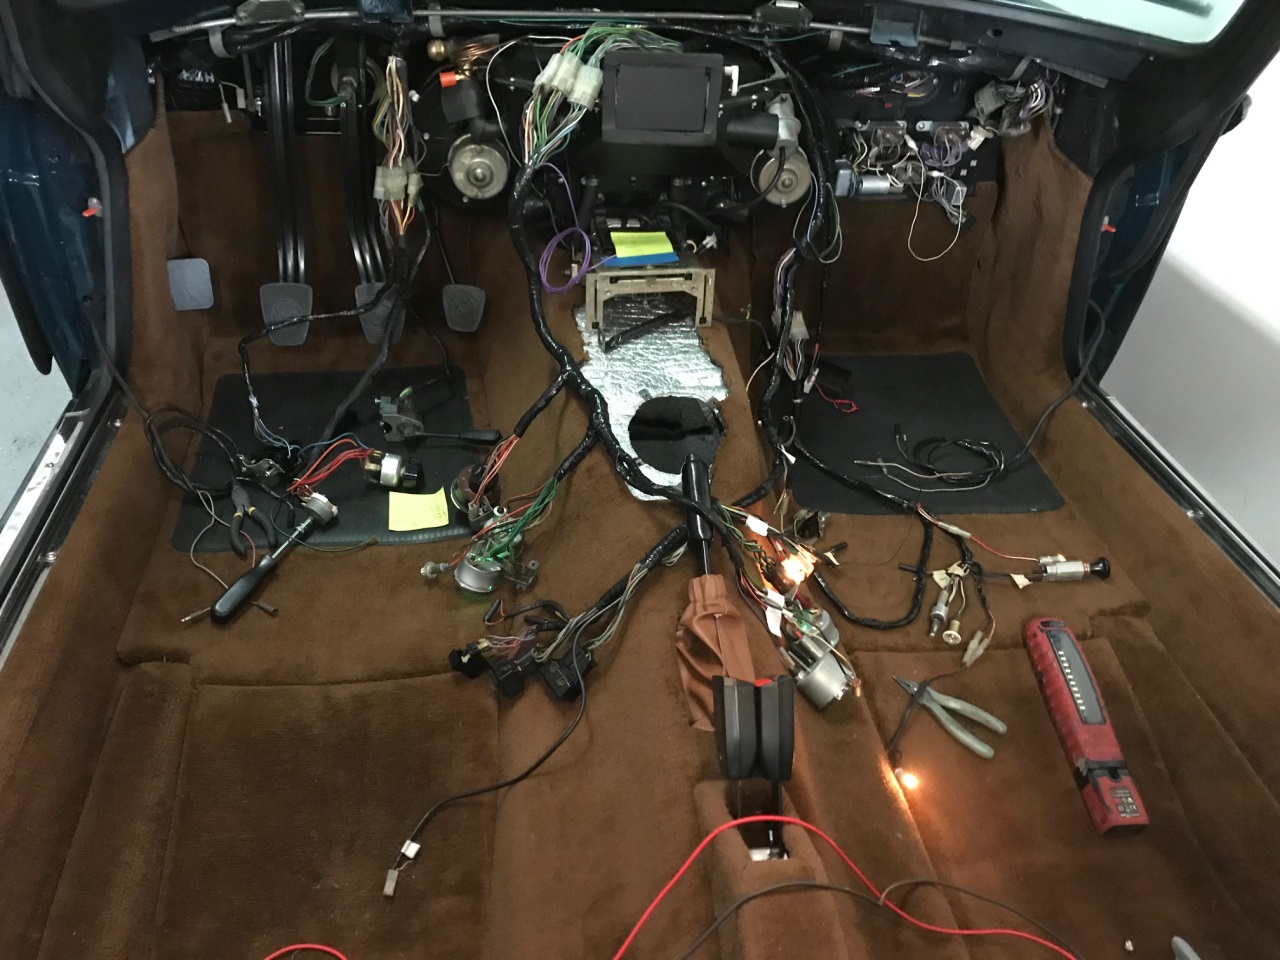
By now all of the main Looms are installed. They were checked repaired and rewrapped as needed. All plugs and connectors were cleaned and
contact cleaner was used everywhere. The fuse strip was badly cracked so a new one was installed. I also included some wiring for the
Electric water pump and made a relay box for the headlights to make sure they get the best possible voltage supply.
I connected up everything - gauges, switches, lights etc even the elusive A/C type heater fan switch which I had finally located and was
able to troubleshoot any problems whilst they were all easy to acess. The grounds for the rear lights were very flaky so I modified them
all to give a proper ground rather than using the clips. I was also able to set up the windscreen wipers and install the arms in the right
place. The rear side/brake lights were replaced with LED items and thay are super bright, well worth the money. The turn signals were
looking OK so I left them with normal bulbs. I also replaced all of the instrument lights with green LED's and they look good as well.
Strangely on an otherwise Mk2 wired car the oil/brake/handbrake warning lights were wired same as Mk1, so some are in series. Its a crude
bulb checking device but I would rather see full brightness when something goes wrong so rewired them so that they are all seperate. As I
have deleted the seatbelt warning I will use the spare hole in the dash for a EWP warning lamp, which will light if the water temperature
gets too high, not a bad thing on the Stag! Finally a AGM battery was selected, Lots of power (and cost) but I felt it was worth it given
that the fan/EWP will be running on after ignition off.
*Click on images for bigger version*
June 2020:
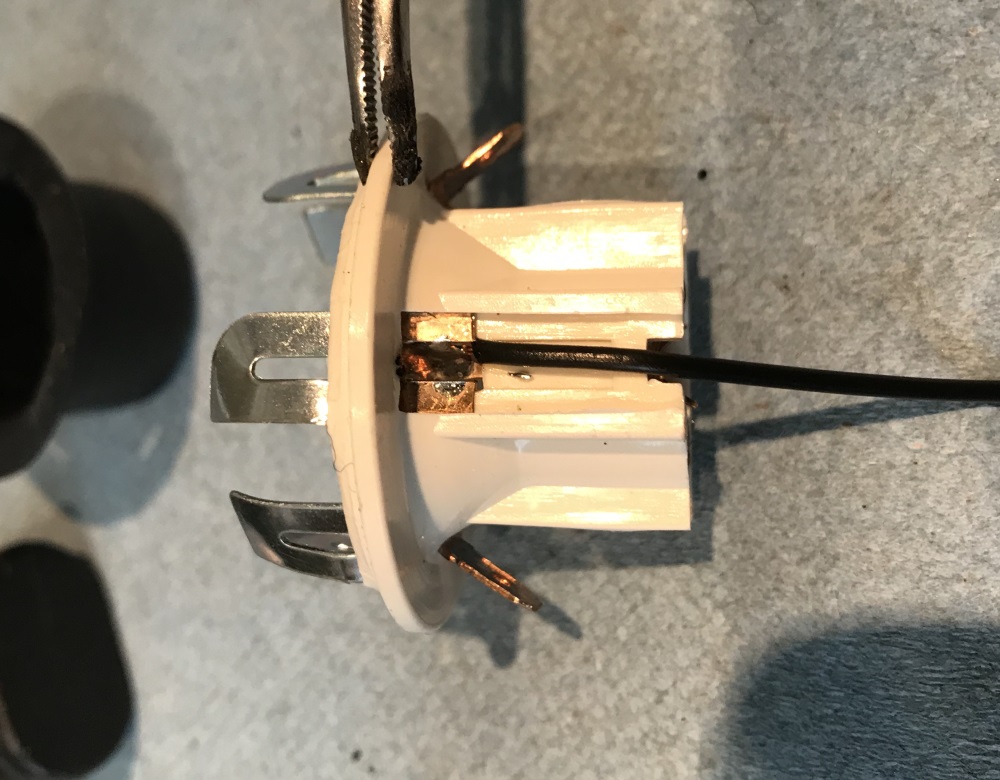
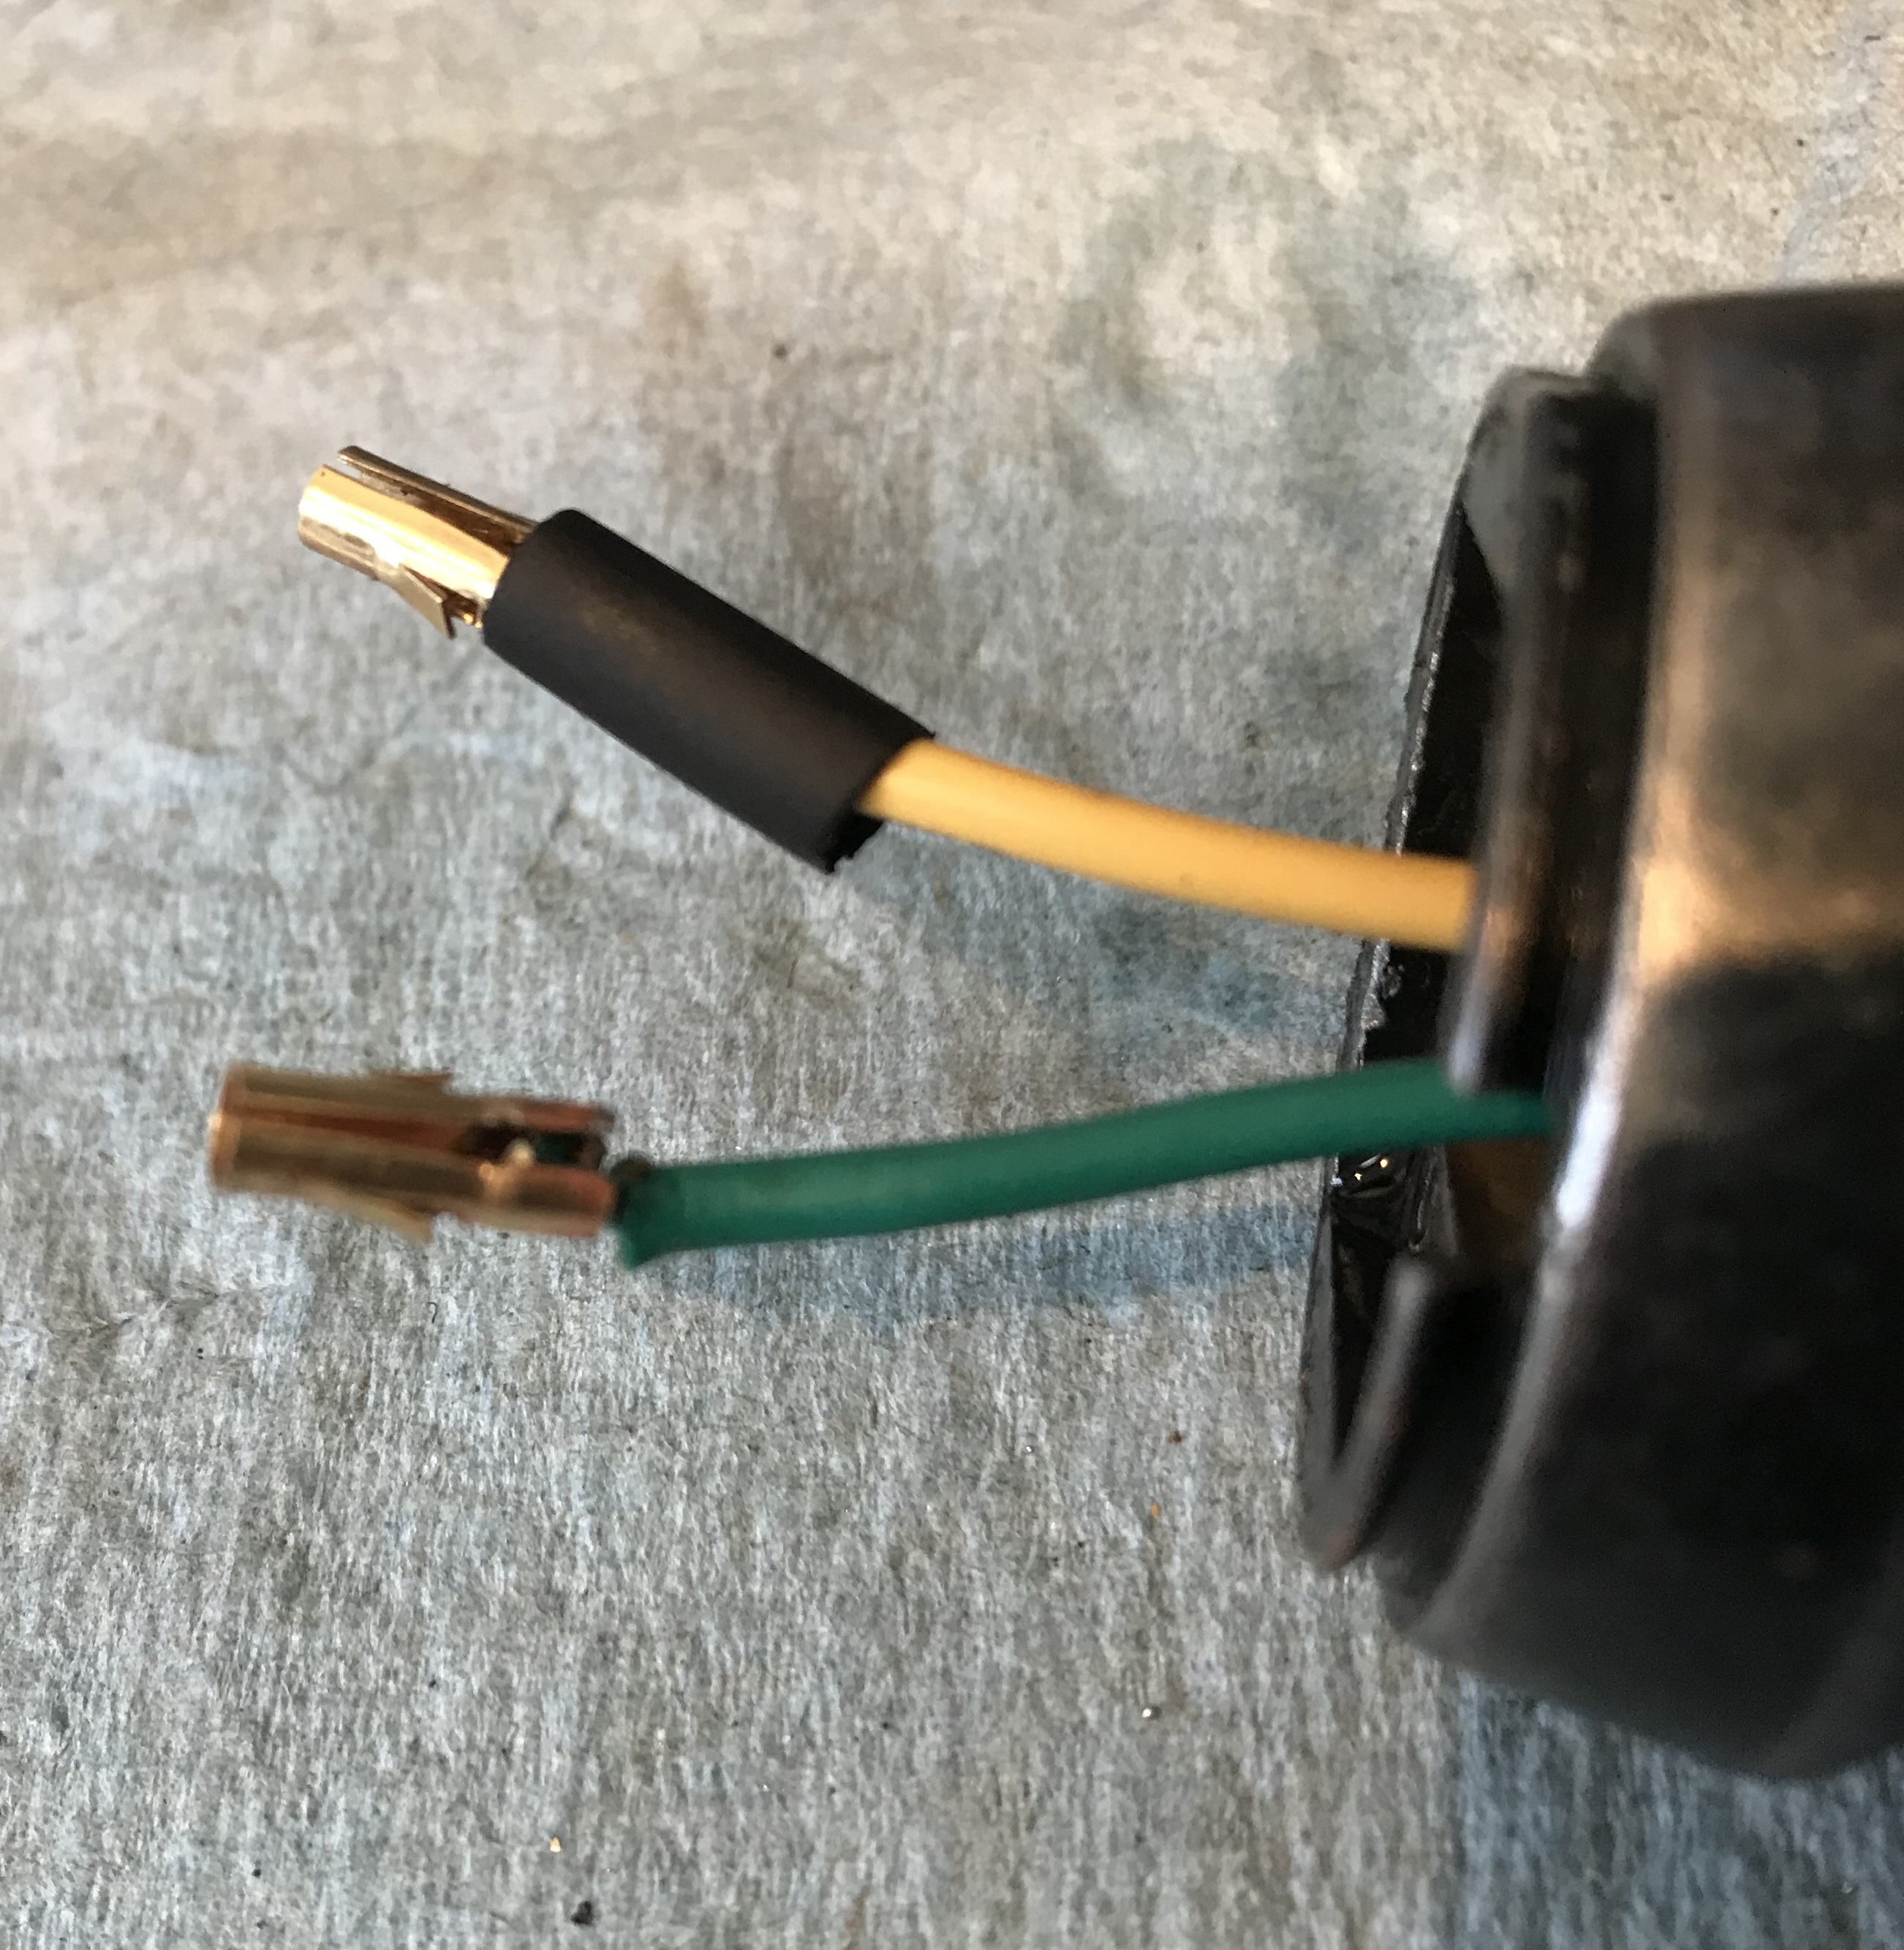
Quite a few electrical things going on, The OD switch was an issue as the correct connectors are not available, I used the Riste pins from
the multi plugs which when cut down and the wire soldered to them have a split to go over the contact and the "ears" grip it rather well.
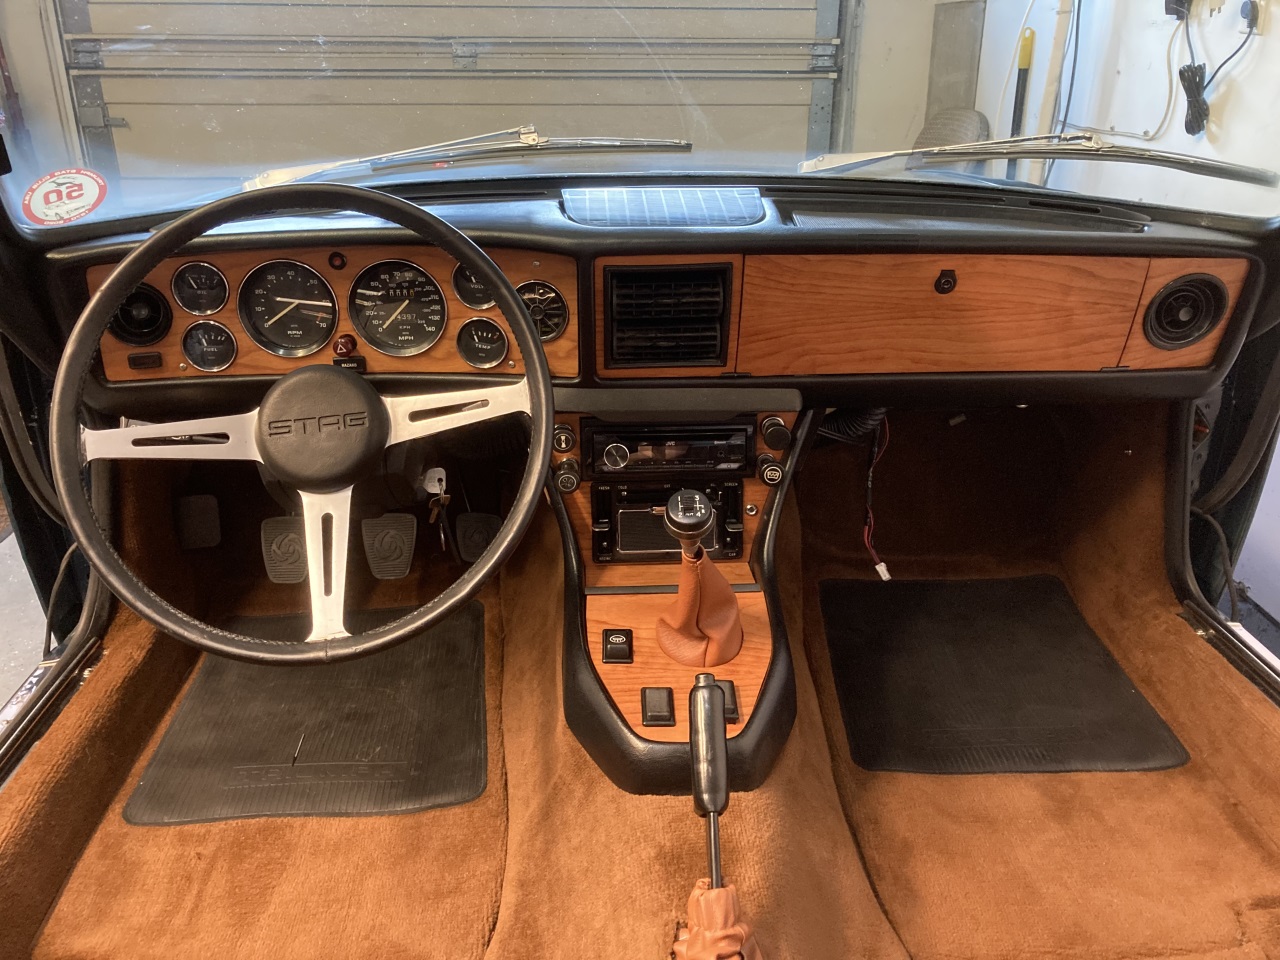
I have also installed a modern radio with bluetooth and the wideband controller is in place near the relay board. For the radio I picked up
the permanent 12v from the cigarette lighter and the ignition 12v from the radio supply. Speakers will be in the dash, I tried a pair of 4
inch pioneers but they wont fit, so with a bit of coaxing I got a retromobile 5x7 squeezed in there, far from Hifi but sufficient for the
handsfree and GPS commands. The water pump controller was mounted into the glovebox along with the O2 sensor cable its controller is mounted
to the relay board with a relay feeding it. I also installed a led warning light for the EWP controller in place of the seatbelt warning on
the dash, I have eliminated that circuit. An initial short was traced to the cigar lighter, which was just disconnected as the Radio has a
much more useful USB connector for charging phones and suchlike.
*Click on images for bigger version*

Jan 2021:
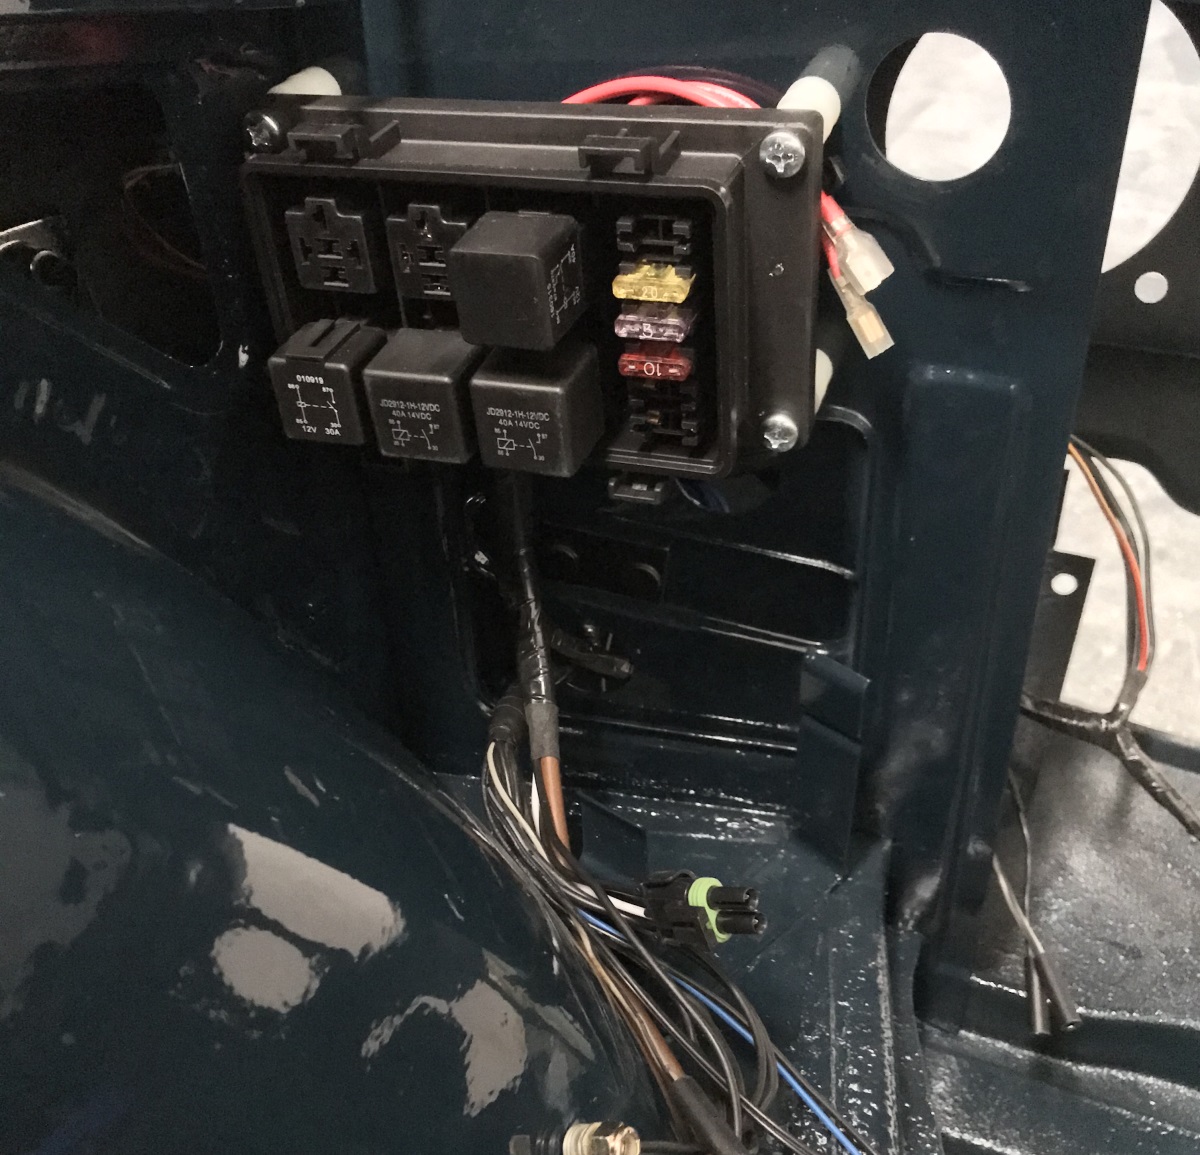
Decided to rework my Headlights and relay box. I had wired both dipped lights on one relay/fuse and realised that it would be safer to have
them seperated so that should one circuit blow then at least the other still works and it doesn't get dark all of a sudden! The car is
actually wired that way so I added another relay which is fed from the other side and now they are completely wired/fused seperately.
The main beams were already on seperate relays and fuses so these were left alone. As an additional failsafe the grounds were kept seperate
as well, so a bad ground will also only affect one side. All that required removing the headlight units so in a fit of boredom I also
installed some H4/H1 headlamps and ceramic connectors which should work better than the sealed beams that were there. I must say the lights
are pretty good now and for what I wanted I see no need for LED or fancy lights.