August 2017:
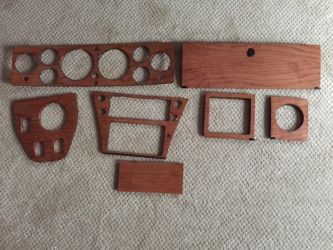
The wooden dash pieces were there, but some were delaminating and the veneer was not great. I decided to have a go at re-veneering
and after fixing as much of the delamination as I could with epoxy, and making a center console piece from scratch I reveneered with some Cherry,
and after a stain and a few coats of water based varnish I think they will be fine..
*Click on images for bigger version*
November 2019:
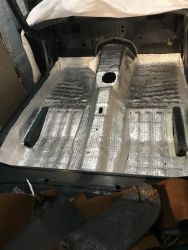
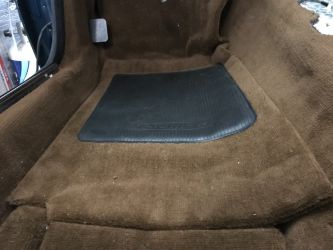
Over 2 years now and finally some interior is going in.. First was some acousic pads, then a full layer of sound deadening underlay, I chose the
lightweight thinner stuff, about 1/4 inch as the others seemed to bulky. The sill carpets were installed after the left and right looms were placed
along the sills plus the backboard beneath the rear seat.. The boot was trimmed out and after the looms were in place and the boot bords prepared.
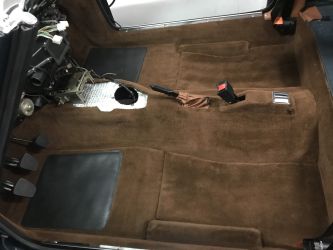
The tunnel carpet was installed once I worked out the run of the center console looms, Im pretty sure It can be run under the console rather than
under the carpet. The B post covers were re-trimmed, quite a fiddly job which took a whole day but once that was done I could install them and also
fit the new seatbelts. After the footwell sound deadening was in the rest of the carpet was laid but it did not look right and was folding up at the
tunnel. I decided to trim them to fit, both sides to keep the rubber mat centered and they fit perfectly now but since then I have found that the
overhang was normal, just not quite as much as I had. Anyway I am much happier with the "proper" fit I have now.
*Click on images for bigger version*

December 2019:
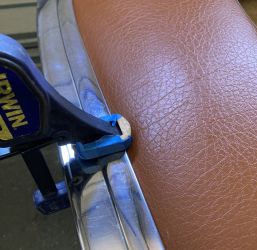
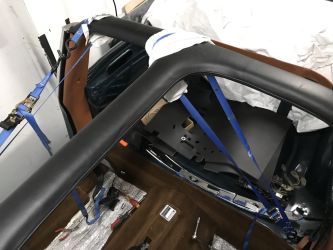
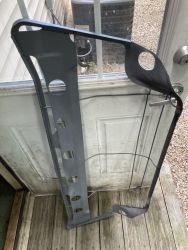
I am cracking on with the T bar. It was covered with new foam and black cover, a tip was to use clingfilm over the foam to assist a smooth install.
The front of the T bar is a challenge, my first attempt caused the T-Bar to be miles off due to excess material inside that front piece. The zip and
the seam are hard to deal with, in the end I cut them to about 1/4 inch and sewed them up both sides with upholstery thread, that way they were not
folded under. Next challenge was the cover around the B-Post bolts, some glue was inserted and they were clamped up overnight to secure the cover
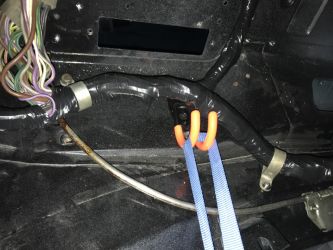
where the bolts go. Finally the interior light wires on the right side, I was not happy with the connectors as they only barely made it through the
hole in the B post and whilst wrestling with the T bar I was concerned about crushing them. I decided to extend the wires so that they could reach
into the B-Post and out again, made them bullet connectors to reduce the size and put some heatshrink around them where they go into the post. Now I
can make the connections easily and poke the wires back into the B post. Second attempt to fit was better but I still needed to move it forward to
get the bolts in. For this I got some hooks and mounted them under the scuttle where there are some welded nuts for the pedal box, then used ratchet
straps to pull on the T-Bar. hat got it forward enough to get one side on but the other was out sideways so I moved one strap to the hole for the
suspension mount near the rear seat and was able to pull it enough to get the final bolt on.
*Click on images for bigger version*
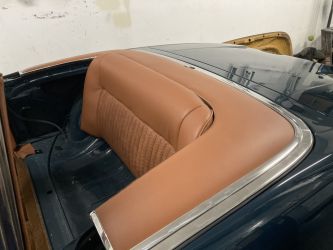
June 2020:
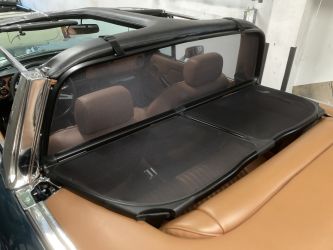
The rear tonnau was next, the trim was removed and buffed up, I have two tonnaus and yet again the chrome from the scrapper car was better with no
real dings. The tonnau was painted body colour underneath and the trim and foam installed, I reused the trim clips as I had plenty from the 2 cars.
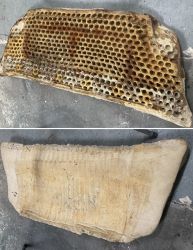
Then the rear seat back was recovered, not too bad once you work out how to do the hog rings on the flap at the top part. The base is another
matter, what a mess these things always are. The foam is invariably rotted due to water sitting in the seatpan and removing the glued on cover
causes more damage. I had tossed my original on the first day thinking the foam would be easy to get but no, its not available and a very sculpted
shape so not easy to reproduce so I got another seat hoping it will help. At least the frame on the new one was usable so I cleaned it up and painted
it with epoxy. The foam came off eventually and I repaired the missing chunks, strengthened the underneath and covered it with some thin foam. I
made a mistake with that foam as the spray-can glue I used was really not strong enough and the cover, once glued onto the thin foam would have
pulled away from the original foam so I had to slit it and re glue with full strength adhesive. All I can say is its the best of a bad job..
Hopefully one day the seat base foam will be available and I can do this properly (it is!) They were both fitted and look and feel fine so all
is well. I also keyholed the rear seatback mount holes to allow access in case there is a realease mechanism failure.
*Click on images for bigger version*

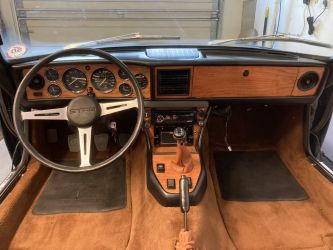
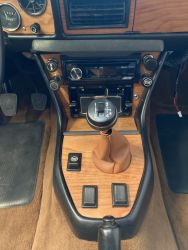
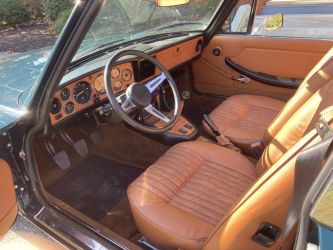
August 2020:
The Dash was installed, My original was not in great shape and was pretty rusty at the bottom, not even a candidate for recovering really.
I had to bite the bullet and buy an expensive used replacement that whilst not perfect will last a few more years and is good enough to be recovered
should I decide to. The wooden dash I had re-veneered a couple of years ago was still looking good so it went in along with all of the instruments.
For the radio I went with a modern JVC unit, not too bling but has hands-free phone, bluetooth etc and was not a all expensive. I'm a big music/Hi-Fi
fan but this is not the place for me, so just installed a dual cone speaker in the original dash position, which was not easy, even the slimmest type
only just fits above the A/C type heater box, but good enough for the phone and gps commands, the music comes from the exhaust! Otherwise the new
Britax belts were installed, 3 point up front and static lap at rear.
*Click on images for bigger version*
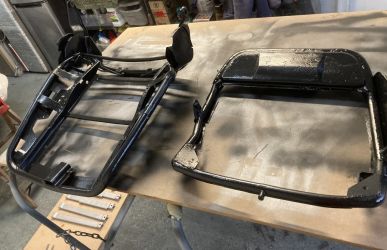
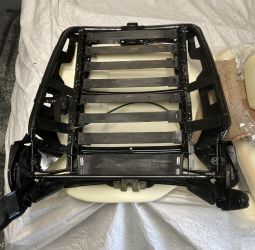
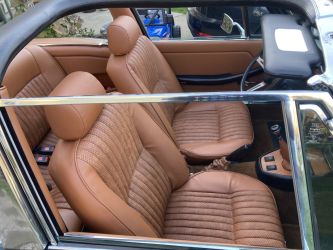
October 2020:
The Front seats were re-installed as soon as I could drive the car and I was not keen to recover them as I was enjoying the driving so much but they
needed doing so as the weather closed in I finally got them out and started the refurbishment. I have done a few sets but these are not the easiest.
The runners were removed, and seperated as I had runners from the other car the best parts were selected. They were cleaned and painted, then
reassembled using grub screws to replace the removed dimples. After sandblasting and painting the frames with an enamel paint I could start the
reassembly. The seat back straps were shortened as they were a little stretched and the diaphram fitted fine. Recovering started, the seat backs
were the hardest, Aldridge foam and covers are great but still need some fettling. The socks on the arms to the seat base are a bear to get right.
I found that it was important to offer up the rear seat panel as you assemble to make sure the foam has not shifted. Another tip is not to tighten
up the horizontal seat back straps until the rest of the cover has been stretched into place. The headrests went together OK once I replaced the
wooden stapling blocks that were rotten. At least the seat bases were pretty straight forward, not nearly as bad as the backs. The second seat went
better, I actually went back to the first one to re-do a few items I felt I had done better on the second one.
*Click on images for bigger version*
November 2020:
Although my steering wheel is OK I wanted to get a leather cover to make it a bit thicker so measured it and was surprised to find that its in fact
a Mk1 wheel, 16 inches. That explained a lot, I really felt it was a bit unwieldy but didnt think of that. I looked into aftermarket wheels but in
the end decided on an original Mk2 14.5" wheel. They are pretty rare in the States so I had to go to the UK for one, even with shipping it was pretty
reasonable. It ended up being a very late wheel with black plastic inserts in the slots and the thicker grip I wanted. I could remove the plastic
inserts but rather like them. The new wheel really transformed the feel of the car, I was quite surprised. The door panels were installed, a layer
of plastic went on the door first held by some double sided butyl tape, the clips I got were only OK. later on after I had removed the panels
multiple times to fix jammed windows I switched the plastic to the door card! The door grab handles are in black, the tan ones that came with the
car were really bad and these black ones from the scrap car are so nice and I actually prefer the contrast of the black ones so I just kept them.
The interior is pretty much done now.
*Click on images for bigger version*
Aug 2022:
Almost 2 years on and I am pretty alarmed that the tonnau cover and rear seat squab material have faded alarmingly. The rest seem OK its just those
2, I know the USA Sun is pretty strong but... I contacted Aldridge where I had purchased a full interior 5 years previously and sent pictures,
without hesitation they agreed and sent me replacememt trim for both pieces at no cost. Pretty glad that I went with them for my interior..
Kudos Aldridge! After the driving season I redid them with no issues. One tip here is not to hit the trim to pop the clips in as it easily dings
the trim but use a clamp of some sort and press it in.. I also obtained a Audi A4 windbreak, just added a pair of brackets to hold velcro cinch starps and use the
rear lap belts to secure the back and it fits like it was made for the Stag.
*Click on images for bigger version*