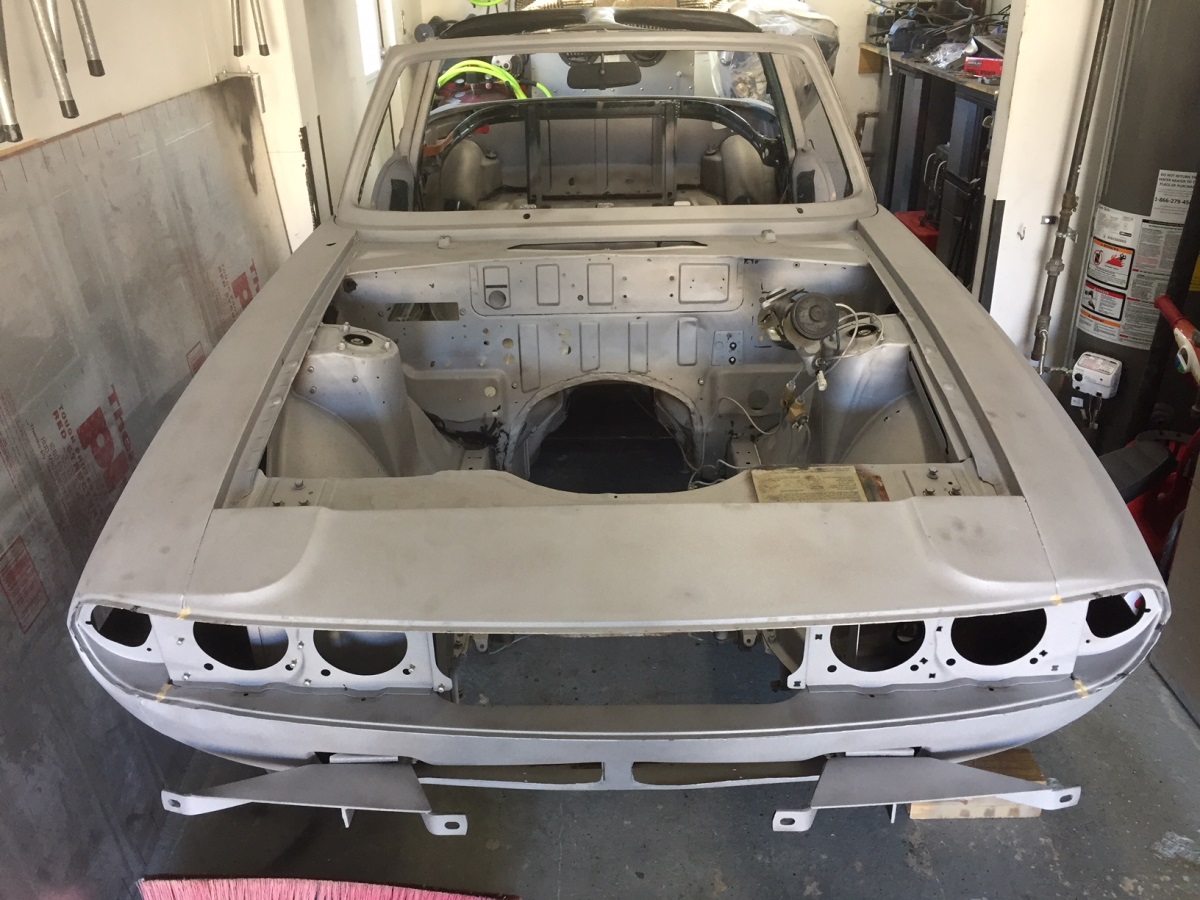
May 2017:
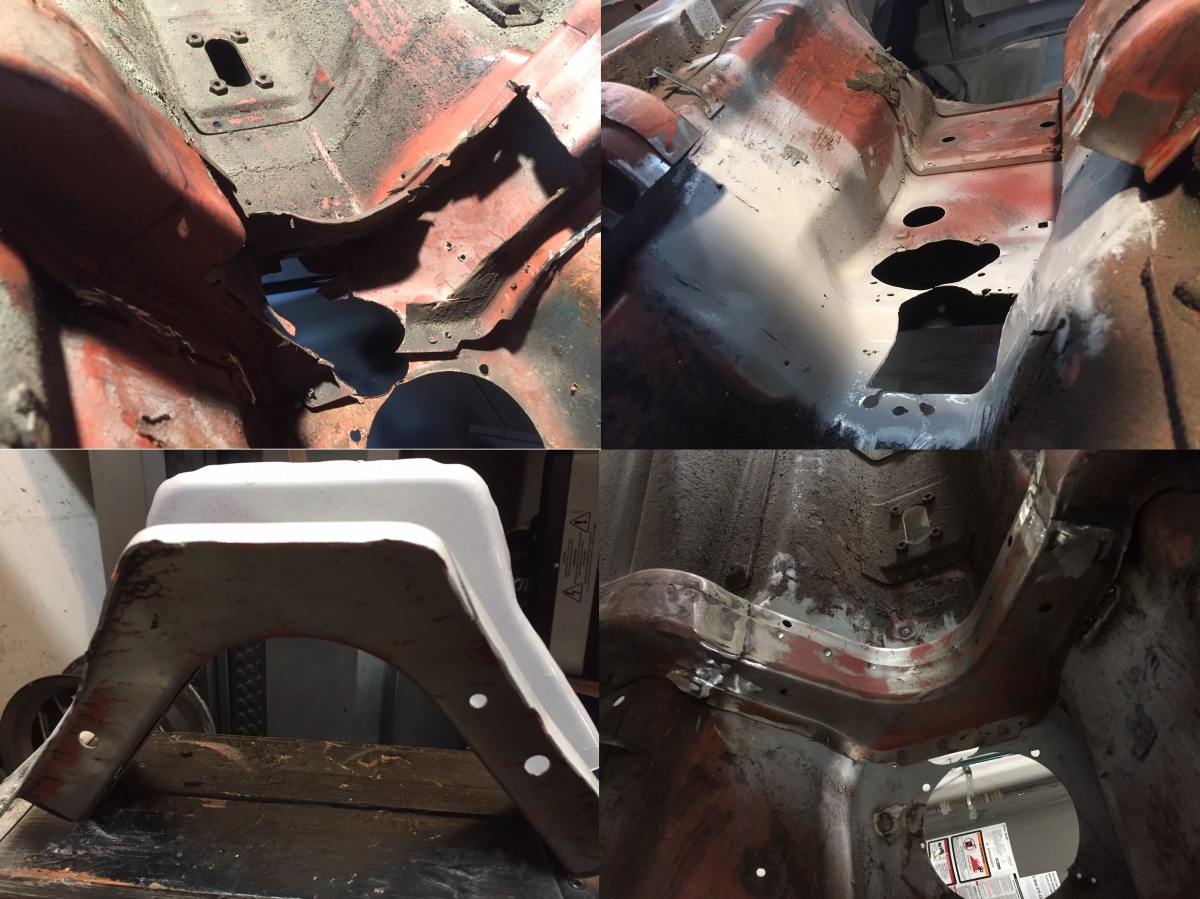
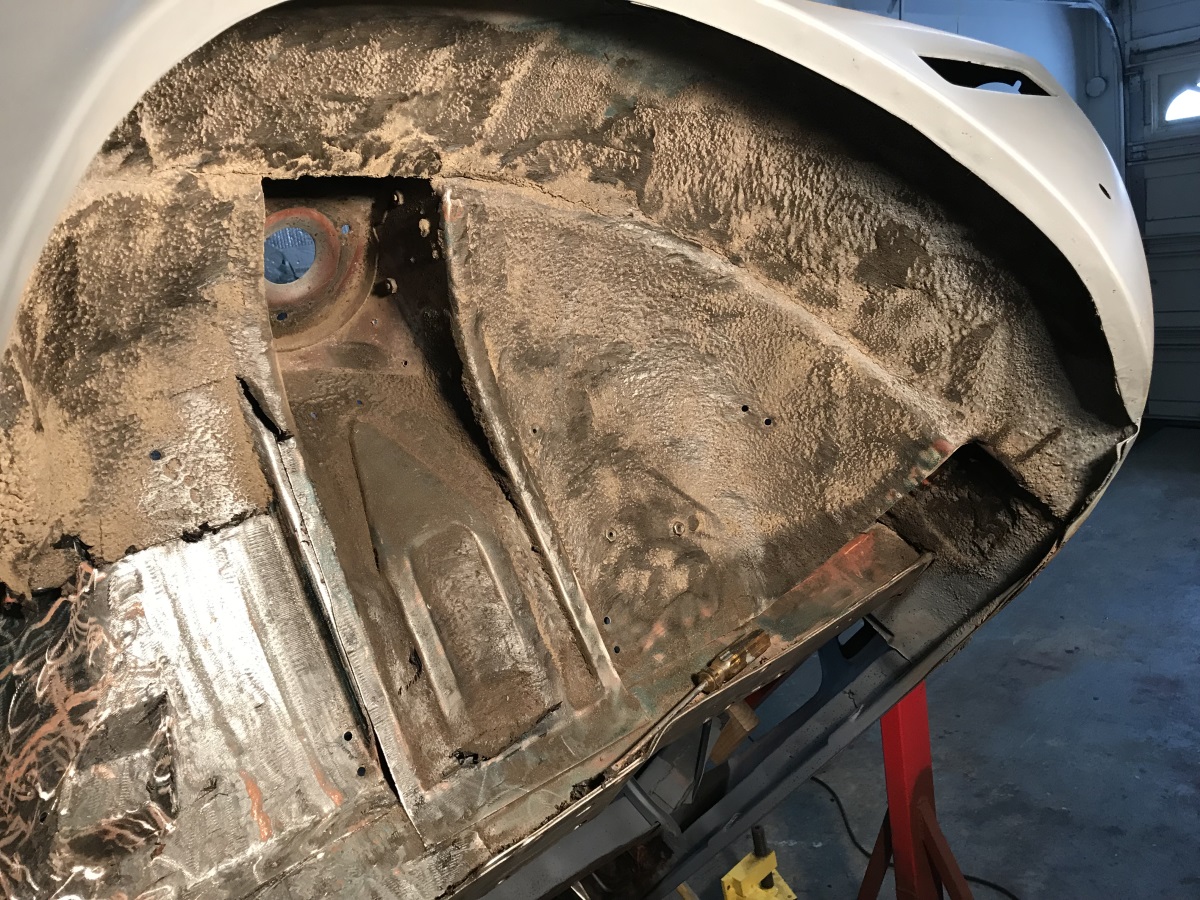
The body is in fine shape with the exception of the rear seat pan and the area around the transmission tunnel/firewall where some animal had
attacked it with a lump hammer, presumably to fit a different gearbox.. Then they cut the crossmember! The Mk1 yellow car arrived and its a sad
sight. Nothing in the way of bodywork left, but I did cut out the area around the transmission tunnel and the gearbox crossmember which will help
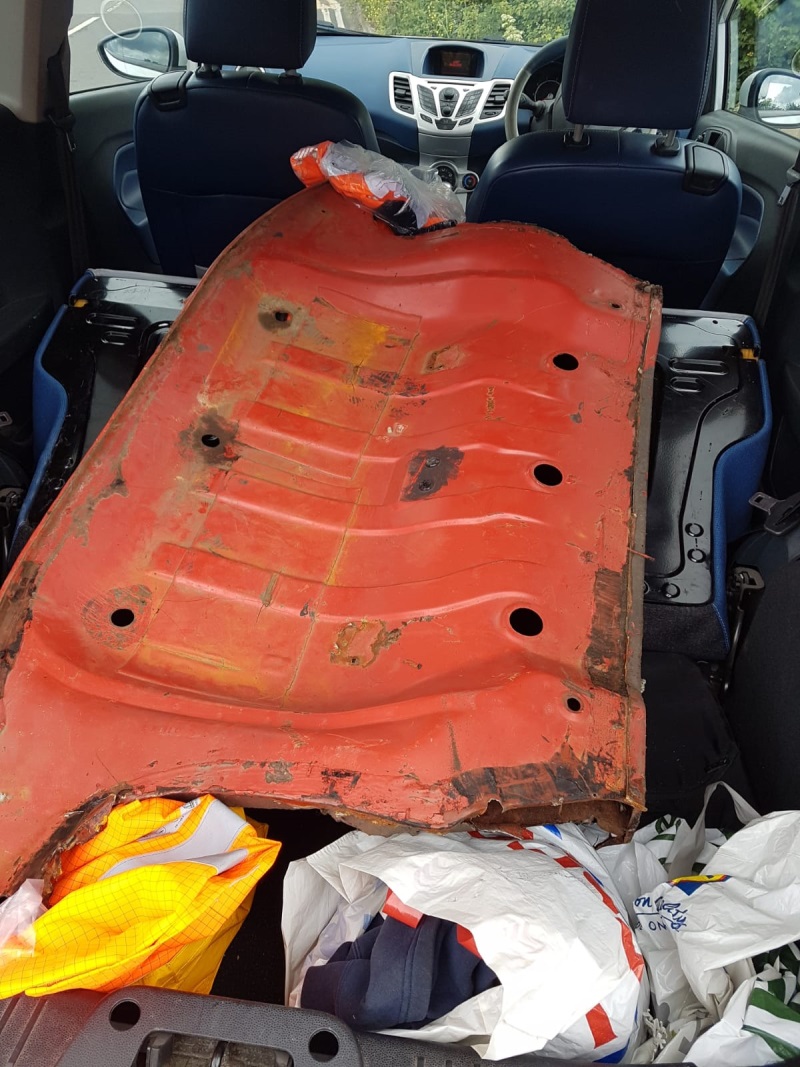
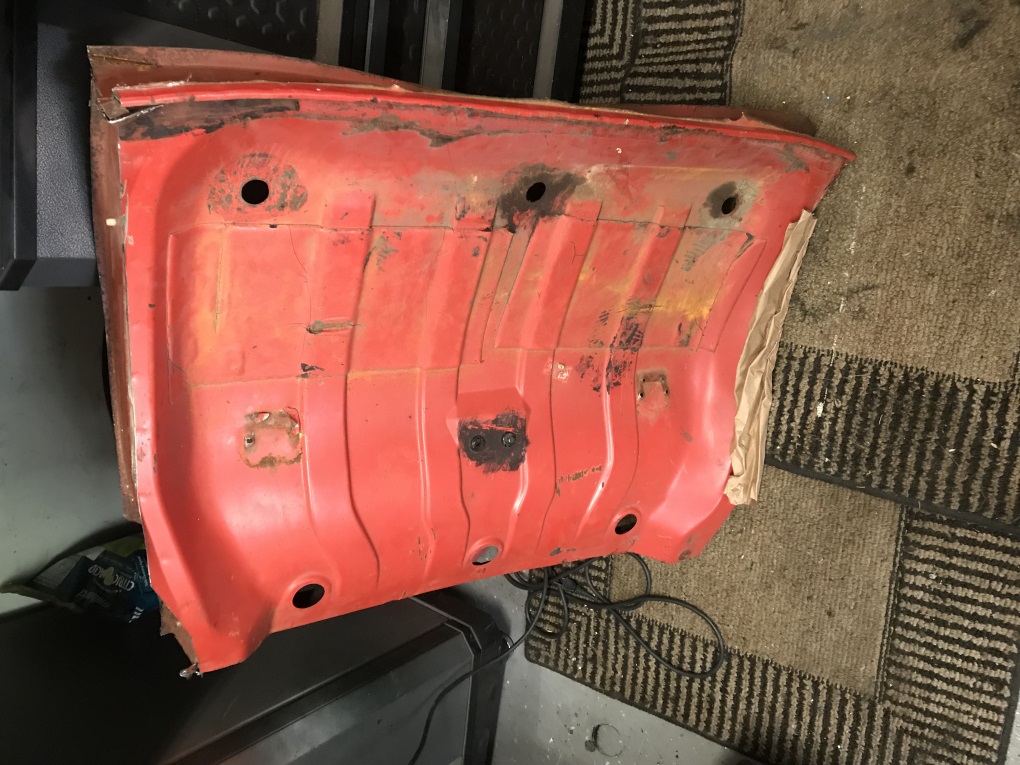
in those repairs to the Bodywork. Sadly the rear seat pan was almost gone so that repair will be difficult unless I can get some repair panels.
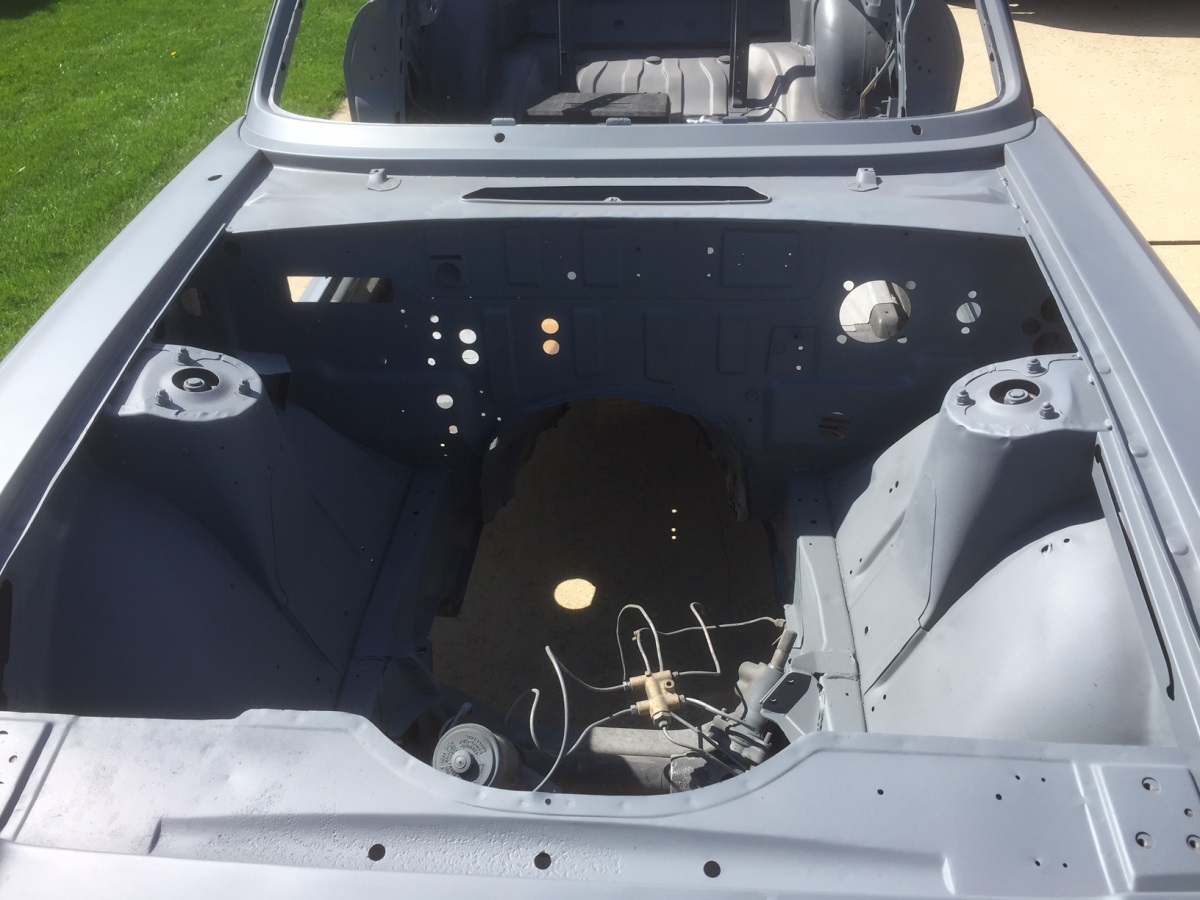
The only other obvious problem is the front passenger floor/bulkhead where there is a hole. From underneath the floors otherwise look fine but I
will not know for sure until I get the sound deadner sheets off.
All chrome was removed from the car and inspected. Its all not awful but I
think that once I have painted the car it will not be good enough. I priced re-chroming and its really high nowadays so I will need to be
realistic, given the value of the finishied car and the fact that I am not building a show car here. Front bumper is almost OK but overriders are
dull. Rear bumper is just dull and has cracks so just not good enough. I'm really considering some S/S bumpers that area actually probably quite
a bit cheaper than rechroming, maybe I can recoup some of the cost by selling what I have on ebay. Three of the wishbone trims are all acceptable,
I'll probably have to source a nice rear left though. The strips on front and back are all dull and some are damaged so reproductions will probably
have to be bought. The front scuttle grill is OK if a little spotty, but at $450 to rechrome I'll live with it. The final pieces are the
hardtop securing plates, which are awful. again I'll make a call later on weather to repro or rechrome these. The rest of the s/s trim, grille etc.
is all in good shape so will be fine.
March 2018:
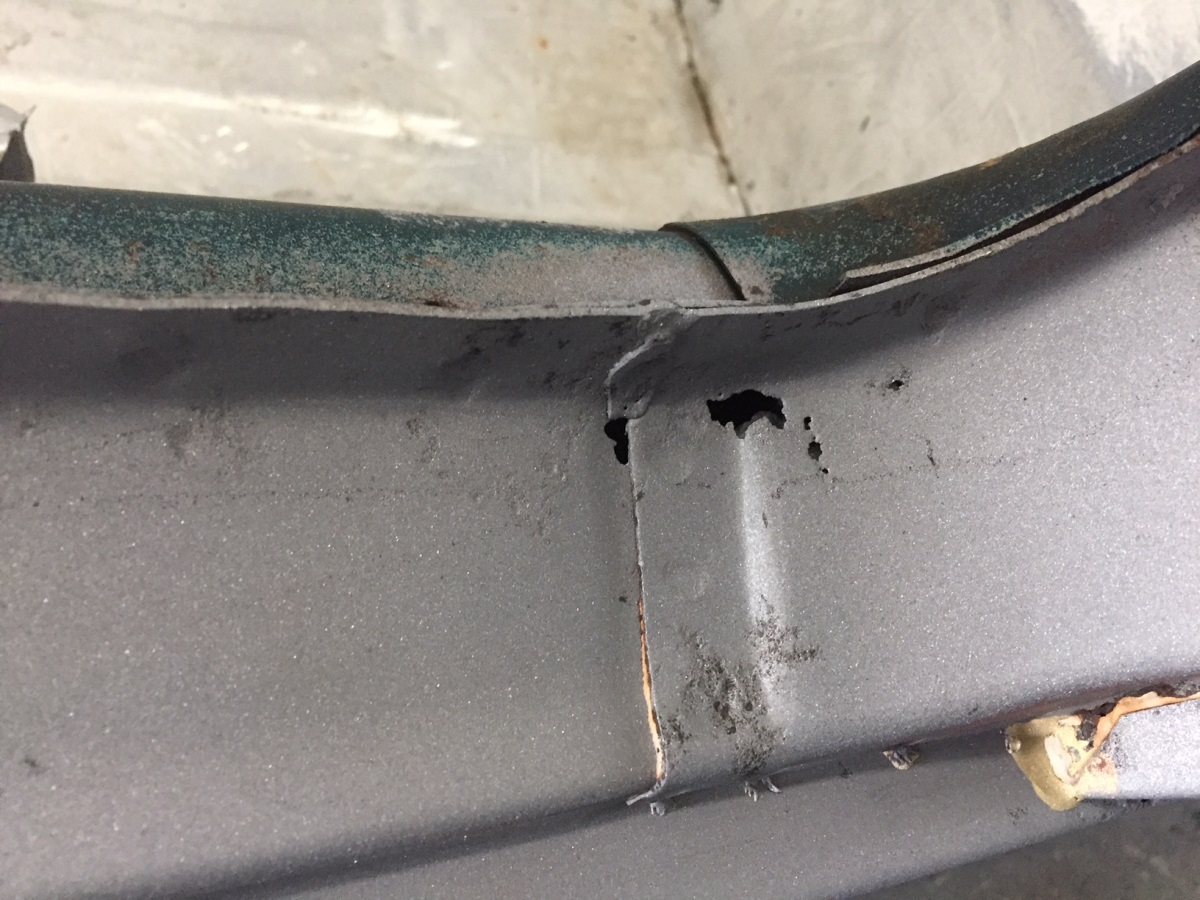
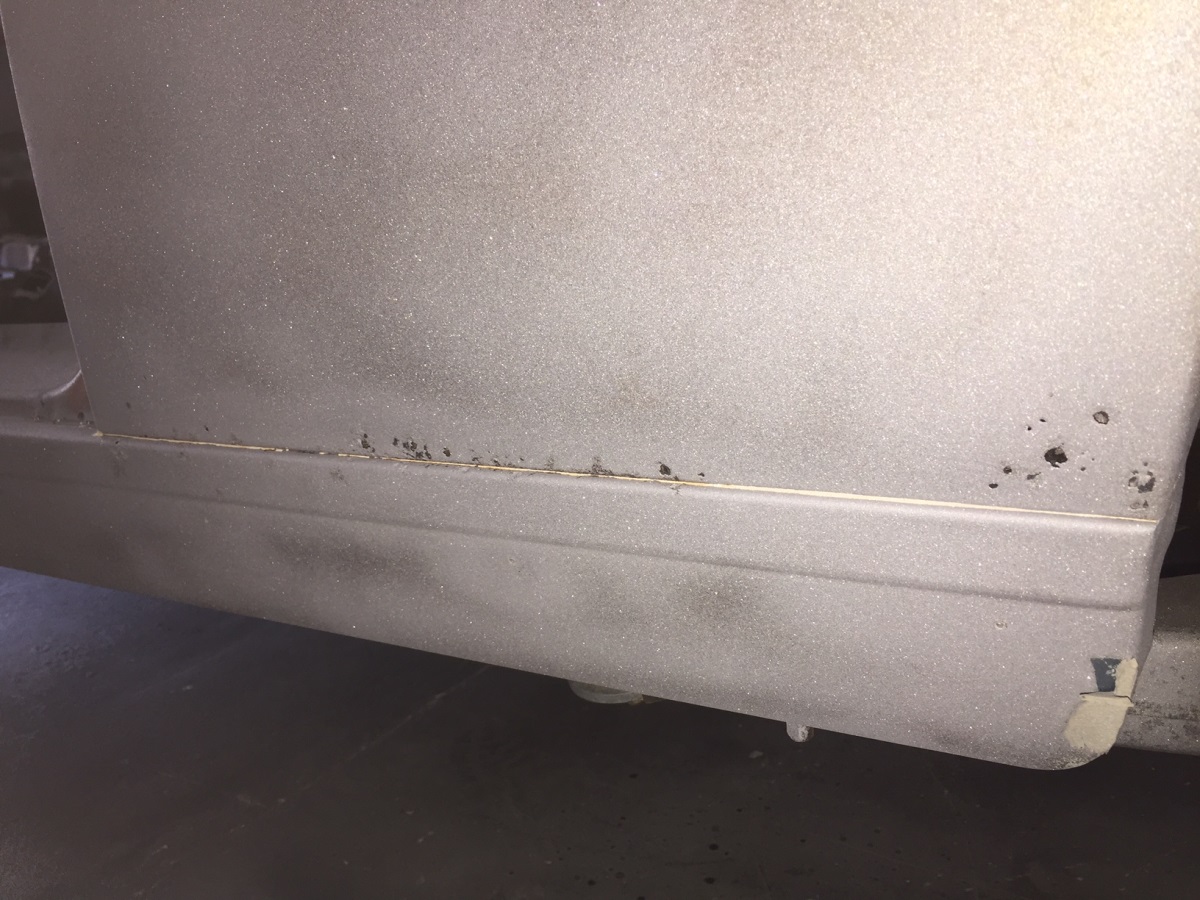
The body was away for stripping this week, very pleased with his work, and very pleased with this body. A few areas that will need work were found
but as suspected this is basically a solid car. There is some rust with holes in the lower front area of the left wing, the front valance will need
attention and the rear wing to sill (rocker) has some pitting that will need to be addressed, plus the odd pinhole here and there on top of the
sills, otherwise they are solid. So nothing too bad at all!. There is some evidence of light body repair on the doors and bonnet where some minor
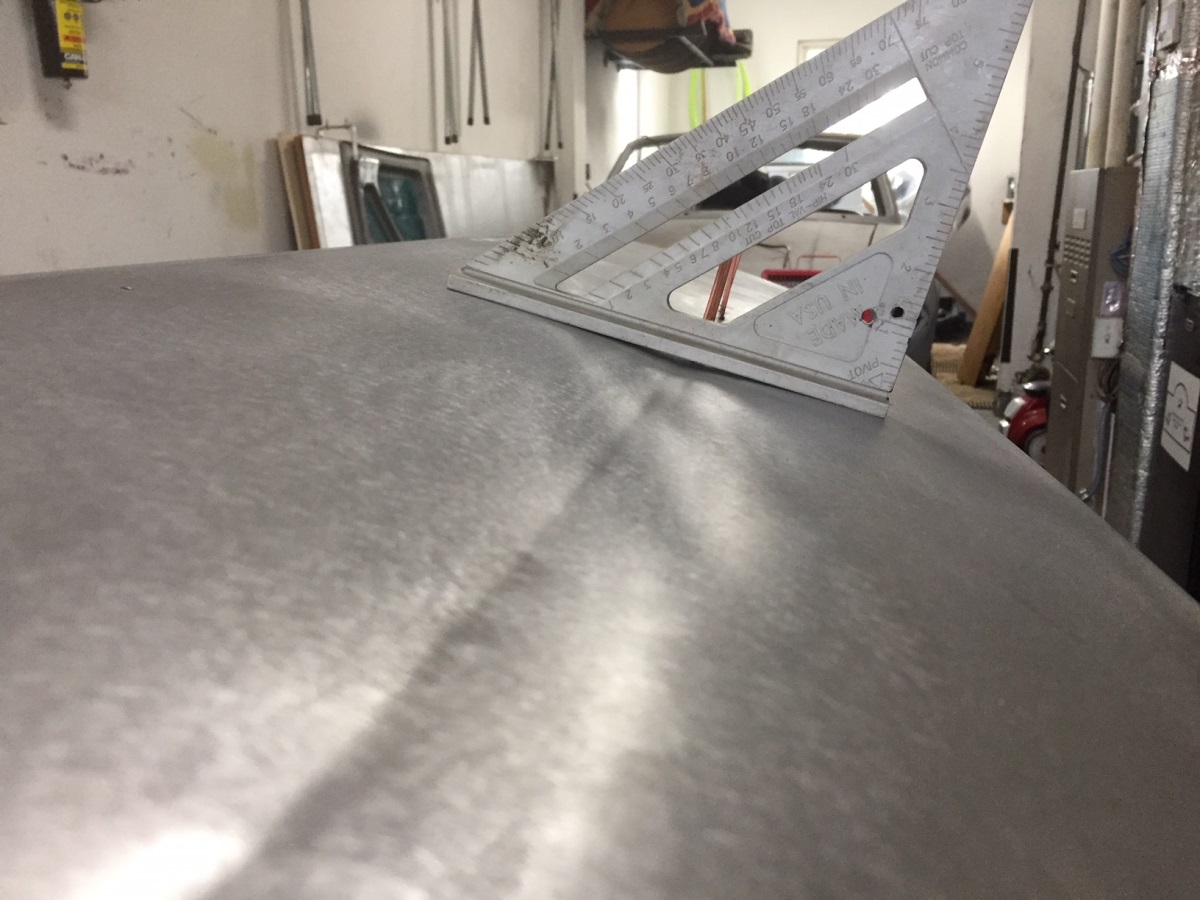
dents were filled and 2 holes drilled for a slide hammer. On the hood there was an oilcan dent, popping in and out from a previous repair,
I made my first ever attempt at heat shrinking, the result was not fantastic, some wavyness still but its no longer an oilcan, i.e. if you push it
in it springs back. The race now is to prep the bare metal and get a coat of epoxy on it to prevent rusting.
*Click on images for bigger version*

March 2018:
Time to start bodywork, Its been a long time so my bodywork skills will need refreshing. First was the drivers door which had a large crease in it.
Leaving it alone was not an option as it would have taken 1/4-3/8 inch of filler, and thats not what I do! The door skin is almost unaccessible
from the back especially at the front so I bought a Harbour Freight stud welder and I am very pleased with it so far. I have never used one before
but it was easy, and mostly got the crease out. I still needed to push the panel out some more but with no access from the rear I finally came up
with the idea of blocking it to the interior panel and hitting through that, It worked well. The interior panel was not distorted much and whilst
the door is not exacly smooth it has reduced the need for filler to the minimum. I did have some oilcanning once I got it out, obviously the panel
was stretched and after a bad experience with gas heat shrinking I decided to try the stud welder to shrink it, that went very well. I got the
oilcan out and that is now my preferred shrinking method, not a lot can go wrong! I think that Stud Welder will see a lot more use before this is
finished! I will probably come back to this again once my skills are sharpened to do some final adjusting.
No major dramas with the other door and the bootlid, It can be seen that the metal on this car is in fantastic shape.
*Click on images for bigger version*
April 2018:
I had a go at the lip around the transmission tunnel, was quite pleased with the result, no metal tears etc. The lowest right area is rather pushed
back, the floor and tunnel in that area are crushed and it will need more work. I will have another go at this area when I can get to the underside.
I managed to beat out some of the easier dings and dents and finally got the whole car covered with a coat of epoxy, I did not bother with the
valances as they will need some attention and in some areas the new paint will have to be removed as I do the body repairs but at least its
protected and I can take my time. The bonnet, boot and doors are now safely in the attic. Next job will be to get the car up onto the rotissary and
get the suspension off so I can attend to the underside and front and rear valances
*Click on images for bigger version*
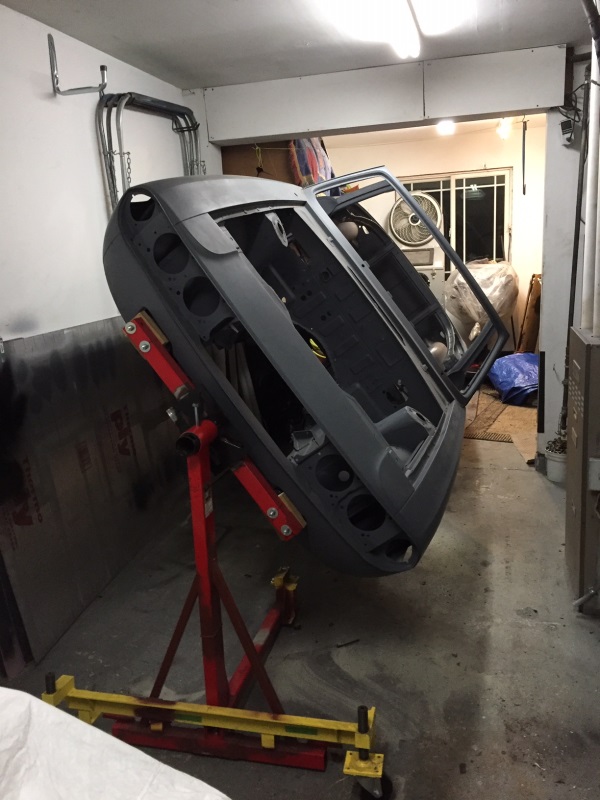
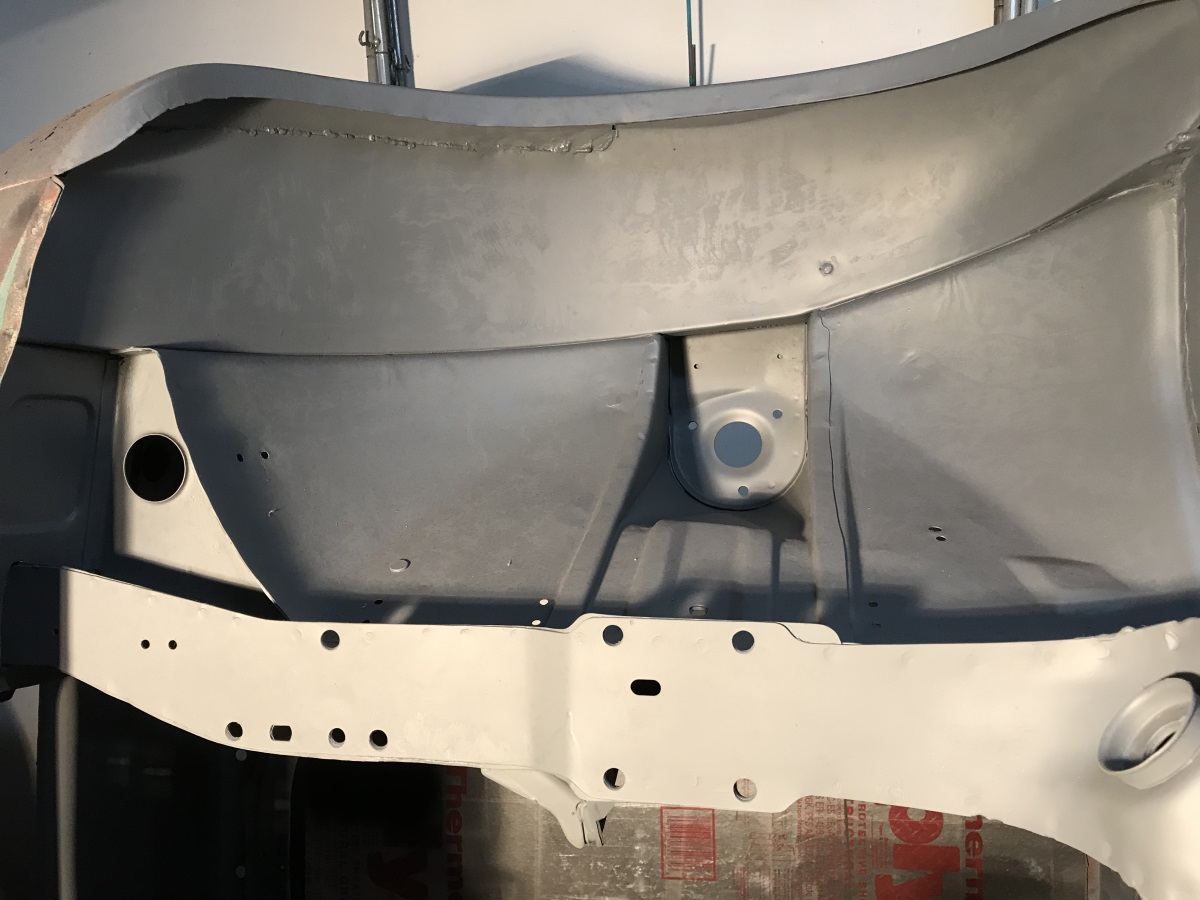
Nov 2018:
Finally got the body up on the rotisserie, Jacked it some of the way, lifted the rear manually but I needed the engine hoist to get the front up,
but all is well. It rotates amazingly well and is pretty much balanced.. until I fitted the T-Bar then I struggled a bit. It has wheels but until
I connect the two with a bar I dont want to risk moving it on them. I later connected them and it moves OK. Then attended to the tedious job of
removing the sound deadening to find that the floor is not too bad at all.
*Click on images for bigger version*
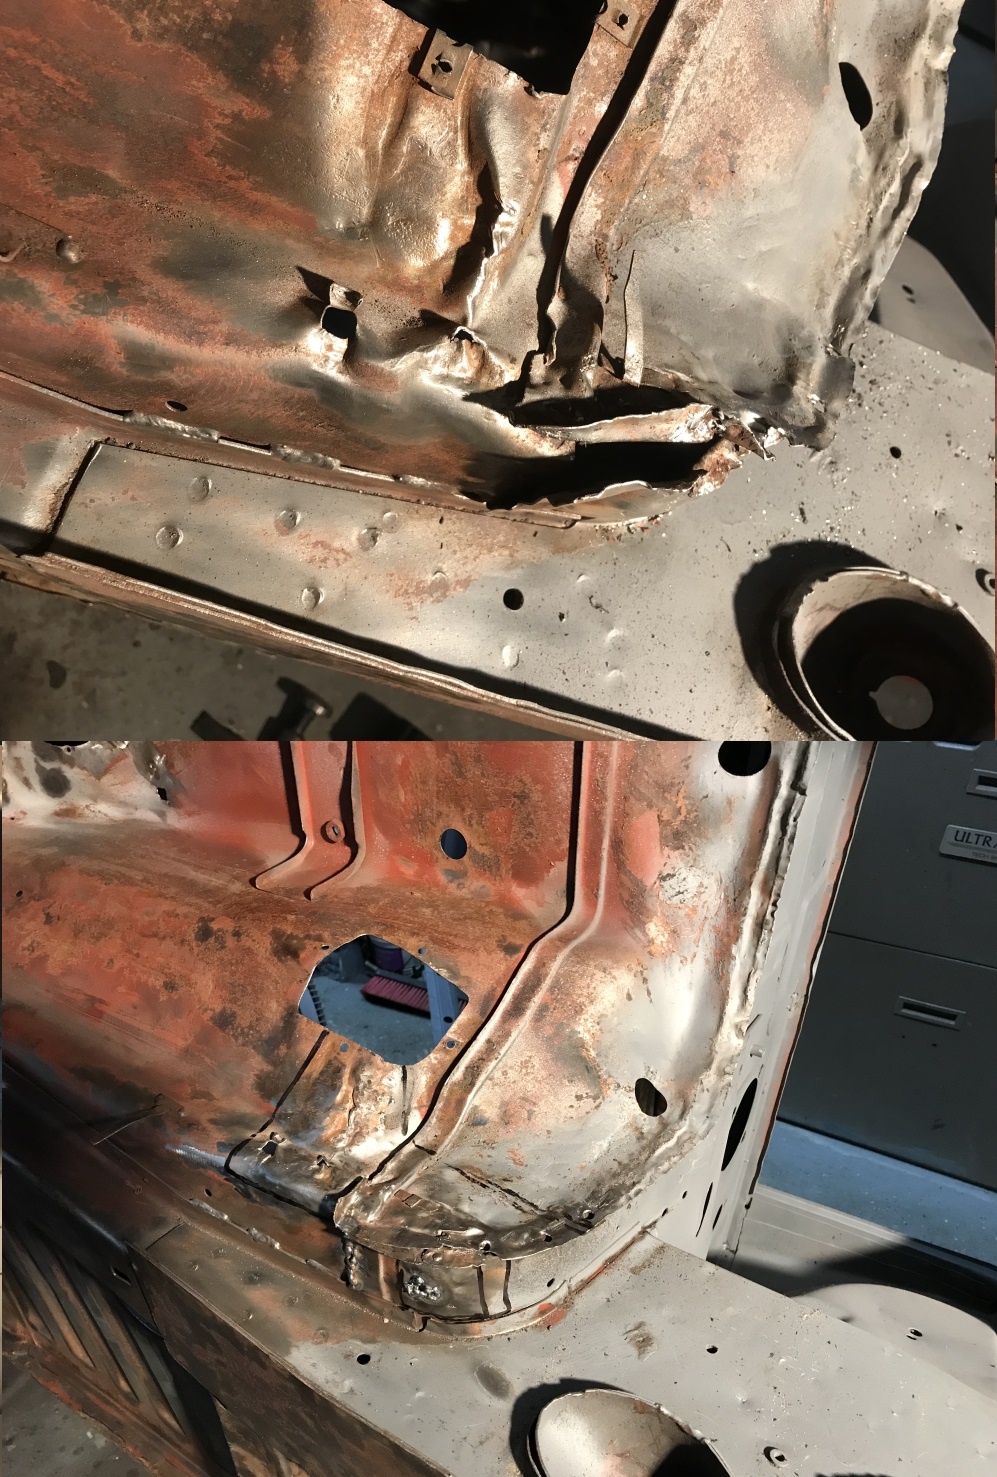
Dec 2018:
I set to on the crossmember and was able to repair that with the patch from the scrapped car. I wish I had also kept the tunnel metalwork as I
will need to replace some there as well. Next was the sheet metal above the cross-member, quite a complicated piece with a few curves but with a
template and a bit of patience I'm satisfied. Continued filling holes, there were three 4"x2" areas that were showing rust holes so patched them,
otherwise the floors are solid enough.. I also cut some access flaps in the floor to get to the crossmembers that were well dented by jacks over
the years. More welding practice closing them up. There are so many screw holes in this car, Including 3 big holes where they mounted a 5 speed
transmission. My hole filling technique is improving but it still has a way to go before I attempt anything fully visible. As I only weld once
every few years it takes a while to get up to speed again, but they are all filled now, just that hole in the front passenger floor/firewall to
complete the floorpan work.
*Click on images for bigger version*
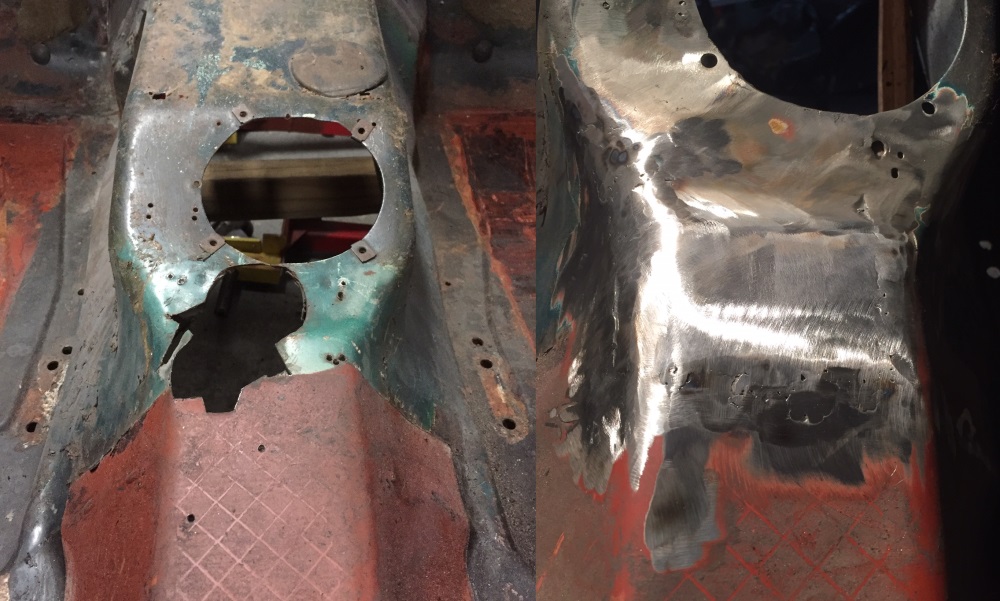
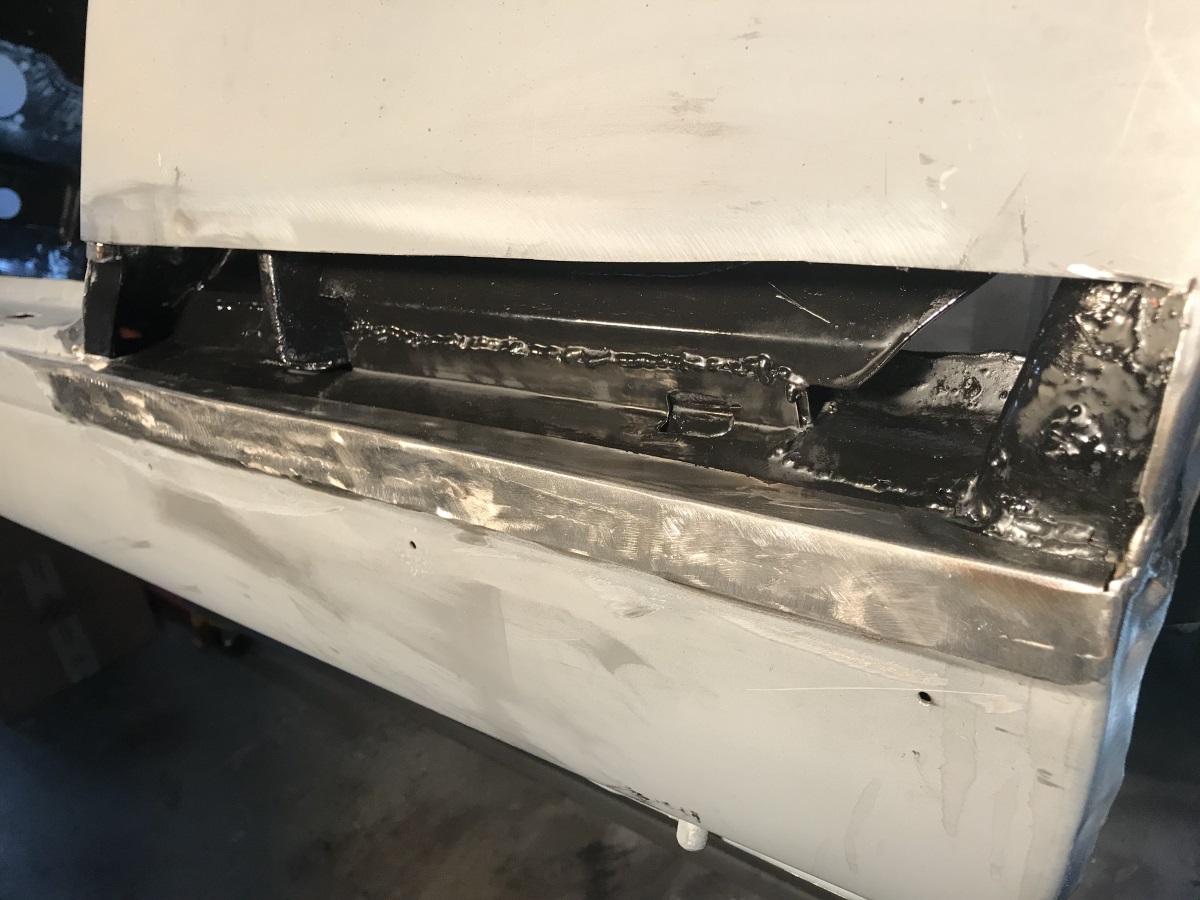
Dec 2018:
The transmission tunnel on lower left side was pretty badly distorted by the PO's beating for a 5 speed box. The seam around the Tunnel opening is
pushed back quite a bit and is folded over. I removed the spot welds to seperate the tunnel from the firewall so that each piece could be moved
forward easier, once both parts are moved to the correct position I can reweld them together. I was able to move them forward to almost the correct
position. Its a lot better, but not great. Looks like I will need to patch some metal in here, the area is soft with metal fatigue and will never
look nice. Time for my new Bead roller and shrinker/stretcher tools. After quite a bit of metal bending and welding I at least replaced the bad
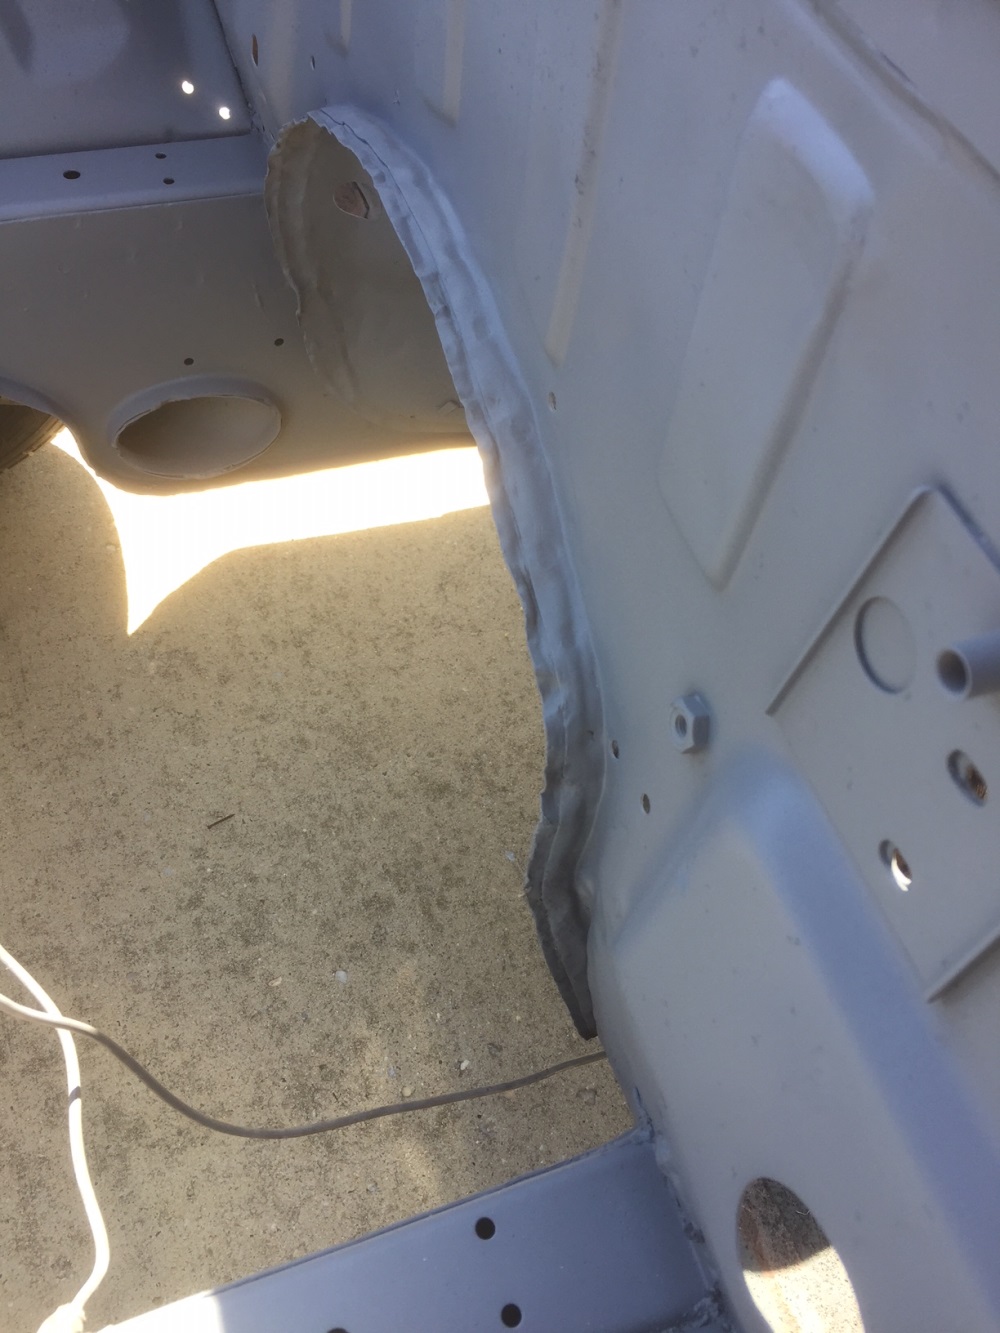
metal and resored the basic shape. The passenger floor pan was rusted through as it curves up to the firewall. As both ends were rusted I removed
a fair chunk along the whole width and welded in a patch. The new shrinker/stretcher and bead roller made this a lot easier, they are my new
favorite tools!. I decided to do an overlap flange on the top, it will not be visible from the wheel well or from the inside (once the carpet
is in!)
*Click on images for bigger version*

Jan 2019:
Most of January was spent removing the underseal which was quite thick in places. Initially I tried a wire wheel but it made a heck of a mess and
basically melted the underseal then splattered it everywhere! Eventually an Oscillating tool with scraper was used along with a heat gun to soften
it worked well and a wire wheel to follow cleaned it up. Then I was able to get a coat of epoxy on the underneath and a coat of POR paint inside to
protect it until I can get the final coats on.I am planning layer of 3M Rocker schultz and colour coat underneath, thats what I did on the Mini
and I was pleased with the reults.
The rear seat pan was left bare for now as I will need to deal with that later.
*Click on images for bigger version*
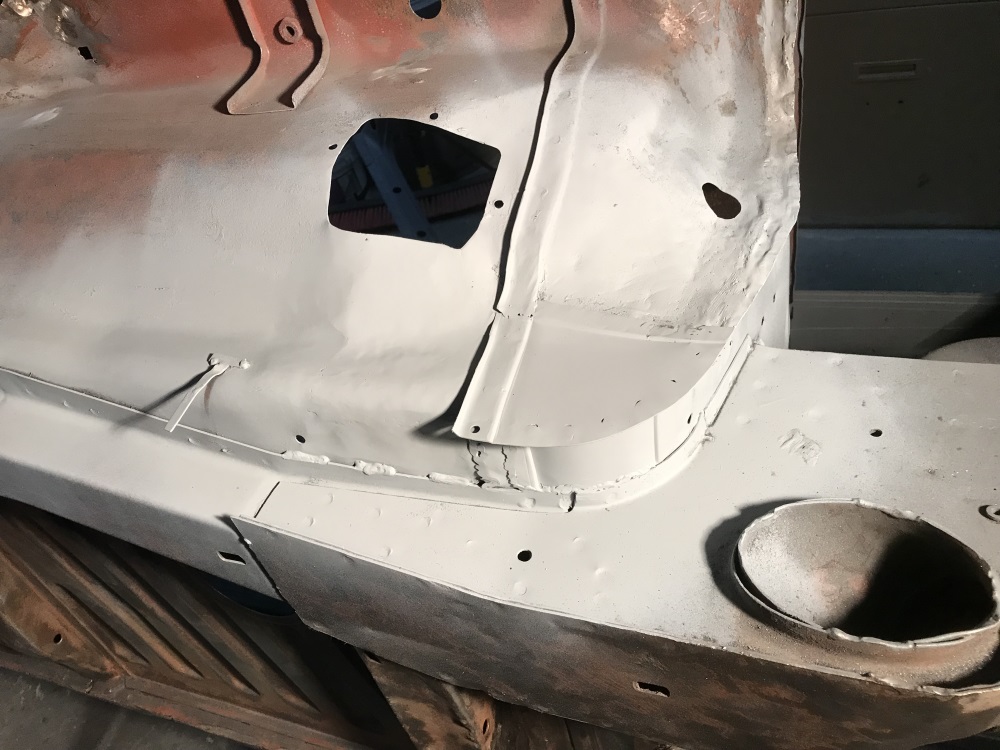
Feb 2019:
The front valance is pretty beat up, I was able to get most of the dents out using levers and some dentless repair tools but a 2 ft section is
rusted through where its welded to the radiator support so it needed patching. The support is in pretty good shape so POR will hold that and a
section was cut out and a new piece butt welded in. I also welded up some random holes and drilled the holes for the TR6 Spoiler I will be fitting.
The rear valance was solid but dented, I managed to beat/studweld the worst out and it looks OK. The front and rear valance had a little filler
applied to smooth out the dings I could not panelbeat out and had a coat of epoxy applied. Eventually these will be covered in Rocker schultz and
painted in bodycolour with the rest of the underbody.
*Click on images for bigger version*
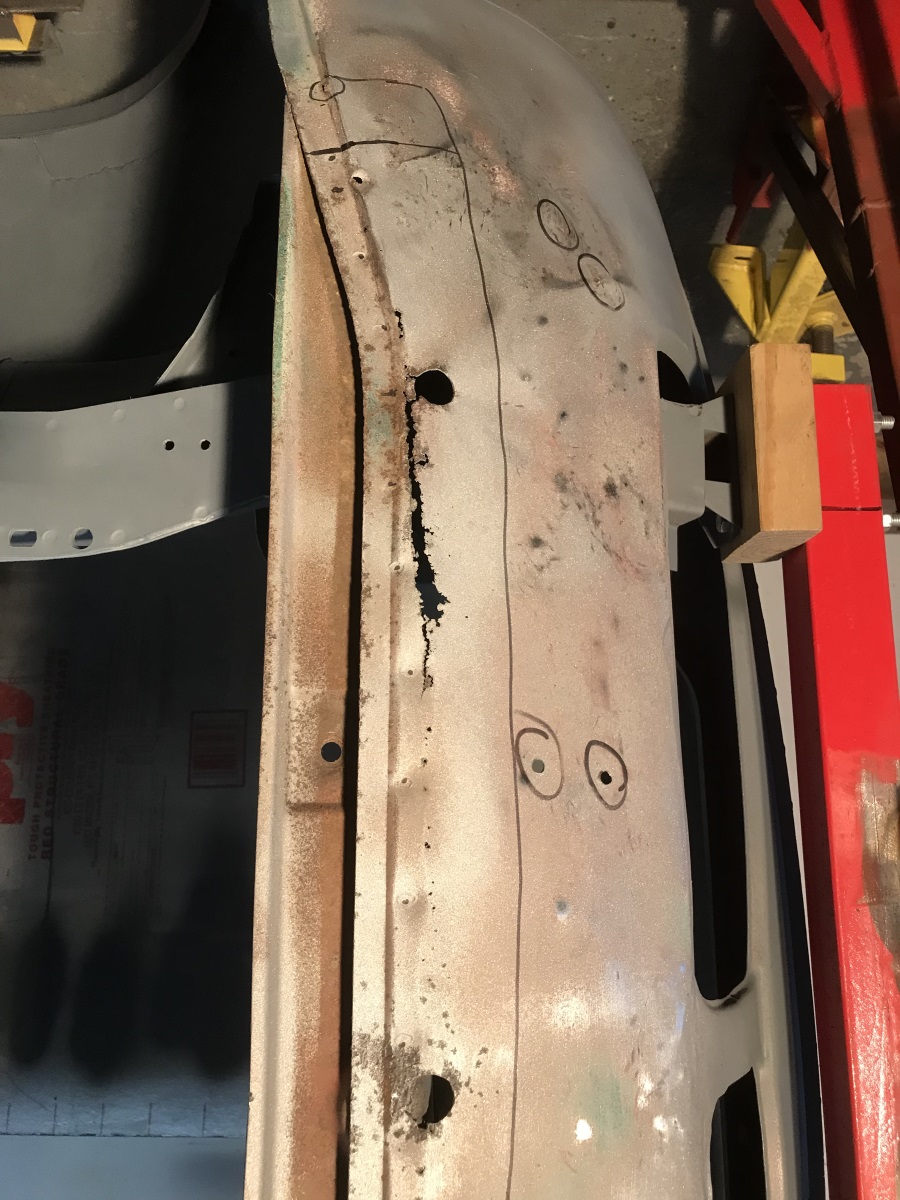

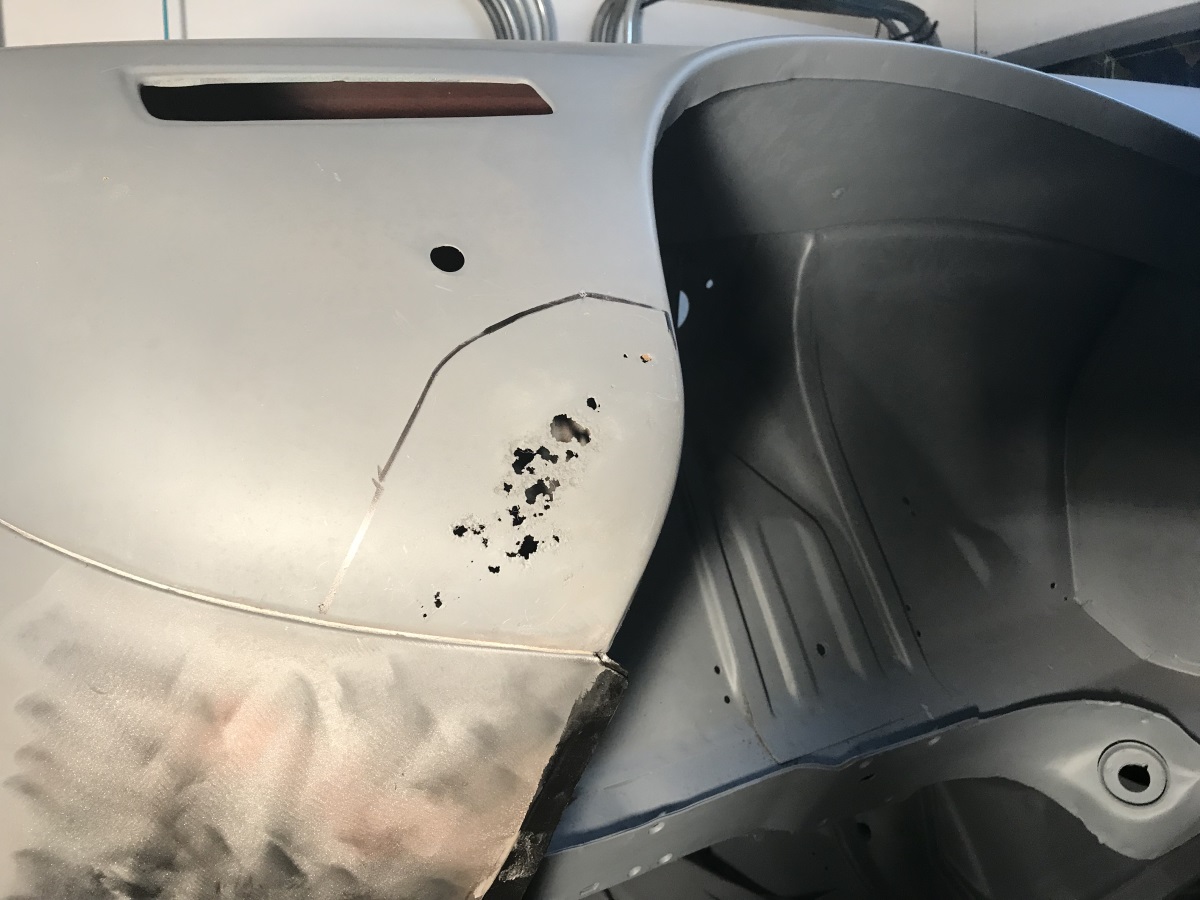
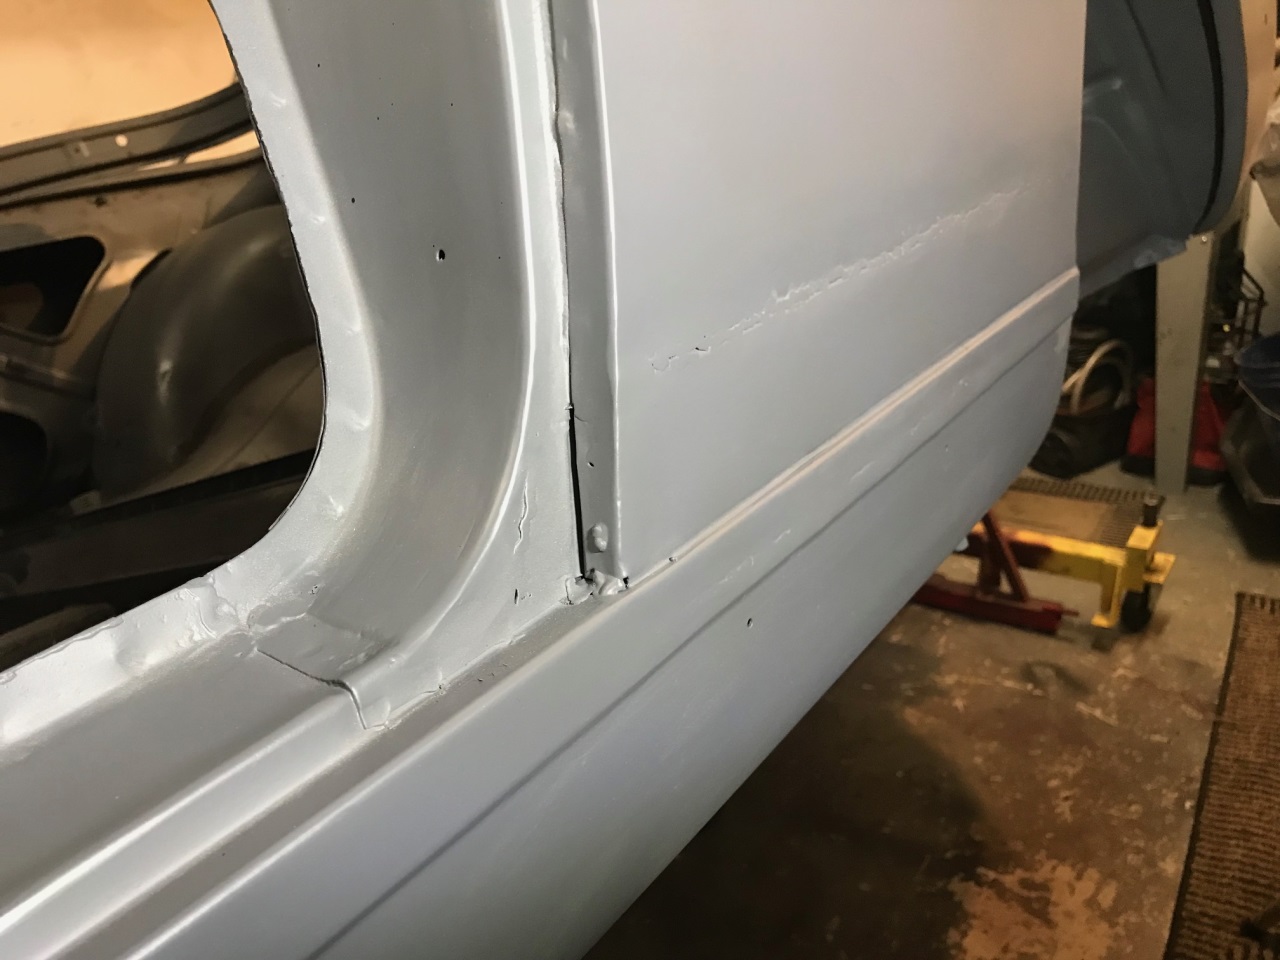
Feb 2019:
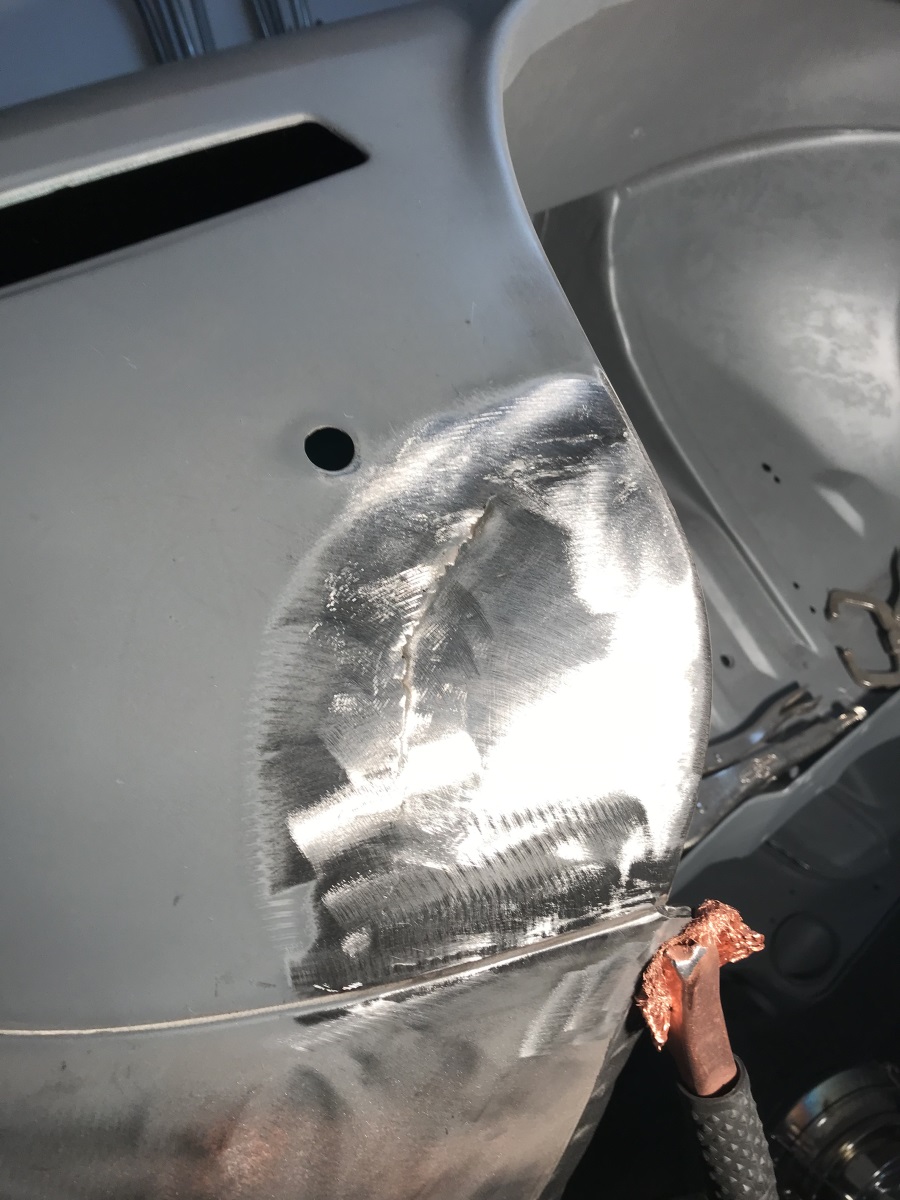
The first patch to the visible upper bodywork, A wormy patch on the lower front of the front right wing. After cutting it out I found that the inner
arch was slightly rusted so this was cut out and patched first then the outer panel was patched with an piece of my old MGB wing, dont tell
anybody! It was almost the correct profile so fitted well. I left the arch shape and the seam alone so it looks pretty original. I was quite pleased
with this patch, my welding is really coming on now.
*Click on images for bigger version*

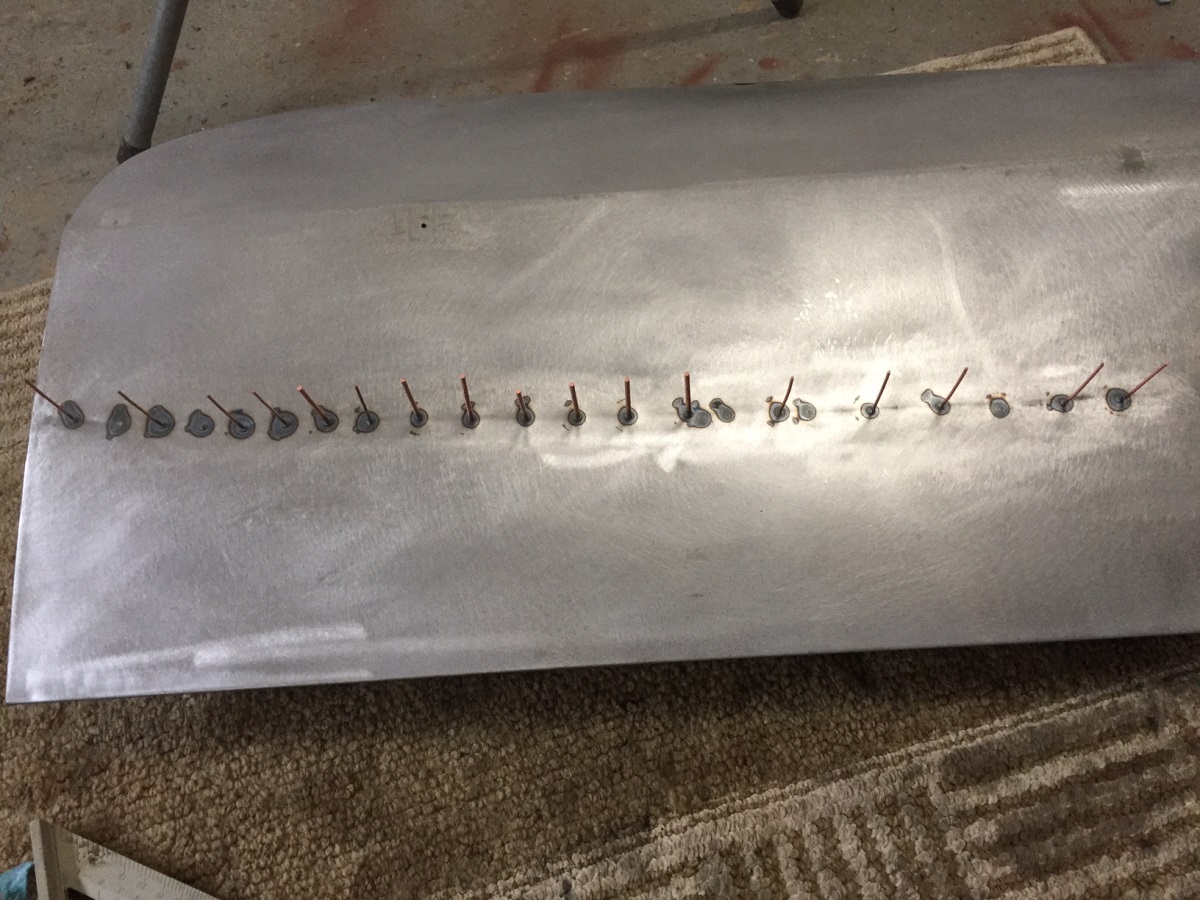
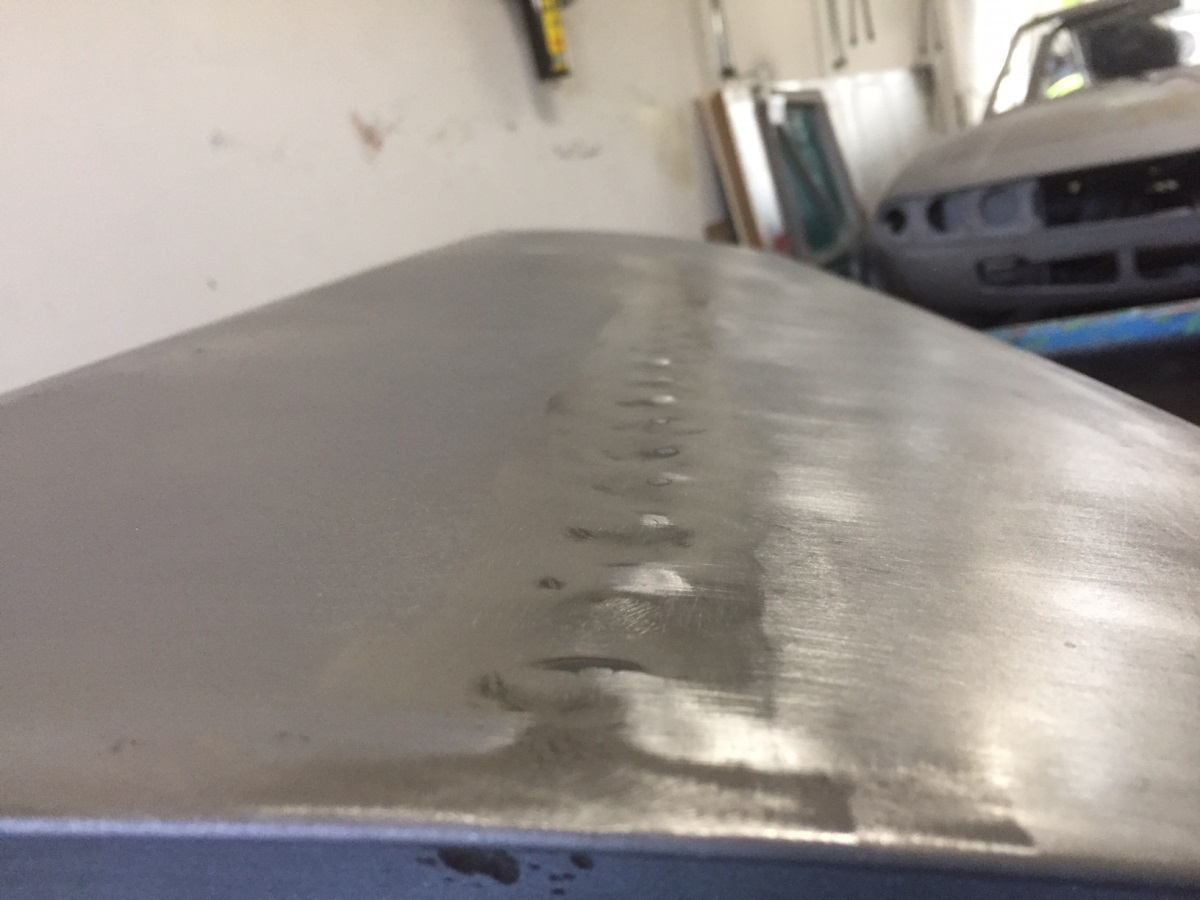
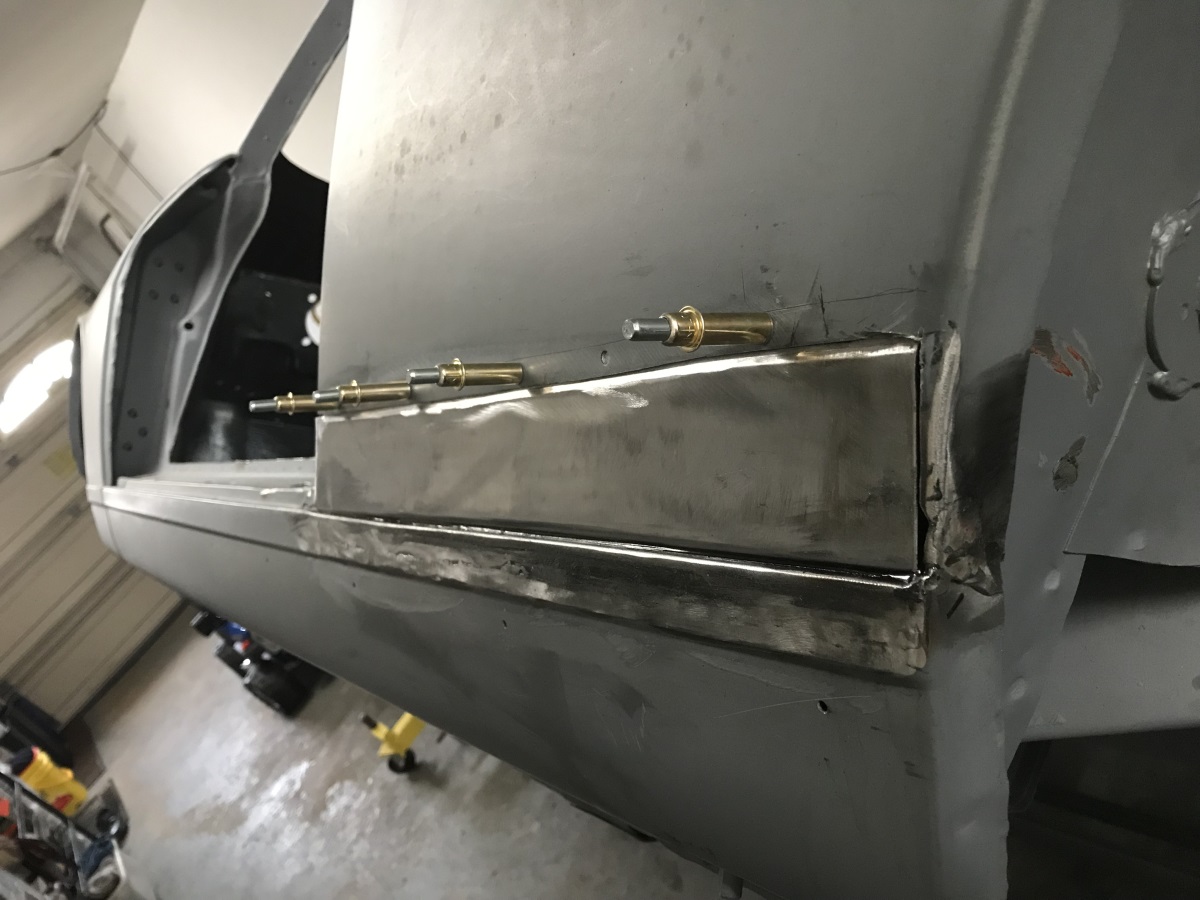
Mar 2019:
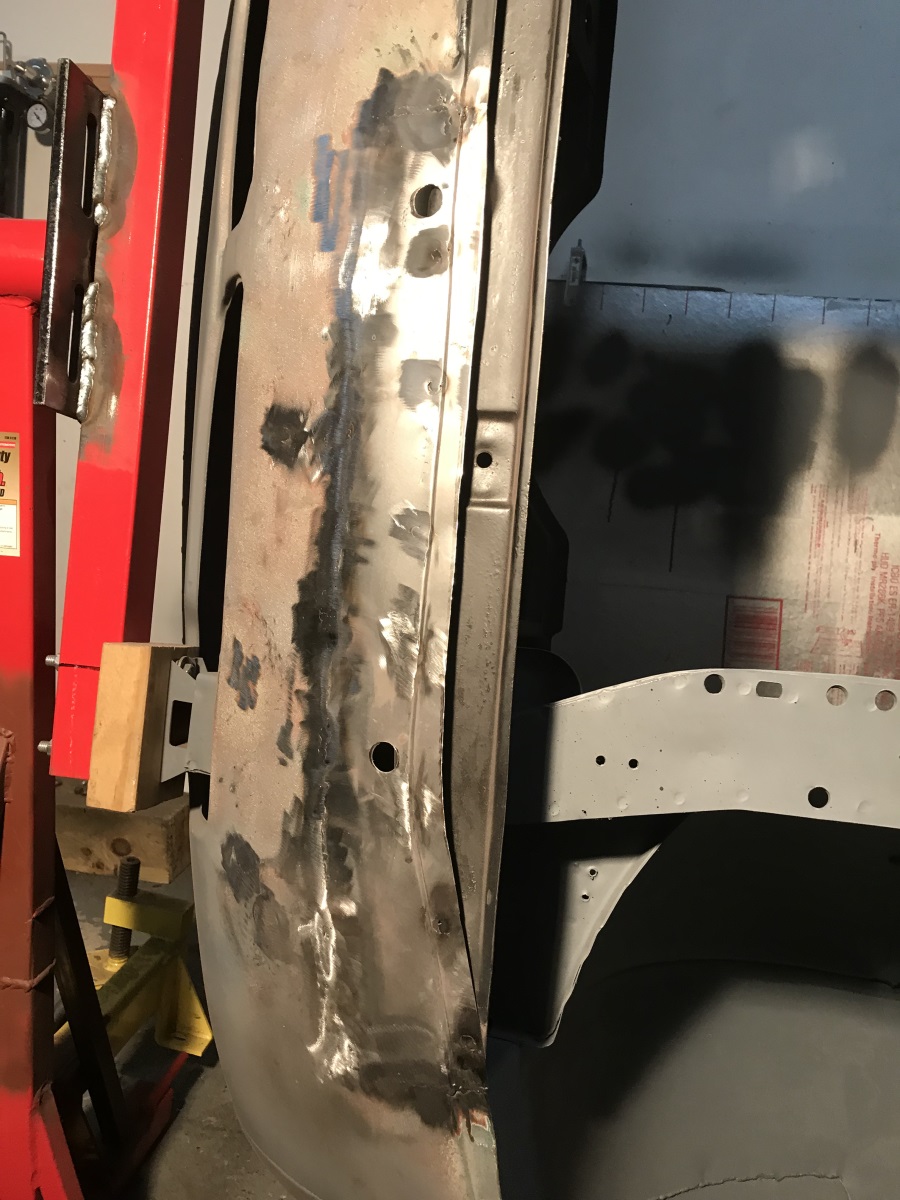
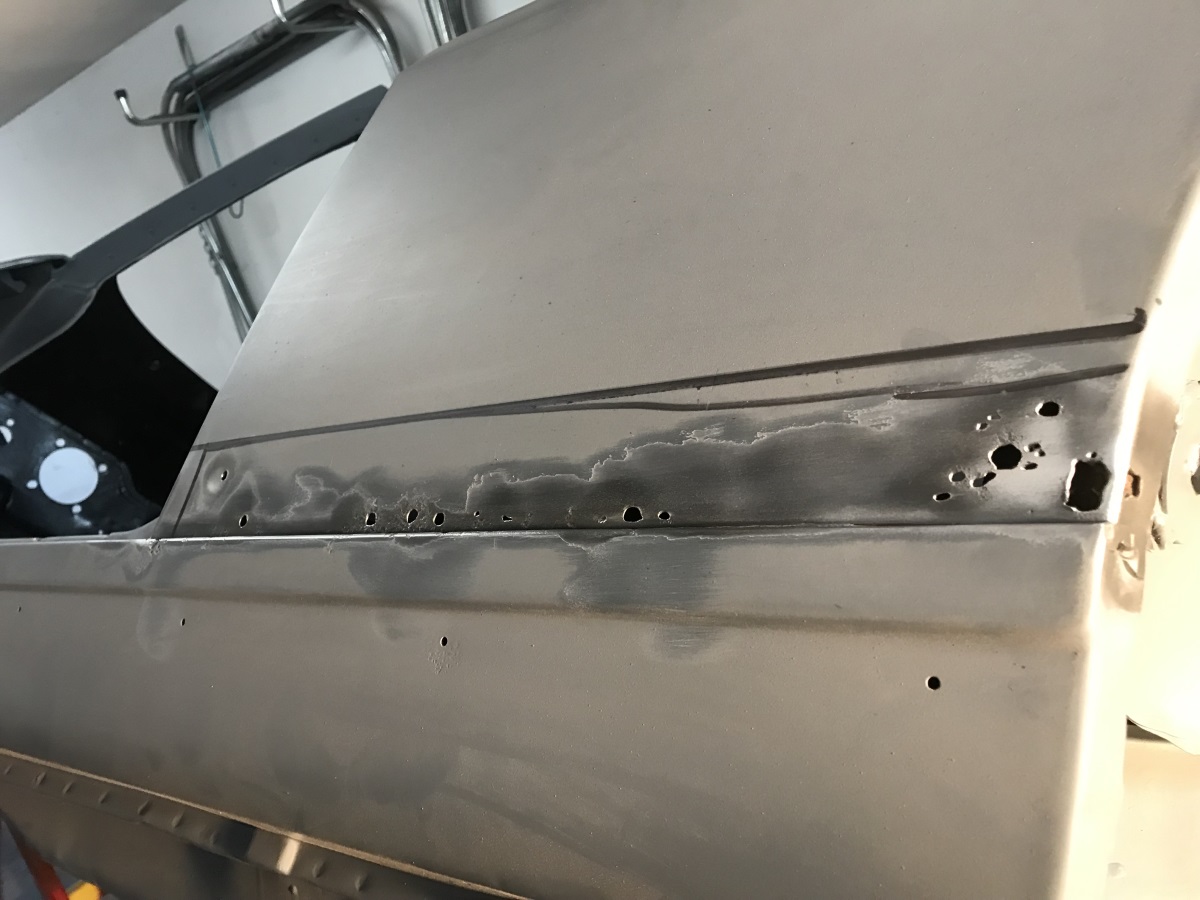
The final visible bodywork patches are to the rear wing/sill area, a well known rust area on the Stag. Right side is not bad at all, there were a
few pinholes but it is basically sound including the internals and I just welded them up. Plenty of POR to the inside and that side should be fine.
The left is not so good. Lots of rust holes and the inner sill has rusted at the top, though the rest is OK. I cut a section of the wing out and
was able to get inside, remove the rust and fabricate a patch for the inner sill. This patch was bent down 90 degrees and welded at the "rib" that
goes front to back, and that gave the small reveal where the rear wing is attached, the original was pitted and holed.
*Click on images for bigger version*
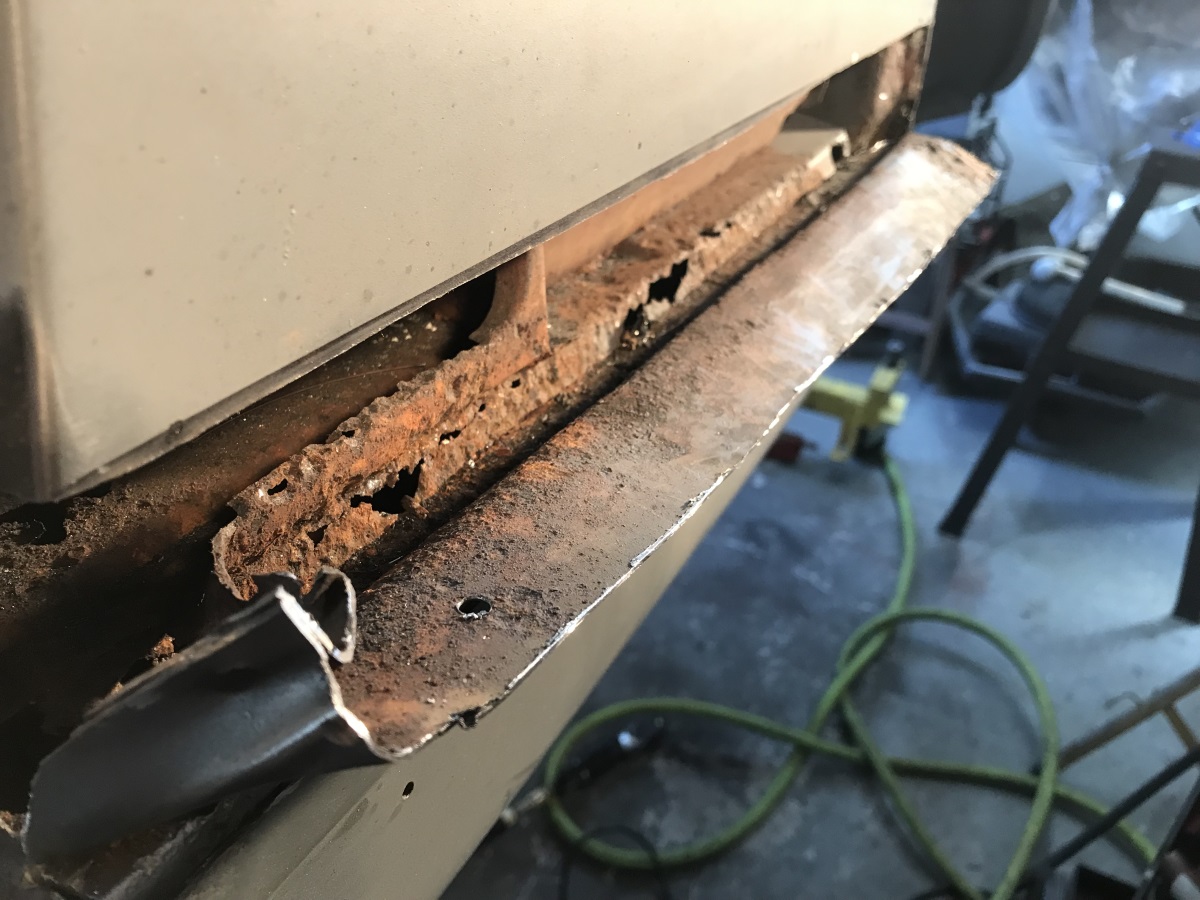
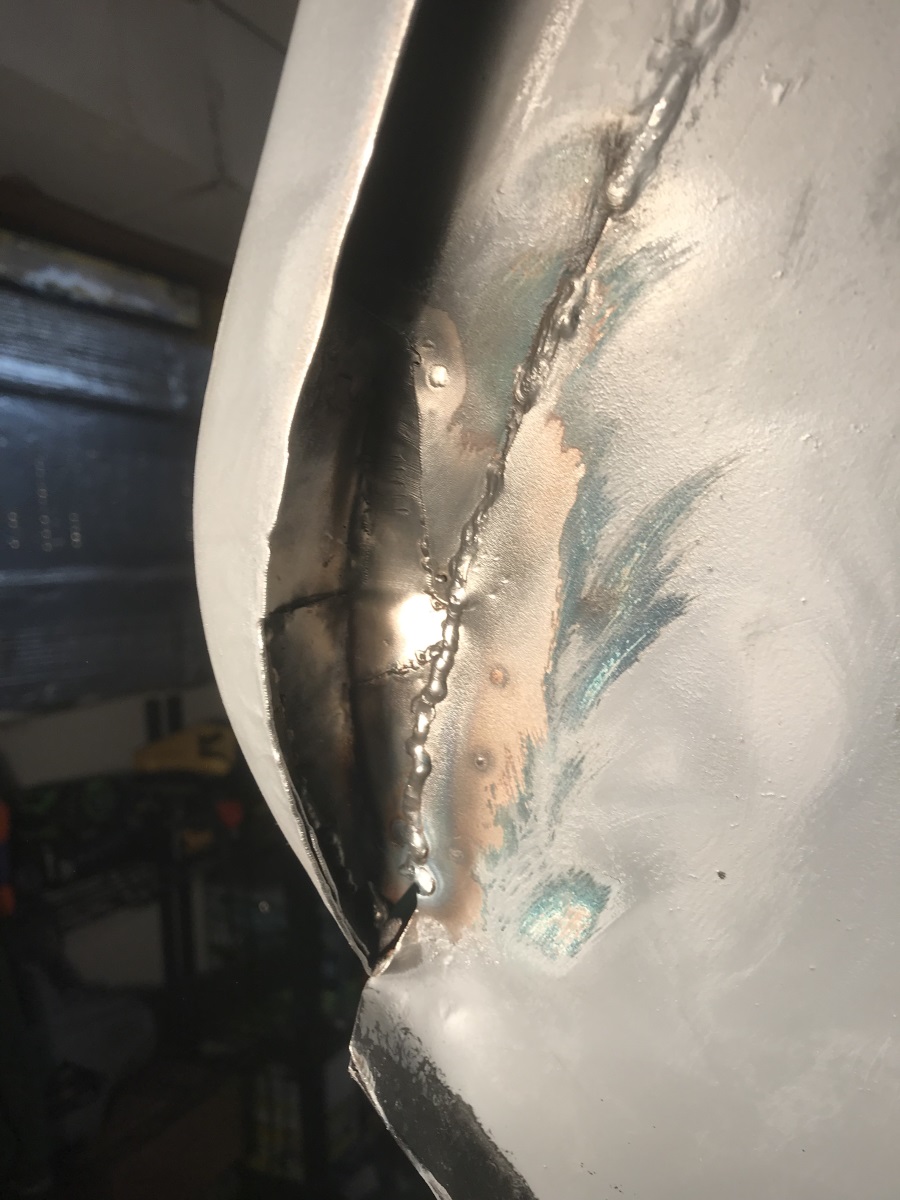
Mar 2019:
The door was test fitted and the gap was checked with the patch, I had to adjust it a little but it looks fine. A couple of areas needed small
patches and then the rear wing patch was glued with epoxy panel glue to that rib as there is little hope of welding it from the inside and I wanted
an original look at the joint there, plus the added bonus of the joint being sealed up tight. A few cleco's were used to hold it whilst it set,
then the rest of the panel was welded in. I used an overlap joint for the patch/original wing joint which was plug welded then seam welded and will
be sealed from the inside with seam sealer. Very little distortion happened and this should blend in well.
*Click on images for bigger version*

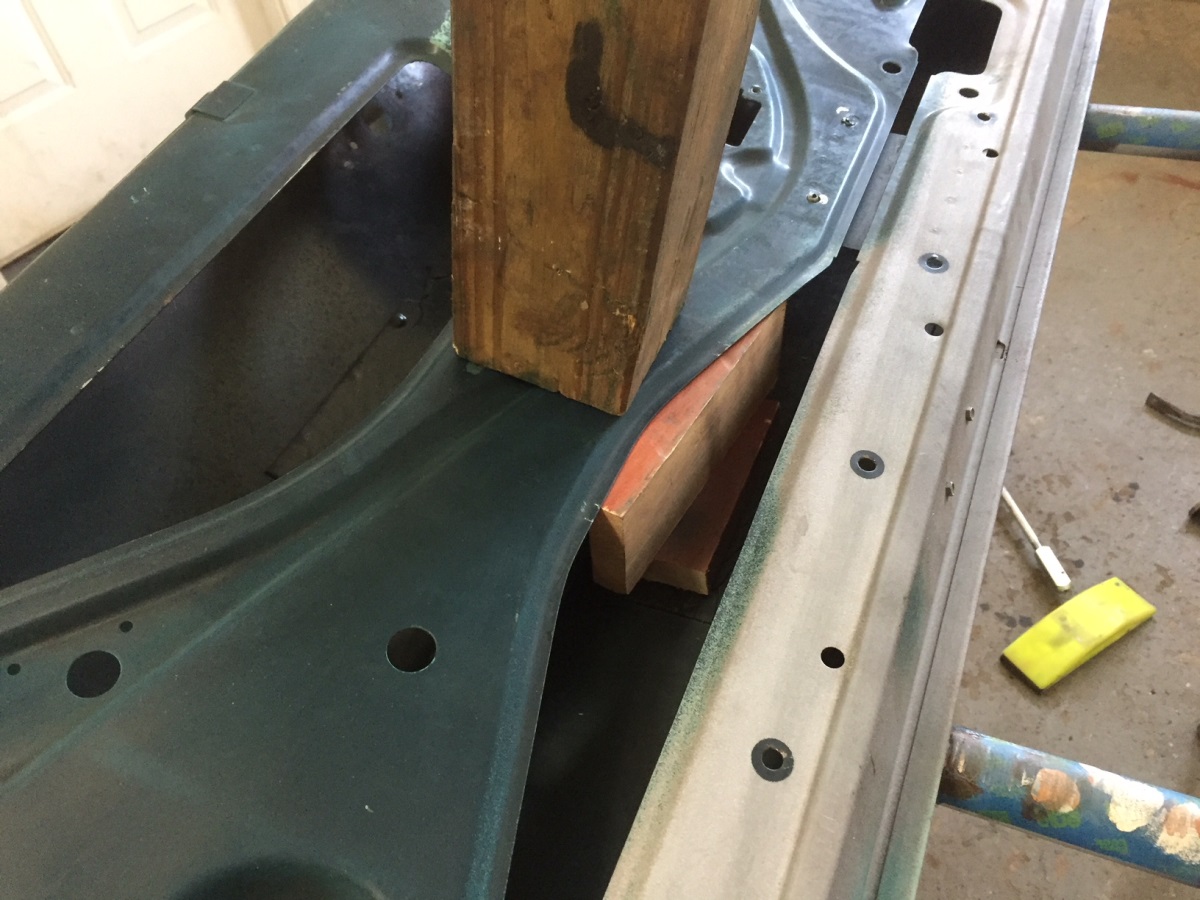
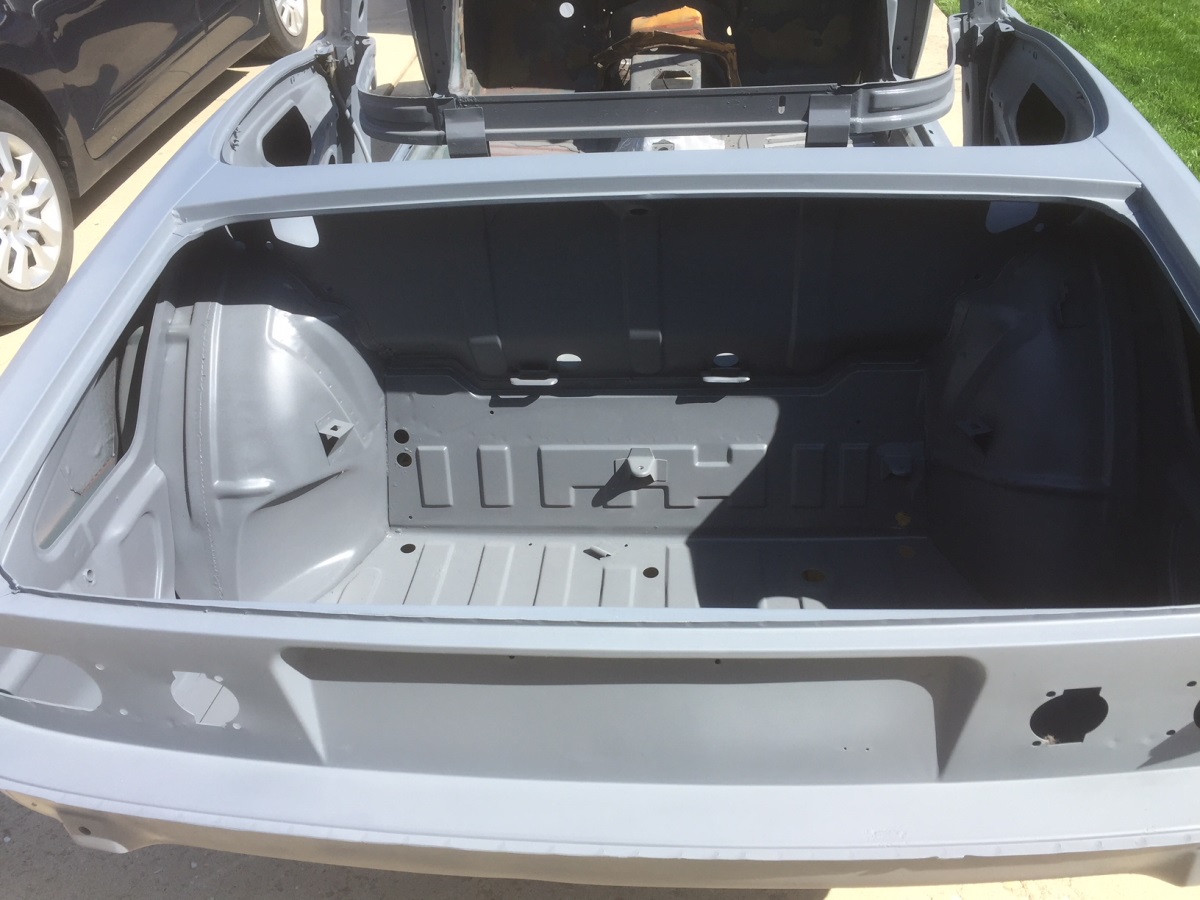
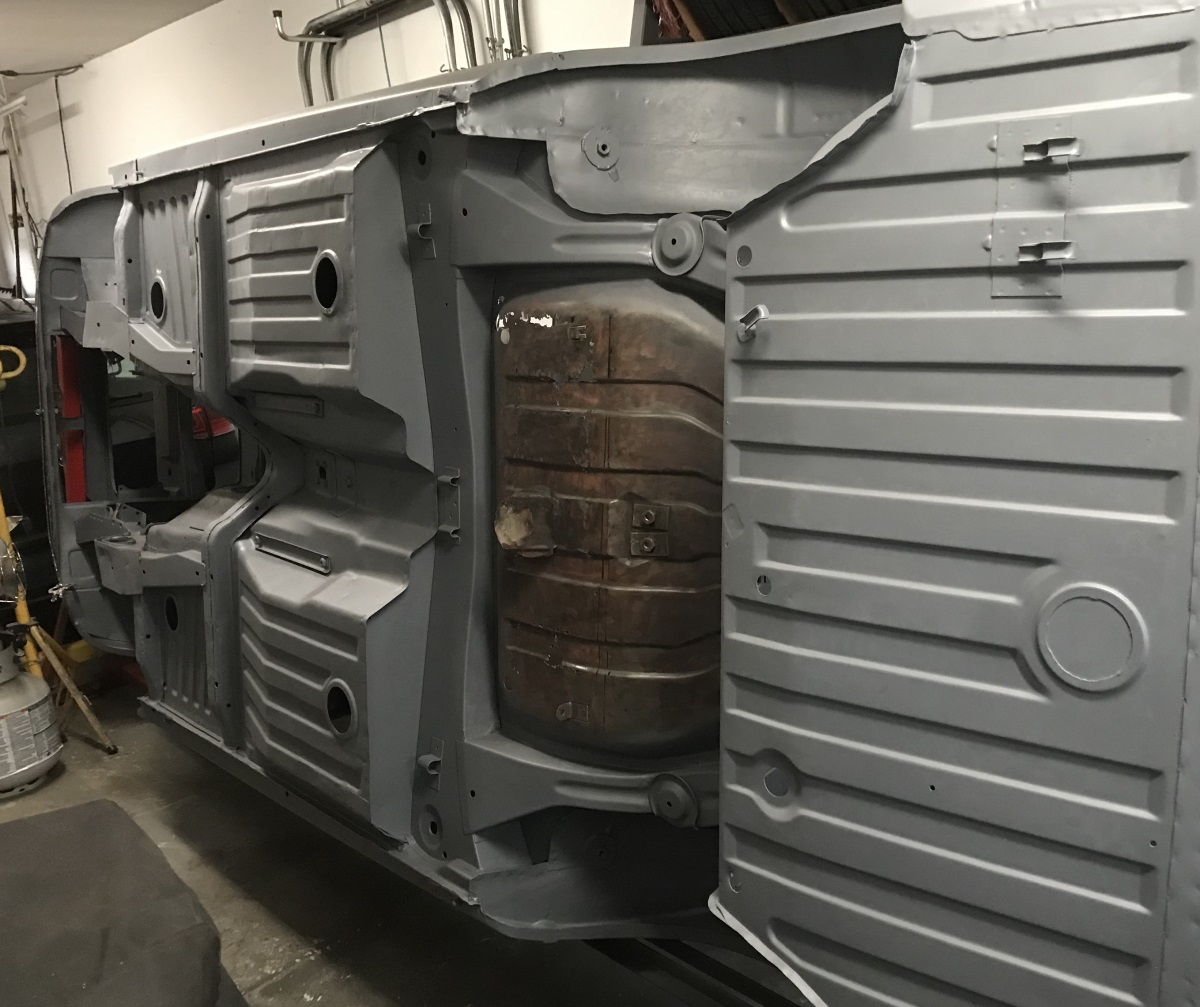
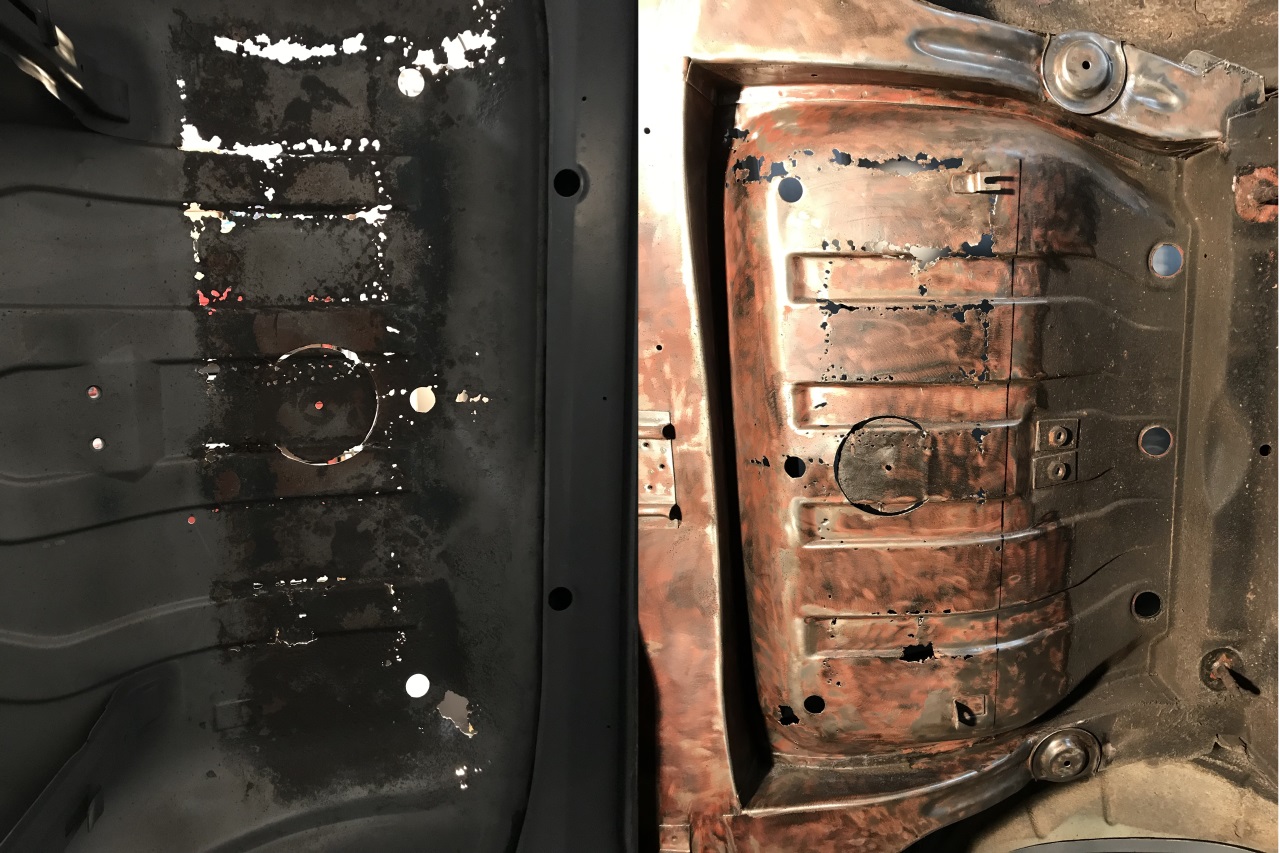
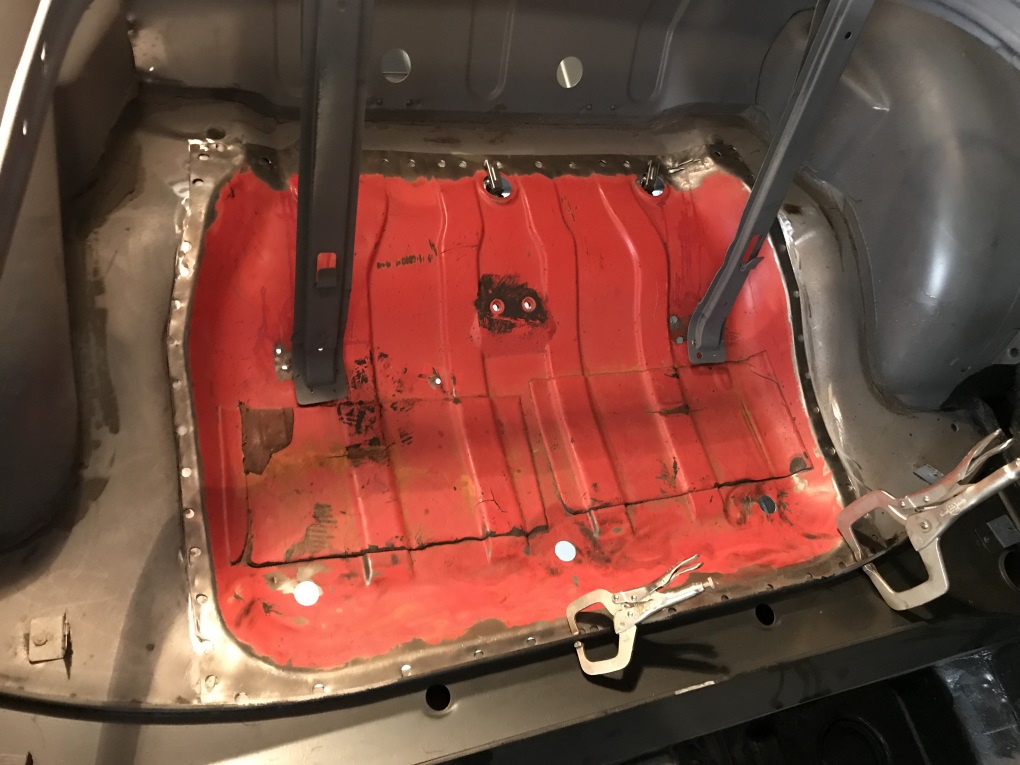
May 2019:
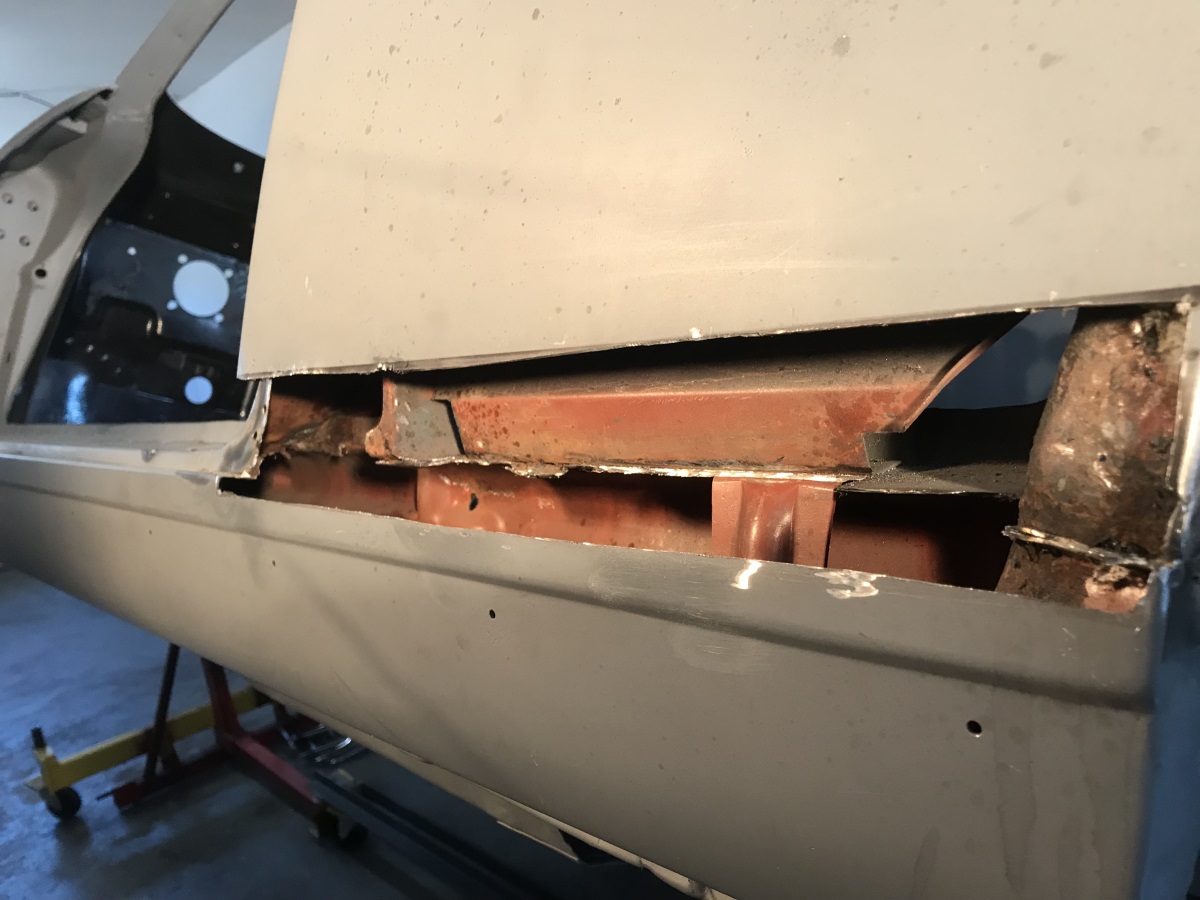
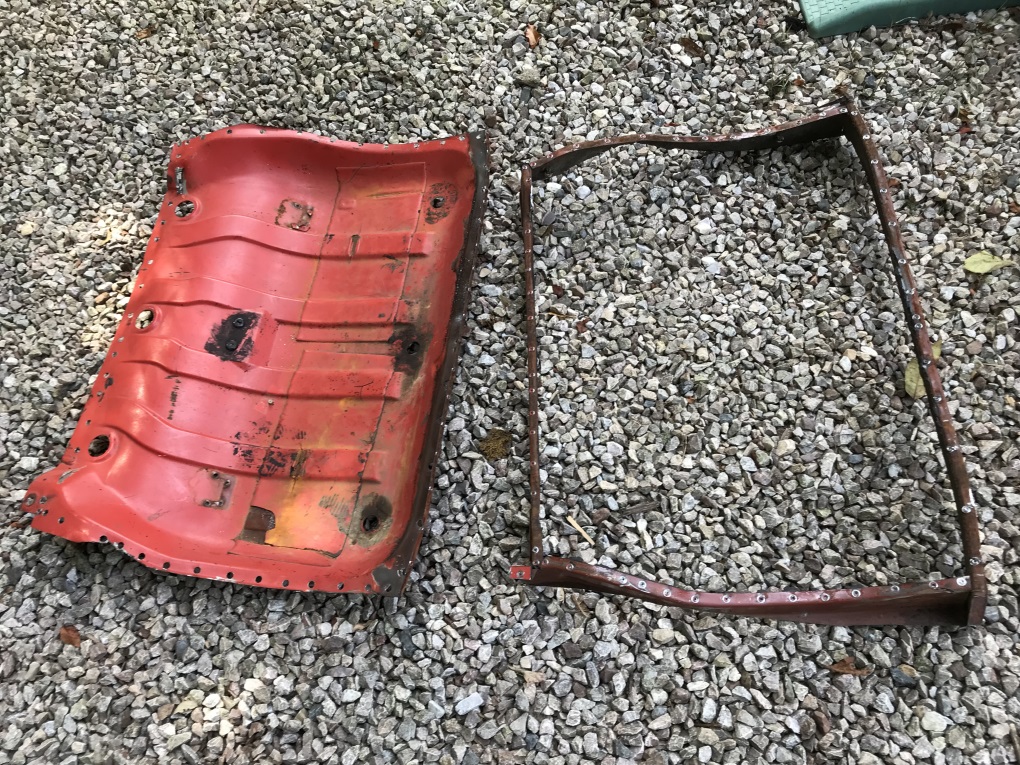
The final piece is the floorpan under the rear seat which is a mess. When I got it there was a layer of glass fibre over this area which seems to
have made things worse, the water got underneath the glass and it just rusted it away. Its beyond my patching skills and although I could cobble
something up nothing within my skill set would look good. So the search was on for a panel from a scrapped car. This proved difficult, I found
someone in the USA but when it came down to actually doing it he seemed to be hesitant, never did give me a price or even an idea of what he had,
4 months wasted. I tracked one down in the UK and again it took months of waiting and ignored e-mails until I was finally told it was ready. On
pickup it was not cut as I had asked, (I had to ship this thing to USA!) nor packed as promised but by this time I just wanted to stop the pain
of dealing with him, Though to be fair the guy in question seems to have the time to attend to such details nowadays. So I have the part, or at
least my Nephew in the UK does and I will need to divert to London on my next visit to the north east and Scotland, cut this thing to a reasonable
size and weight and ship it. That was not planned and "She Who Must Be Obeyed" is REALLY pleased about that! but at least I get to visit my Bruvver.
I plan to only replace the panel just inside the crossmembers, from the bottom it will look pretty much original, from the top some seams will be
visible but the basic strength will be maintained and I feel its the best solution.
*Click on images for bigger version*
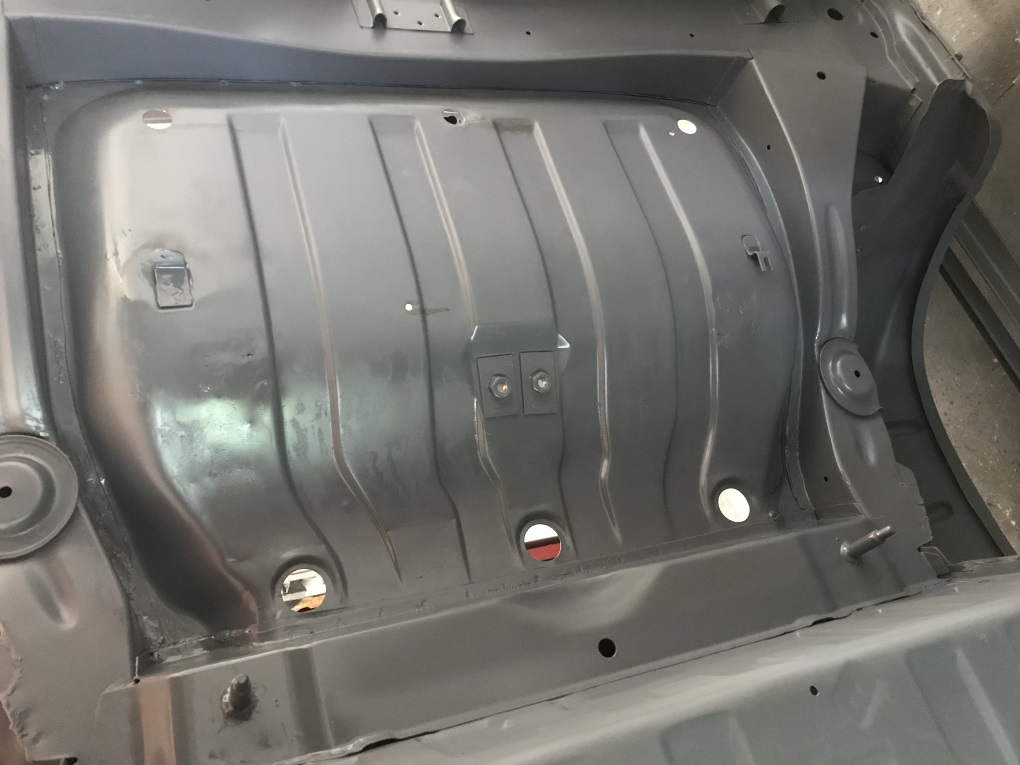
Aug 2019:
My diversion was successful and I annoyed my brother and all of his neighbors by cutting the excess off of the panel to get it to a reasonable size
for shipping. The subframes were still attached and it was too big and heavy so I cut through the panel then the subframes and was able to ship it
at a reasonable cost. When I got home I was able to seperate the panel from the remains of the subframes and trim it to size, clean it up and make
it ready for install. I must say it is a great panel with absolutely no rust. I lucked out there..
*Click on images for bigger version*

Aug 2019:
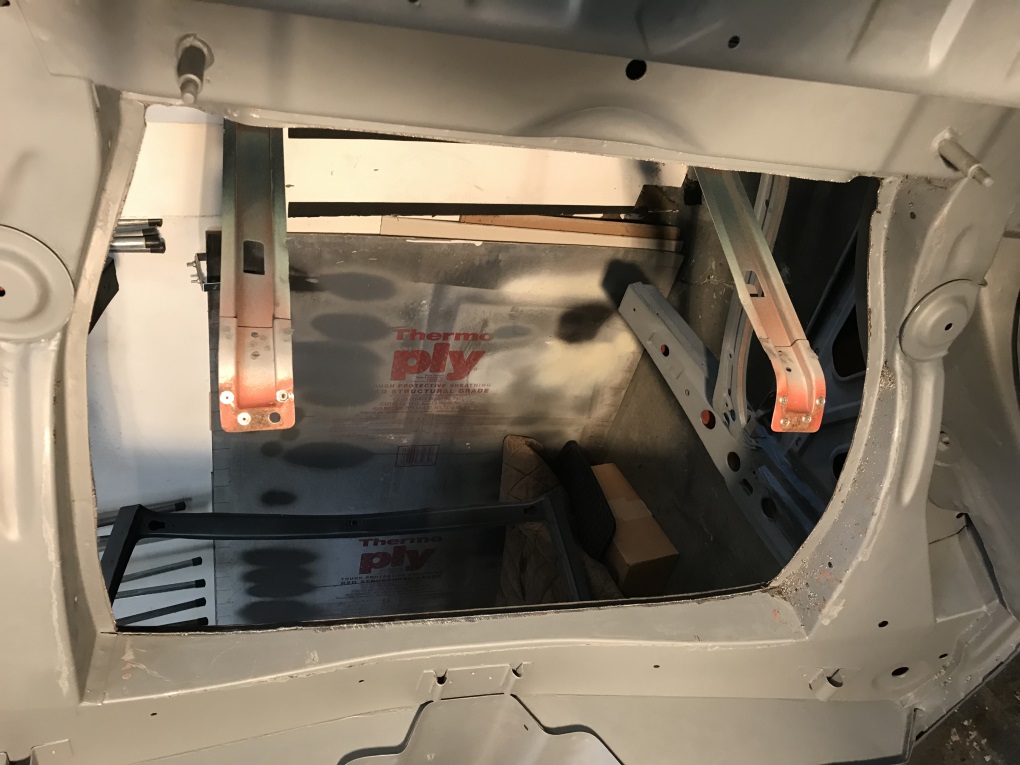
Next I used a sawzall to cut the old panel out, basically following the subframe flanges, that was easier than I imagined. Now I had the original
panel still welded to the subframes so strength was maintained and just dropped the new panel in from the top. At the front I had left the 90
degree lip but trimmed it a little and it slotted into the existing lip nicely. It looked a good fit so I then plug welded it in through the holes
I had made when removing the panel from the subframes and re-weldedthe vertical stays. Some epoxy paint and you would hardly know, especially from
underneath the car I will apply some seam seal all around but in the end I'm quite pleased with the end result..
*Click on images for bigger version*
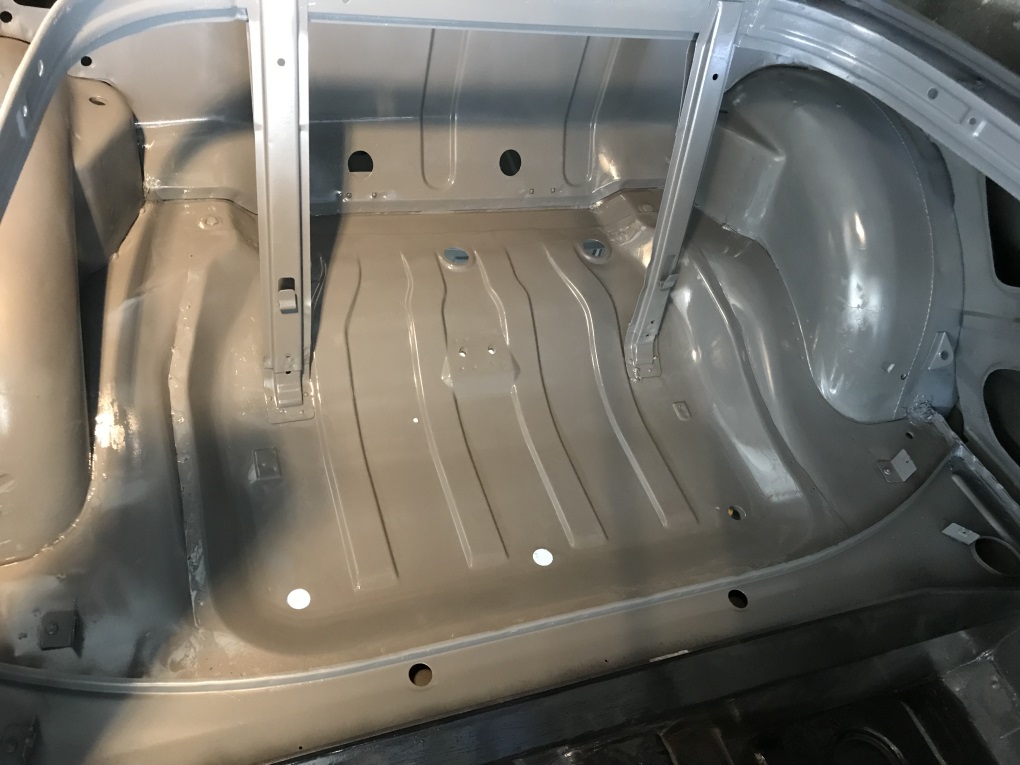
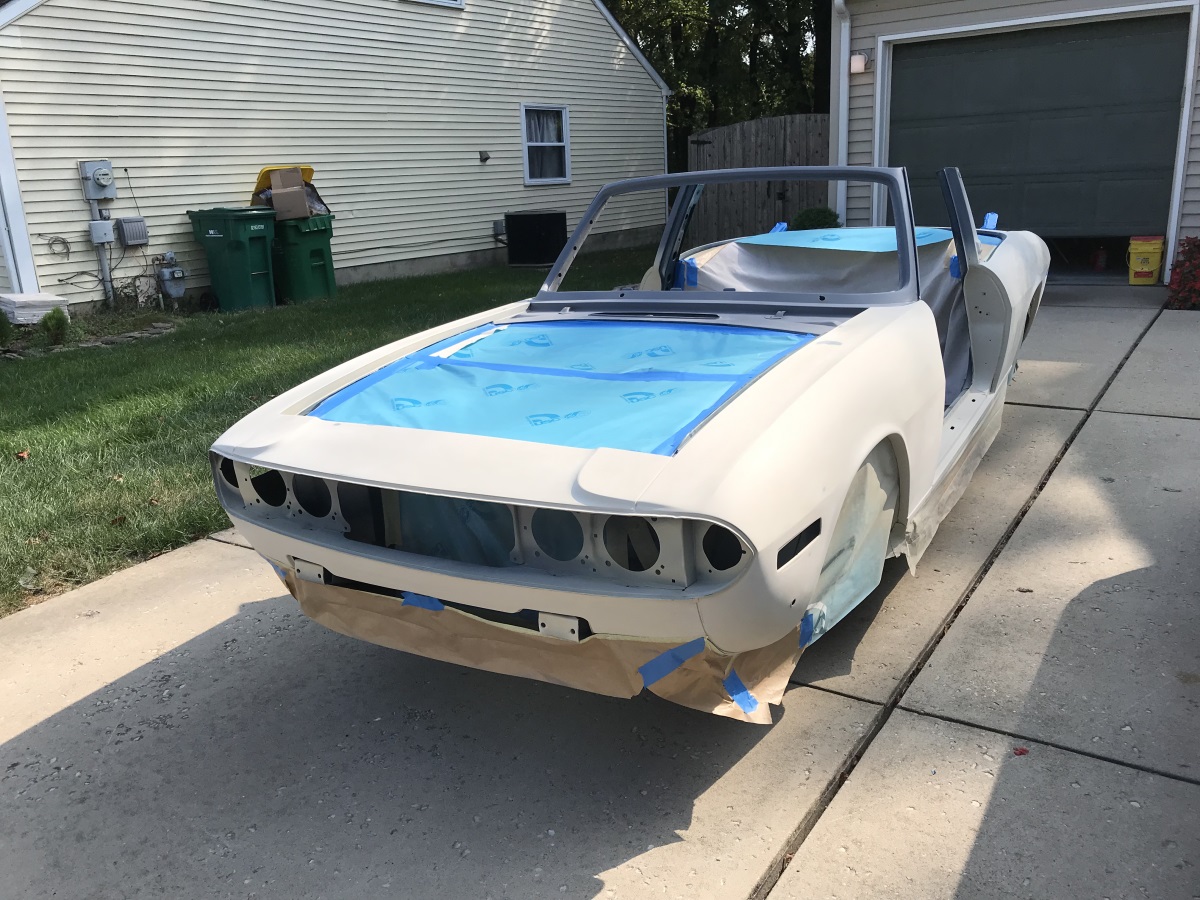
Aug2019:
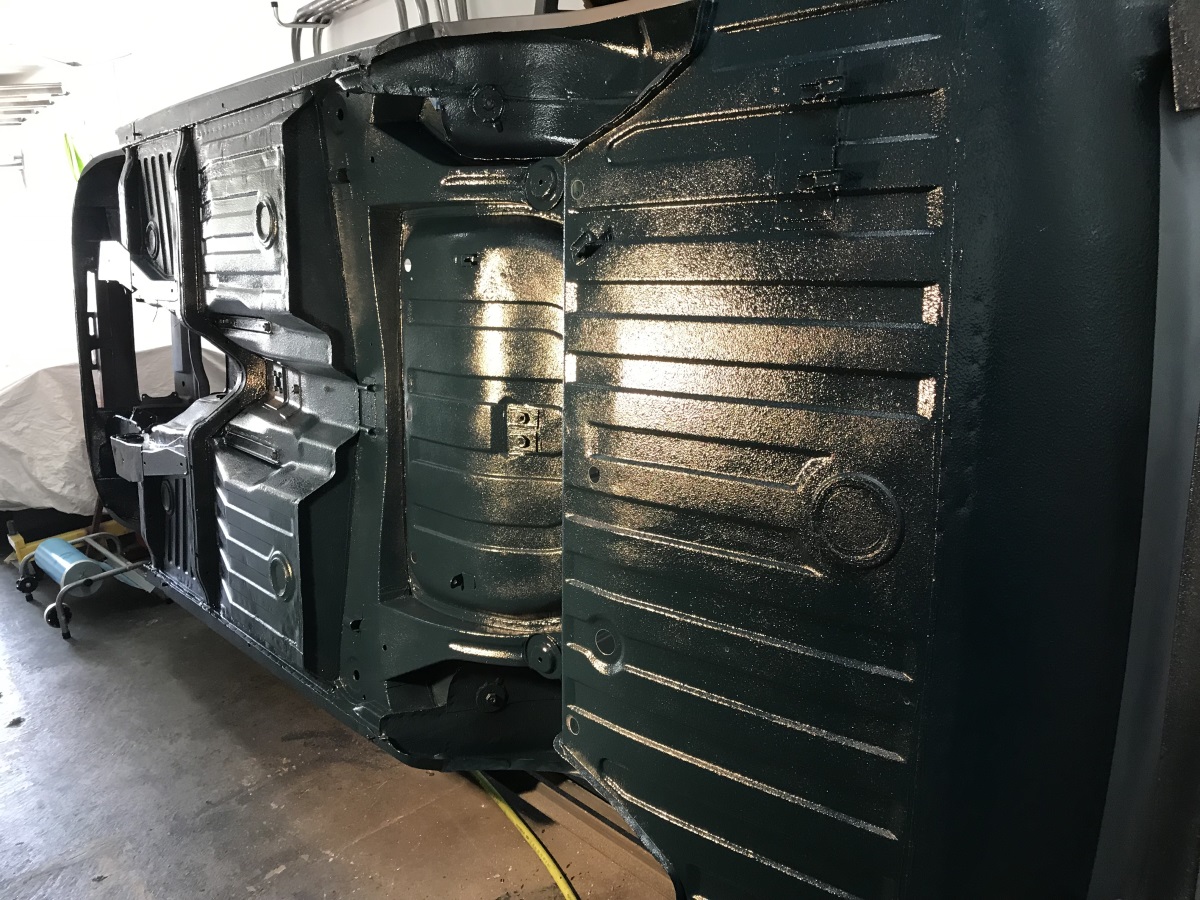
Before taking the car down off the rotisserie I prepped and painted inside the boot, engine bay and hood storage area. The rest of the interior is
already covered and I wont bother making that body cover. I covered the underneath with 3M Rocker Schutz then a couple of coats of colour. The
paint I wanted to use (PPG DCC) has no direct code for the Triumph Mallard Blue that I need so I has a small item scanned. Unfortunately its
much much too dark so I had to mess with it, not easy! It consists of blue, green black and a little white so I simply added a quart of the
blue green and white in the same ratios, that improved things but was still too dark so I added a few more oz of white.. Too much! now its too
light. Another addition of blue green and black got it where I want it. This was an expensive mistake.. This paint costs around $800 a gallon
but having used it before its absolutely the best, lays down really easily and looks fantastic when its done so no regrets. I'm happy with
the boot and interior but the engine bay needed another coat. After painting underneath and interiors, running the fuel and brake lines
underneath it was time to take the car off the Rotisserie on to my wooden dolly.
*Click on images for bigger version*
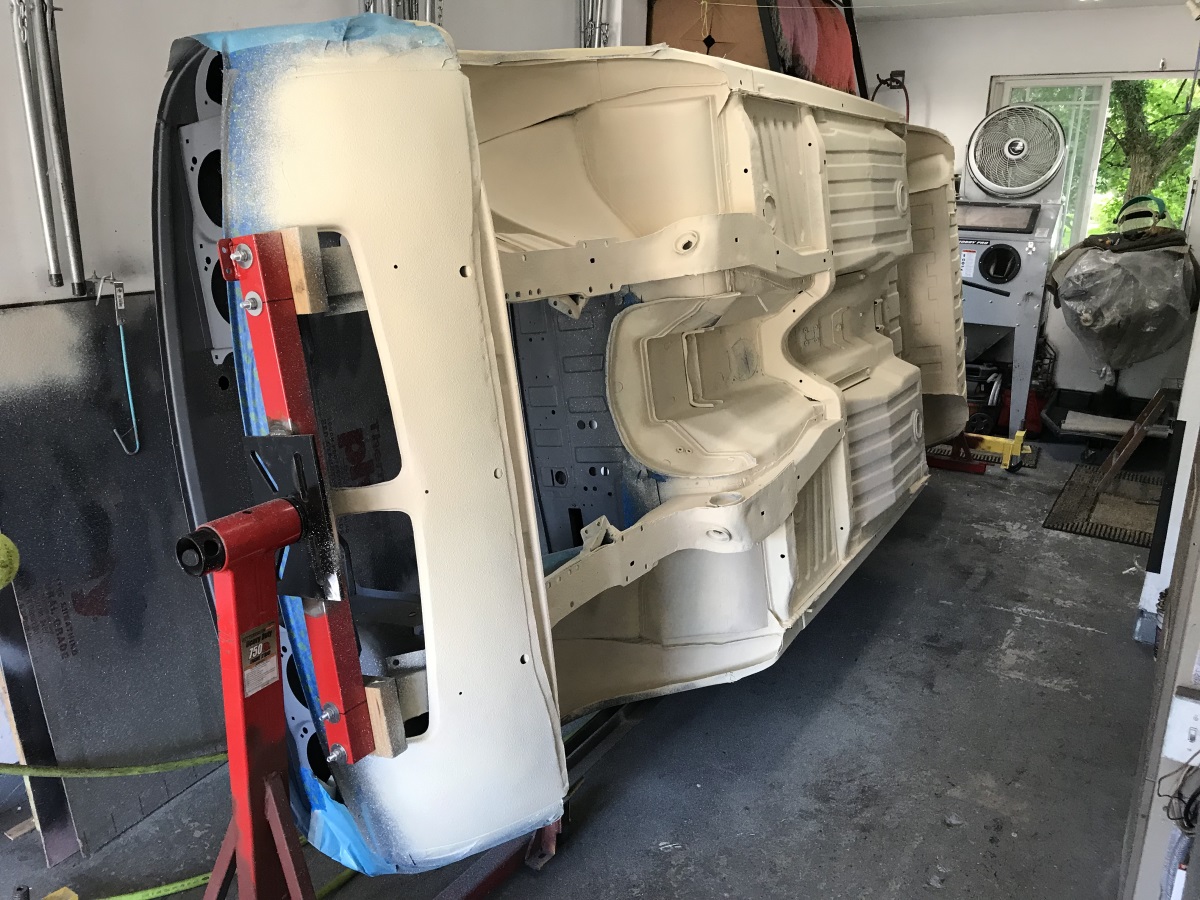
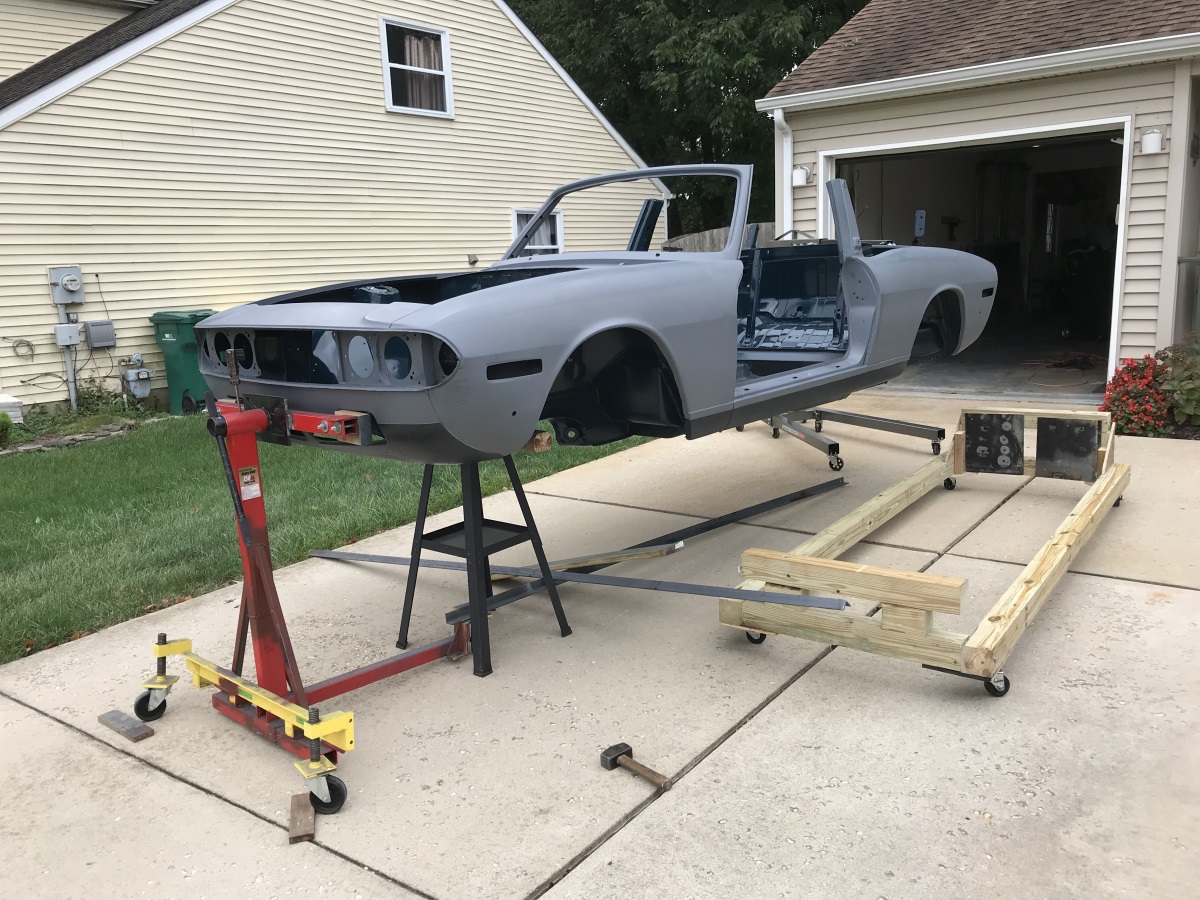
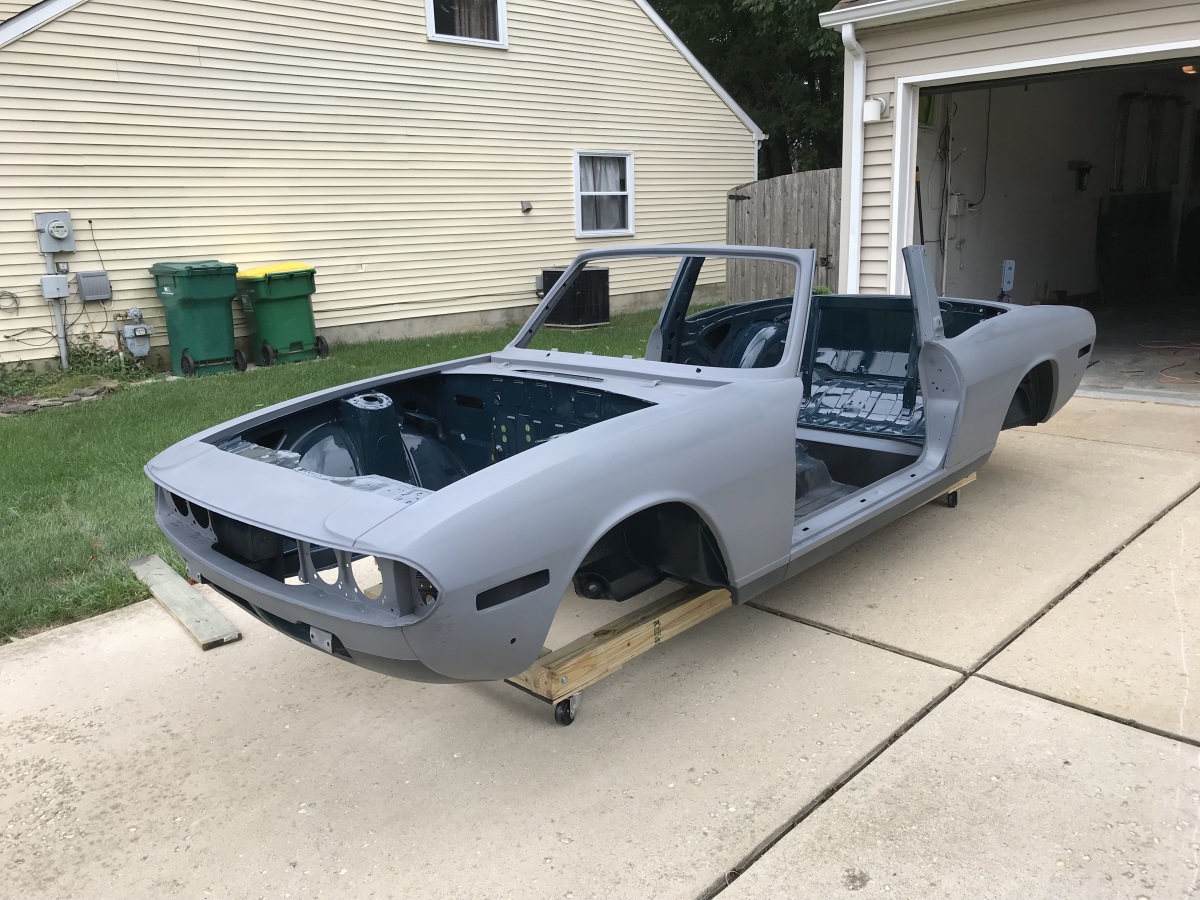
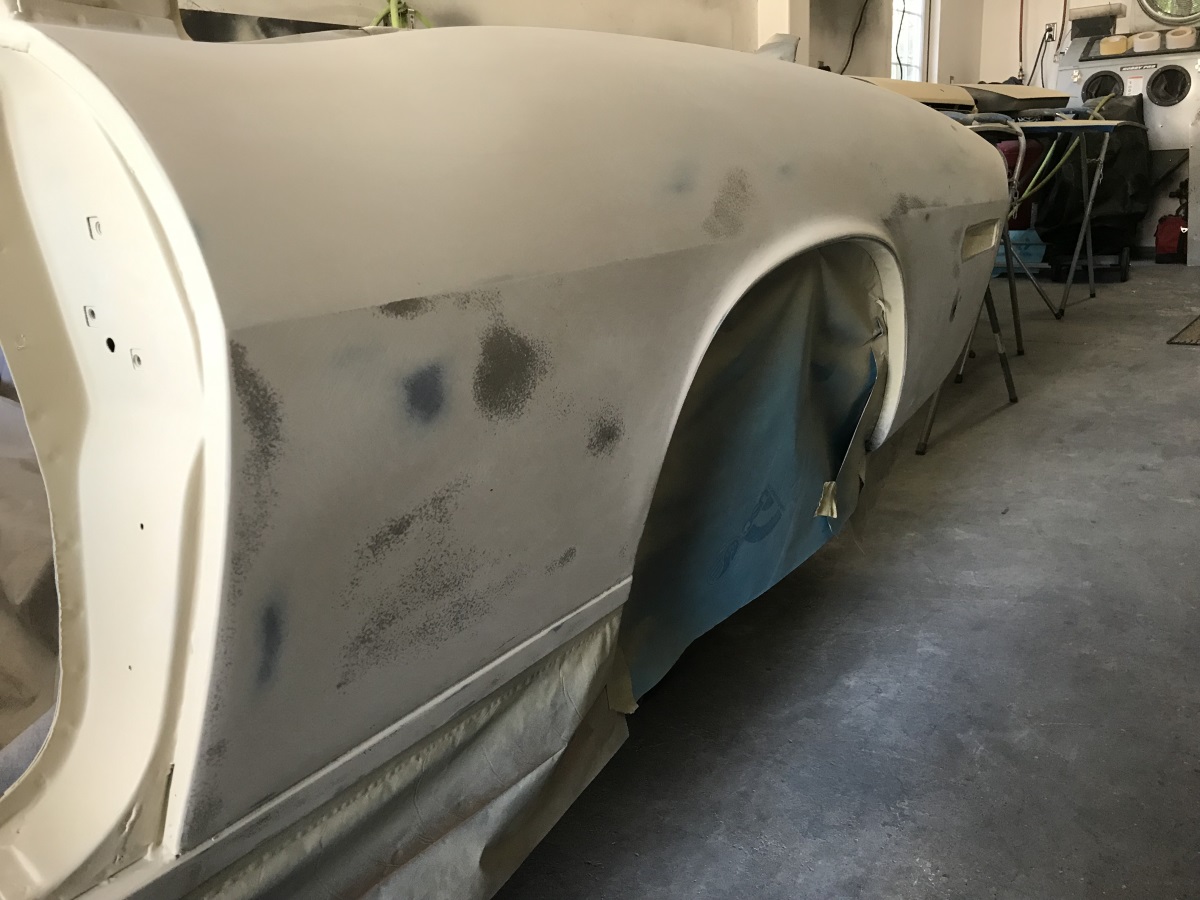
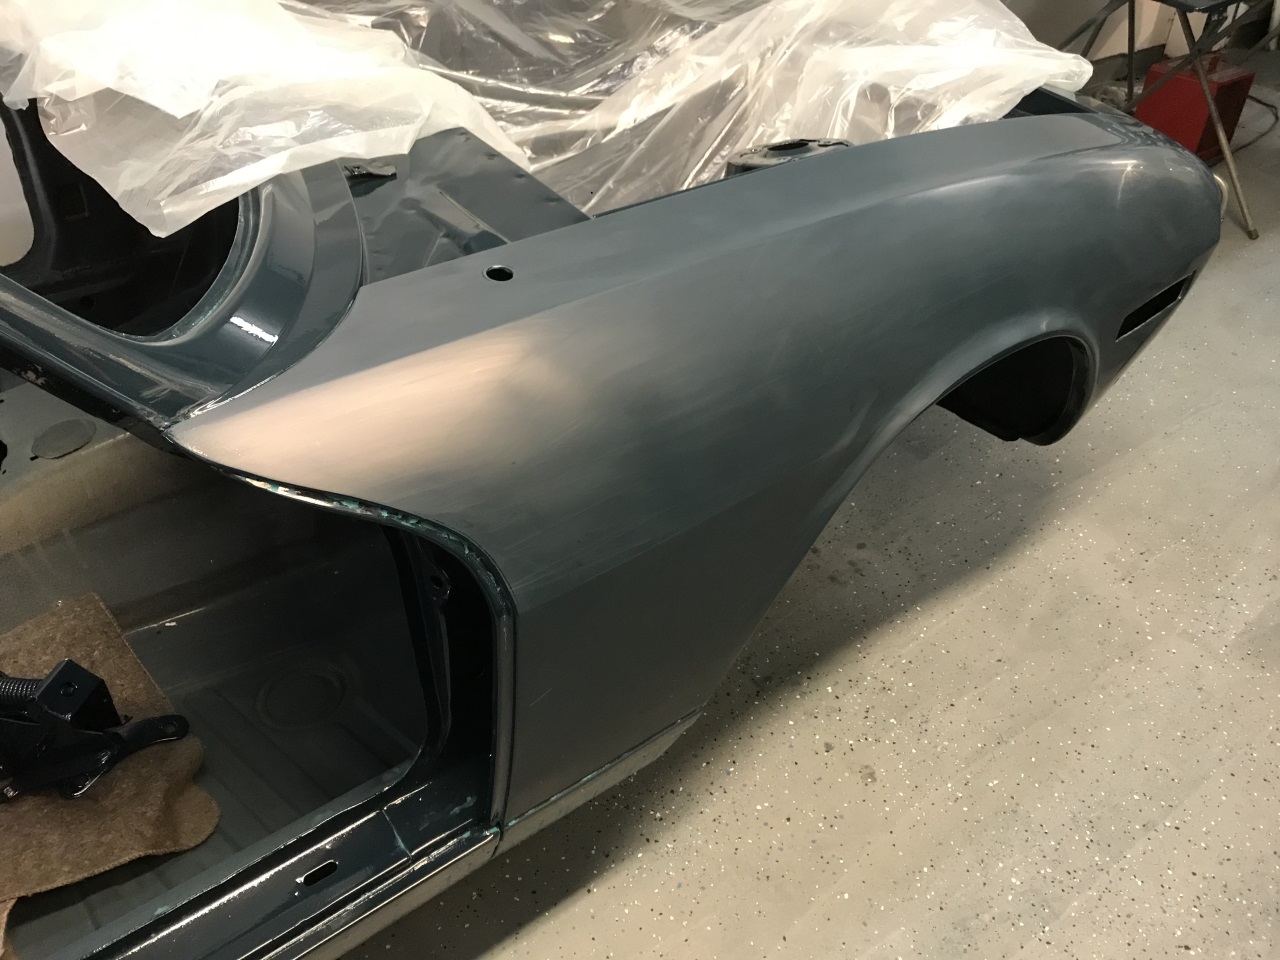
Sept/Oct 2019:
After using filler and getting the body pretty straight 2 coats of grey epoxy was applied, It did not take a lot of filler as the body was not too
bad. Over that went 2 coats of buff coloured polyester "featherfill" This is the first time I have used that and it went well, it sprayed fine
using a 2.0 gun nozzle. I always use a contrasting colour like this so that its really easy to see when to stop sanding. That was dry blocked with
80 grit and then 120 then another 2 coats and blocked again using 320 and 400. A dip in the rear of the boot was a bit too much for the
featherfill so I used some polyester filler to level it before another 2 coats went on to that area and a couple of more areas that still needed a
bit more blocking. In the picture of the rear wing the grey areas are where its down to the epoxy, dark brown is the guide coat, time to stop!
Once it was all blocked a seal coat of epoxy followed by 2 coats of hi-build primer. This was wet sanded with 600 grit wet/dry in readyness for the
final colour coat.
*Click on images for bigger version*
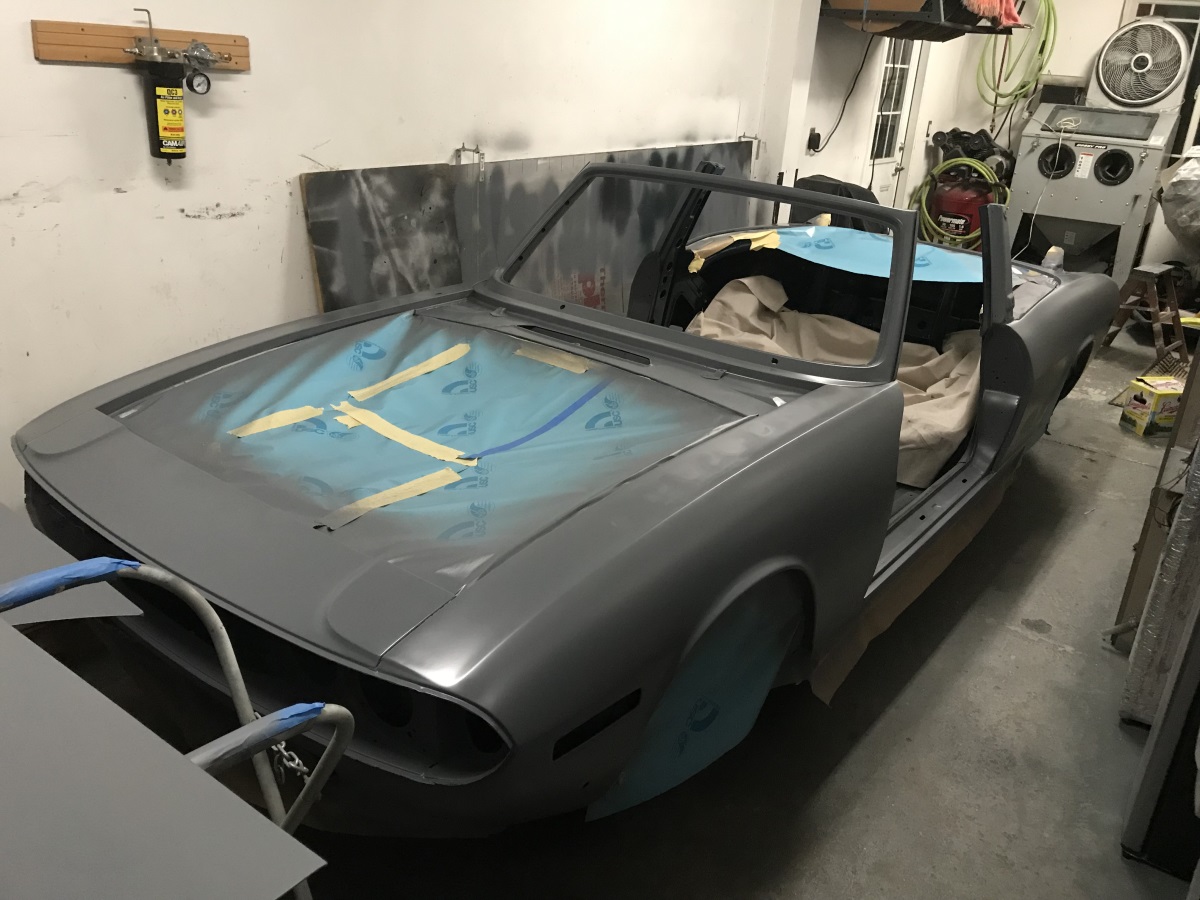
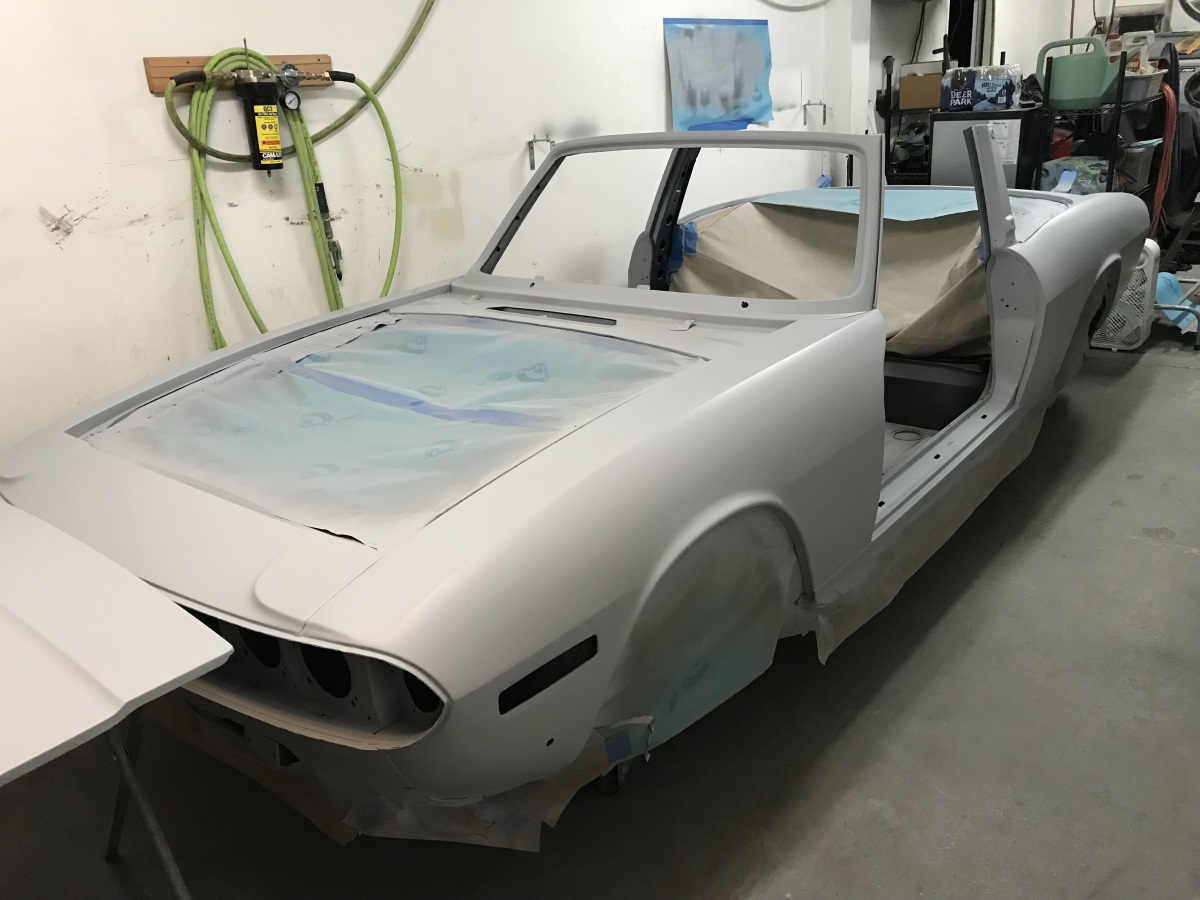
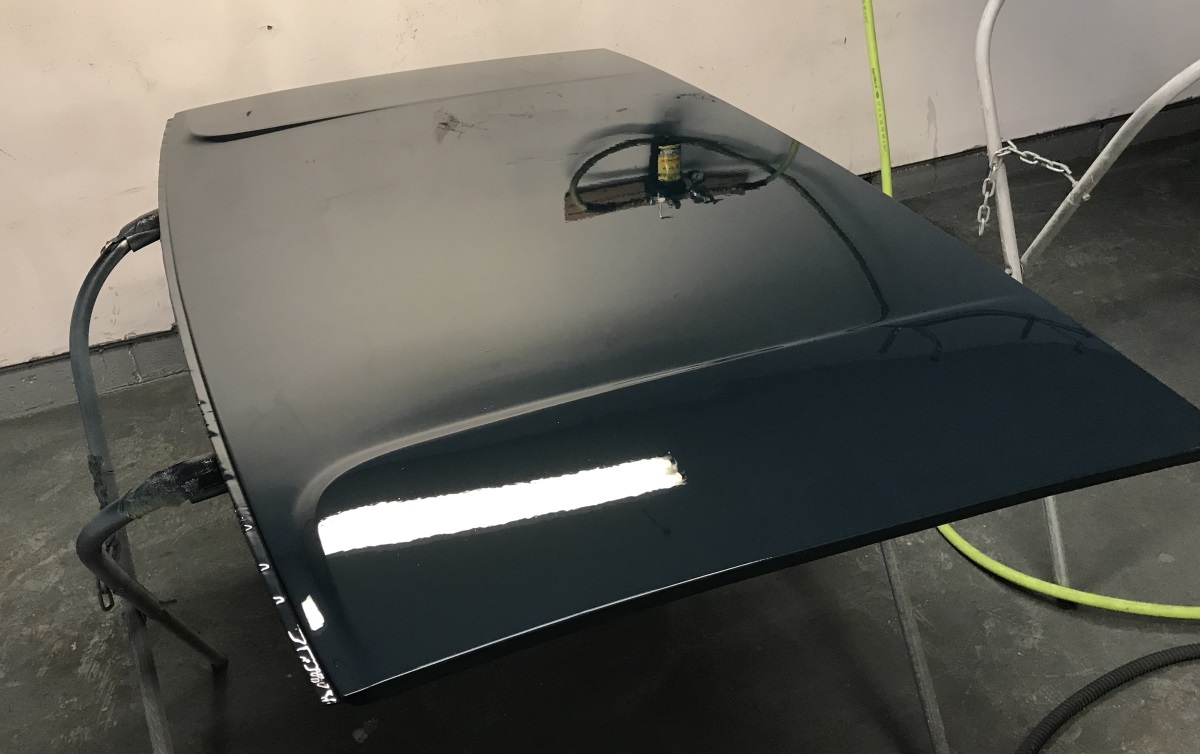
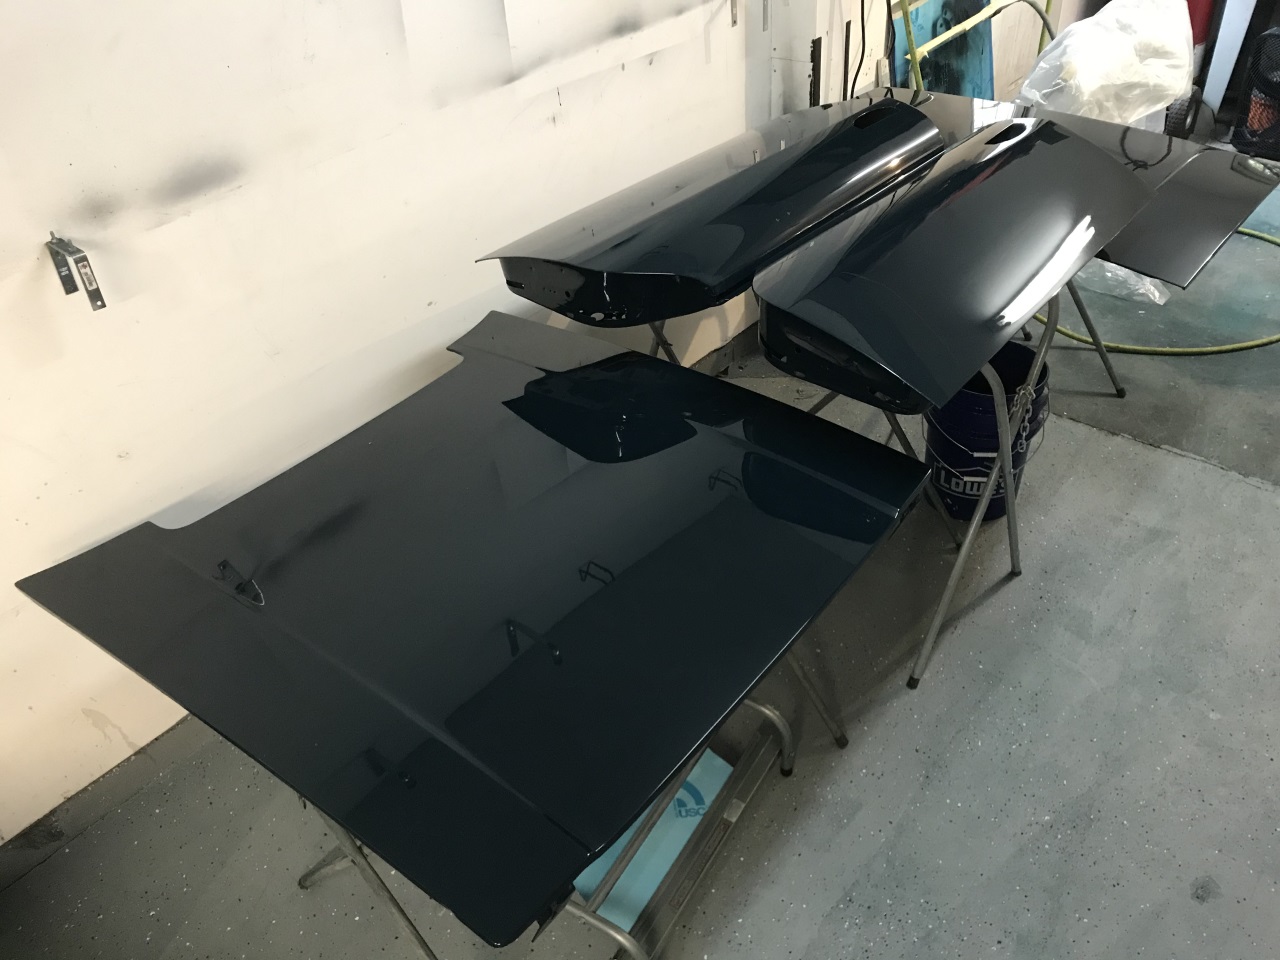
Oct 2019:
Paint day! I spent the previous days preparing the garage, pressure wash the whole thing and used plastic sheet to isolate the problem areas. 5 fans
with filters were used to vent and a frame with filters to sit under the garage door for air inlet. The top area of the garage door was sealed off
and 6 extra strip lights, 4 on the ceiling either side of the body and 2 loose on the floor so that I could see the underside. So busy I forgot to
take a picture!. I used a borrowed air fed respirator which is a bit of a pain with the extra hose to worry about but by far the safest option.
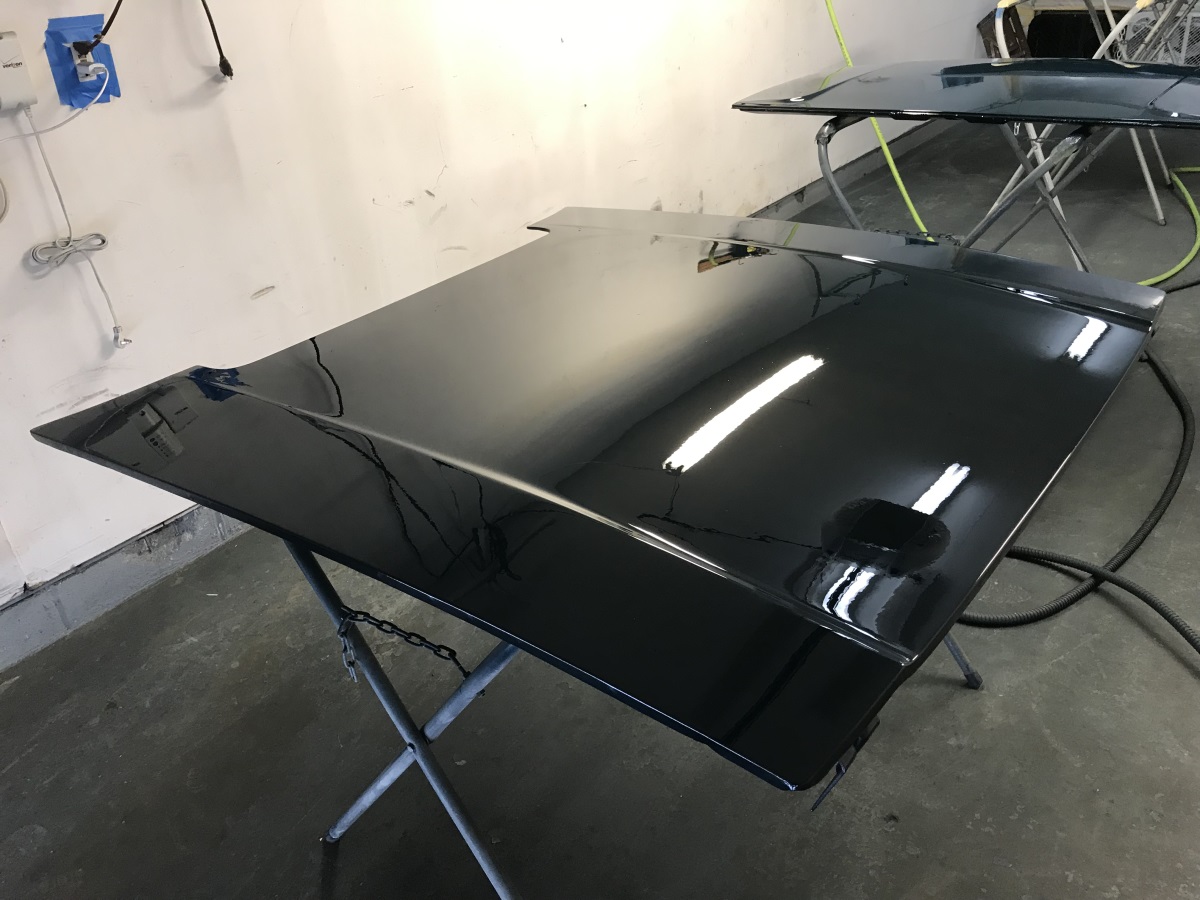
Anyway the doors, bonnet and bootlid were done first, no problems, no runs. After they had dried, about an hour they were moved outside, the
floor was pressure washed again, filters replaced and the body came in Next the body was started by using the detail gun and catching all of the
fiddly bits, wheel arches, door jambs, windscreen and the seams where the chrome trim clips on to at front and rear. Then the big gun came out and
the rest of the body was sprayed. I had one senior moment and forgot to check that the gun cup was full enough when I started the final coat on one
of the rear wings, I ran out half way down the panel and in the 30 secs it took me to top it off the paint had run. Bugger.. I'll need to fix that
later, good news is that have enough paint to shoot it again should I need to. Aside from that I'm happy, some dirt nibs which was always going to
happen when spraying in a home garage but it already looks great, and will be even better once I colour sand it.. The Mallard colour is fantastic,
Its basically green most of the time then surprises you by looking blue! I think it depends on the cloud cover..
*Click on images for bigger version*
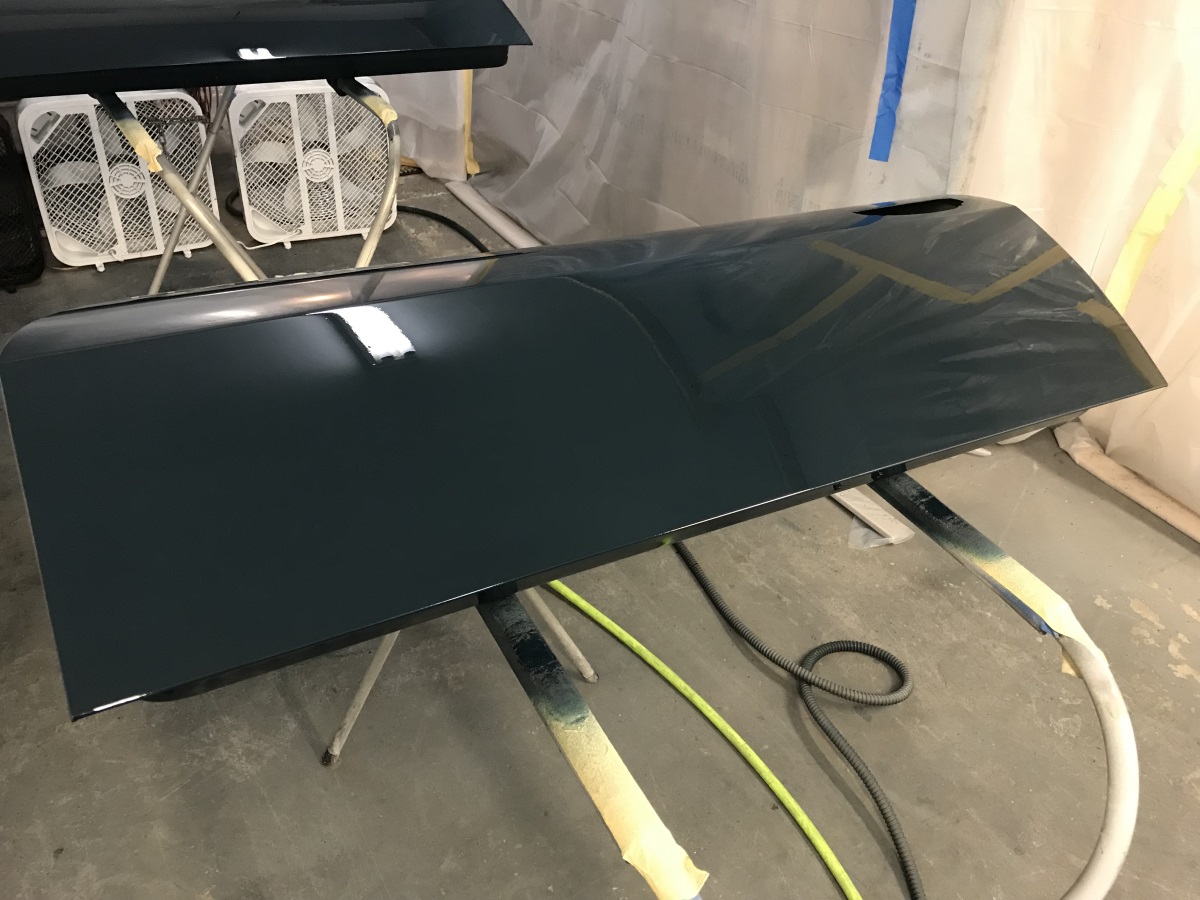
Nov 2019:
I experimented with the Festool nib remover I just purchased, Its very expensive but overall I would say worth it for the time it saves. Initially I
was too heavy handed and damaged some paint but as I did this on the panel I was going to reshoot anyway that was OK. Once I went easy with it it
took all of the dirt nibs and paint runs out, and after reshooting that panel I was able to colour sand and buff the whole car down to bring out a
nice even shine. Very pleased with the results now. Boot and bonnet were fitted and things finally look to be coming on. I will not install the
doors for a while yet as the garage is pretty limited in space and they would cause acess problems. I also will be leaving it on the dolly so I can
move it easily whilst I get some of the work done, especially to the interior.
*Click on images for bigger version*

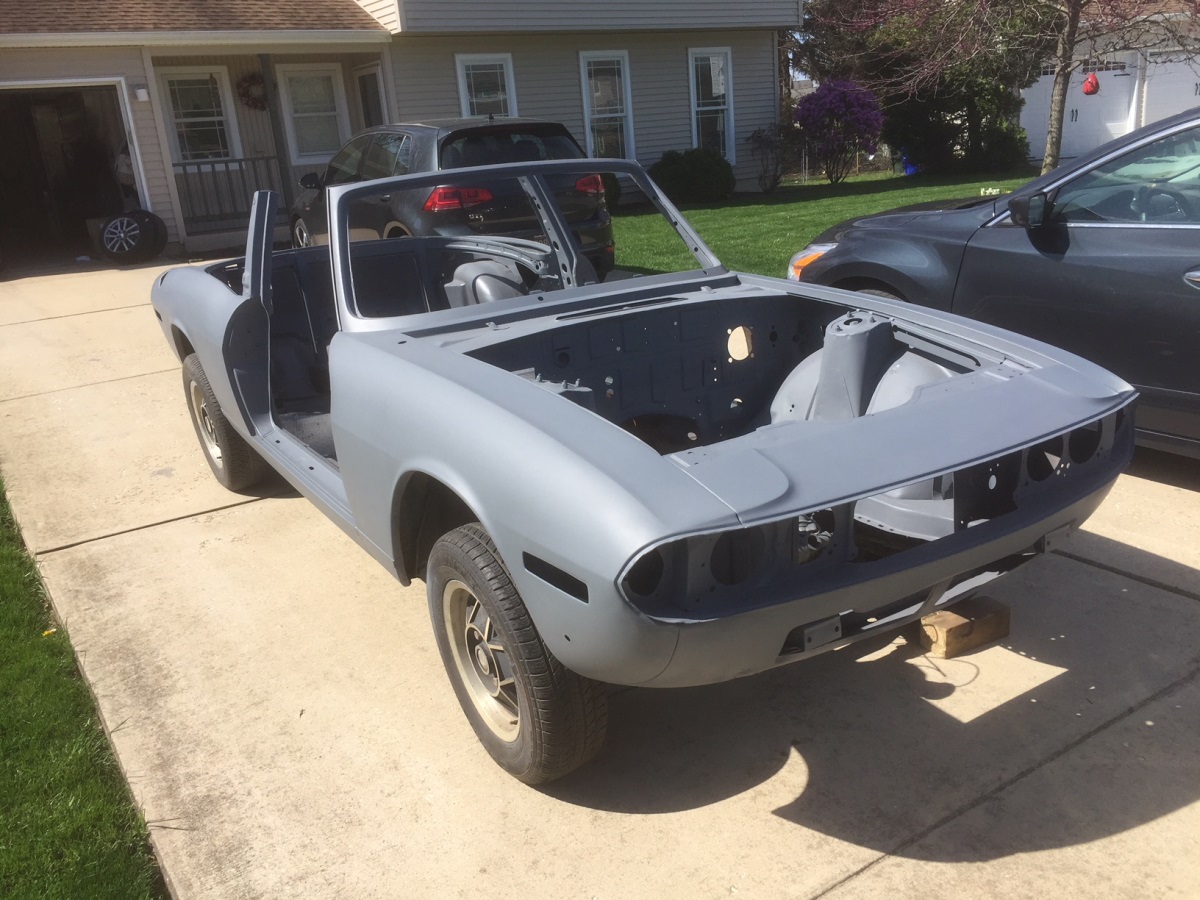
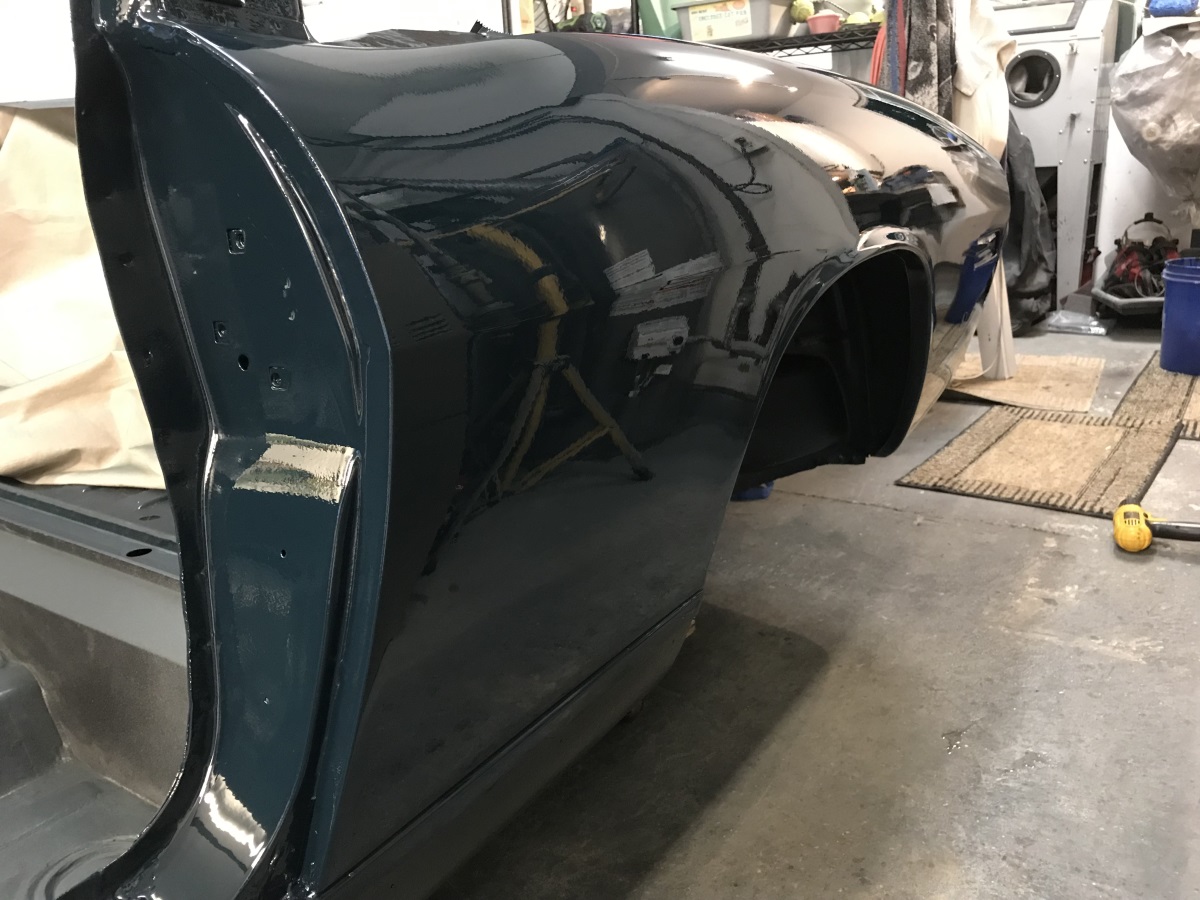
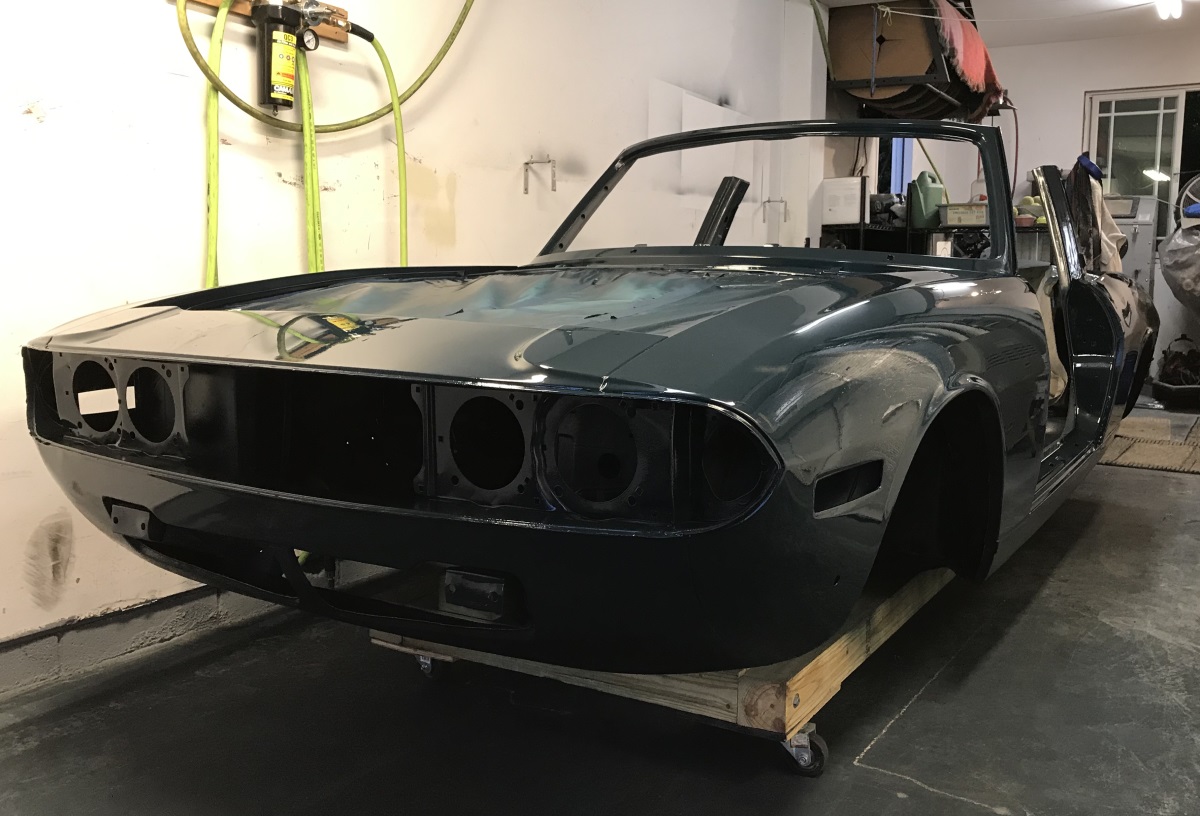
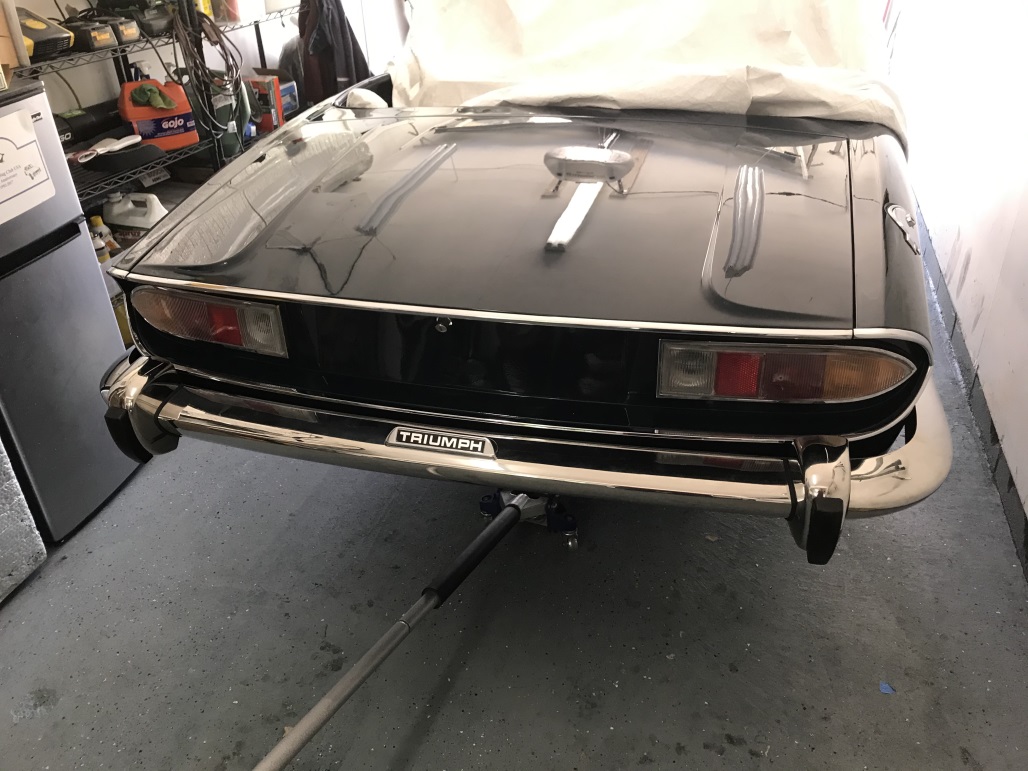
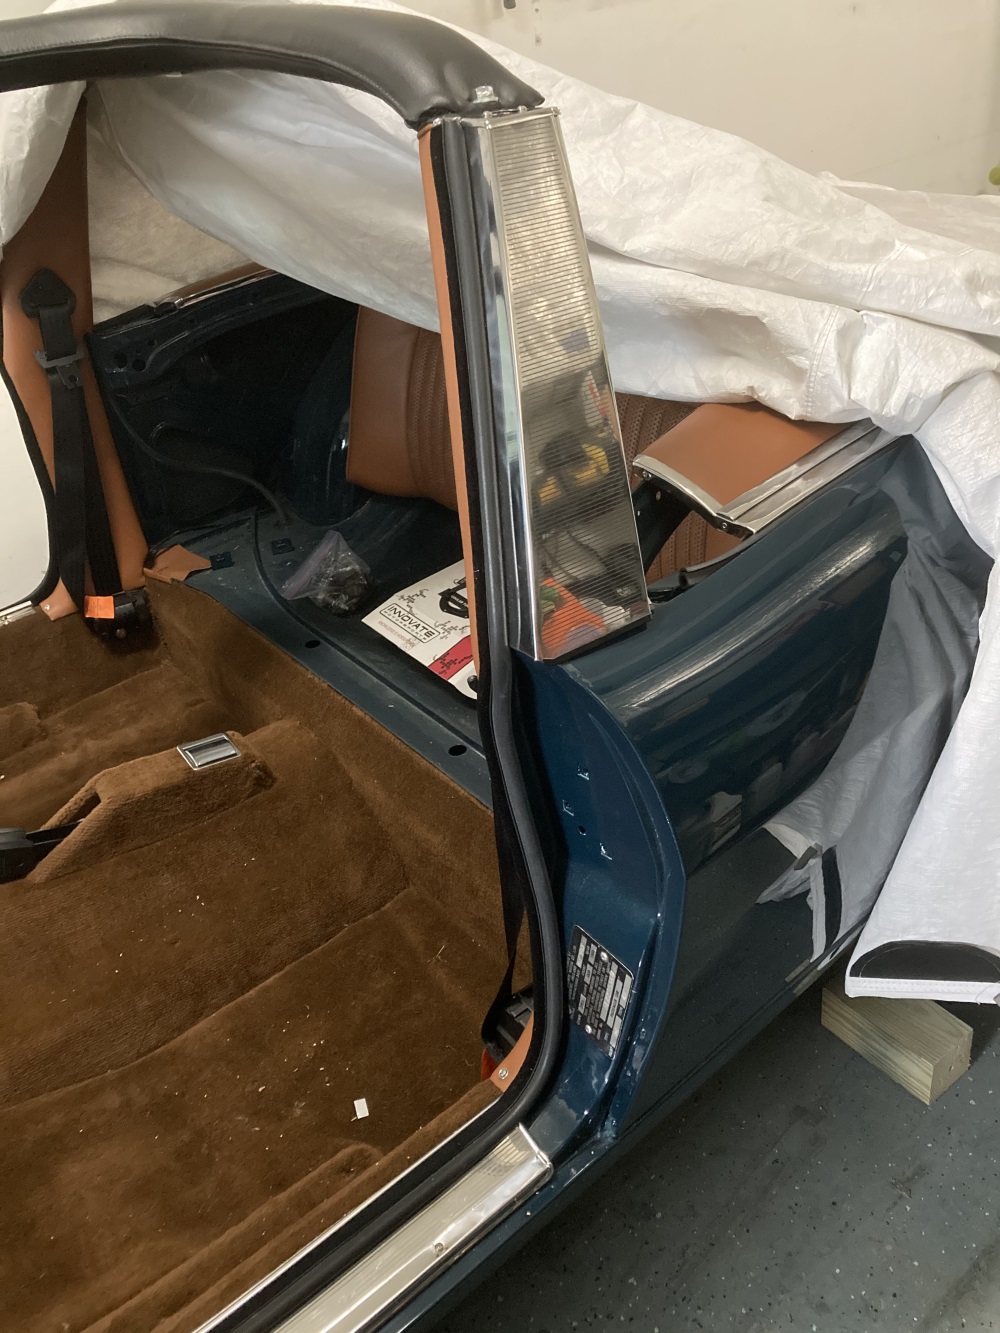
June 2020:
Now the body is painted time for some bling! I installed the B-post trim, door sill trim and windscreen trim. It took me 10 mins to get the
windscreen in, 2-1/2 hours to get the trim in.. not my favorite task!. Then the windscreen capping went on after a new pair of hood locks were
installed. The chrome trim for the rear was OK but once I put it up against my new paint I realised I could not fit it as is, so the wishbone
trims went off to the chrome platers and the worst strips were ordered new. The rear is now installed along with the stainless bumper and it looks
fine. I initially tried the proper clips but they were rubbish, I ended up using silicone sealant and they are nice and firm. The front went on
after the engine was installed. In he end most of the Stainless trim I used came from the absolute junker of a car, it had less dings and polished
up well.I am undecided on the sill trim, I like it as is with no trim, I will need to make a call on that. I do like the UK thin trim but that
would mean drilling my lovely paintjob.. The Tonnau cover was stripped, painted and recovered and all seals wer installed. Only real problem was
the boot seal which was far too large, I found a smaller version locally which works much better.
*Click on images for bigger version*
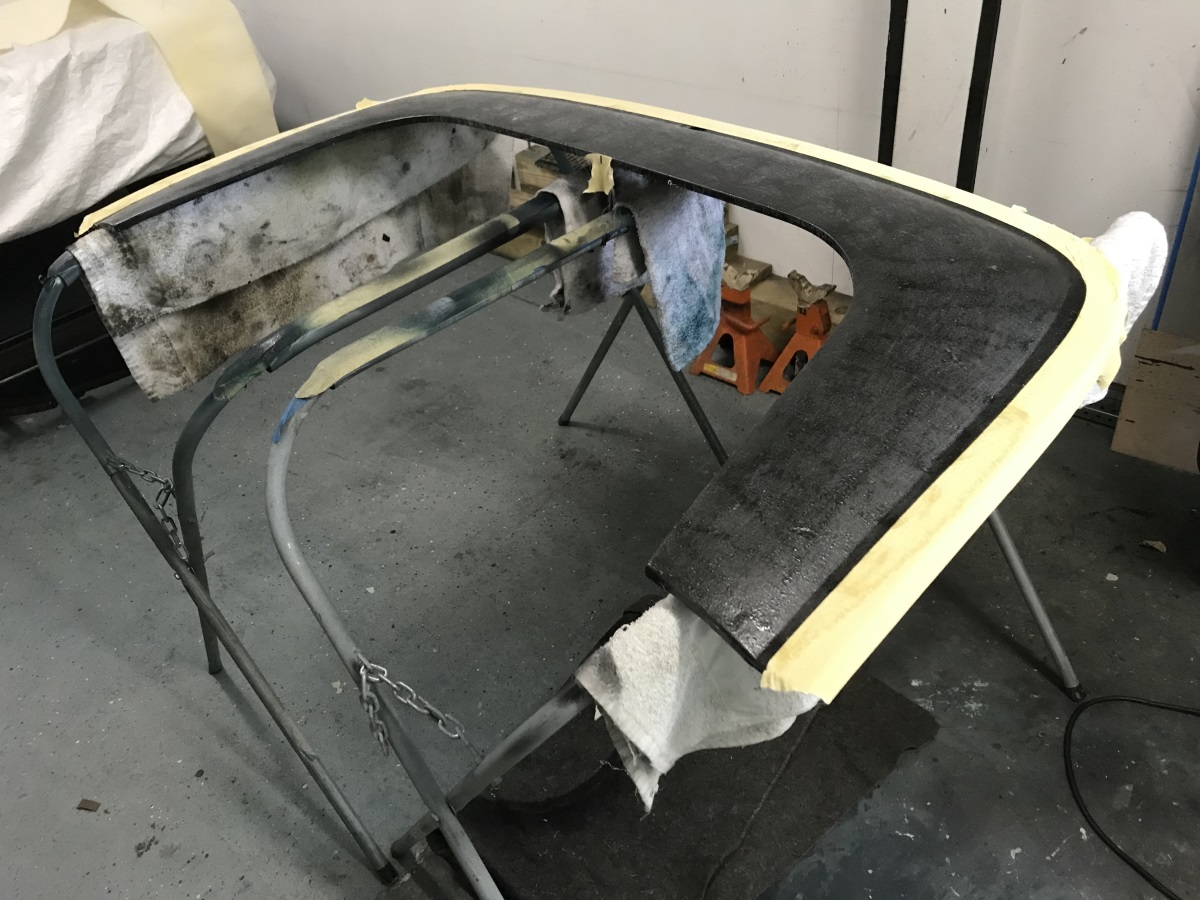
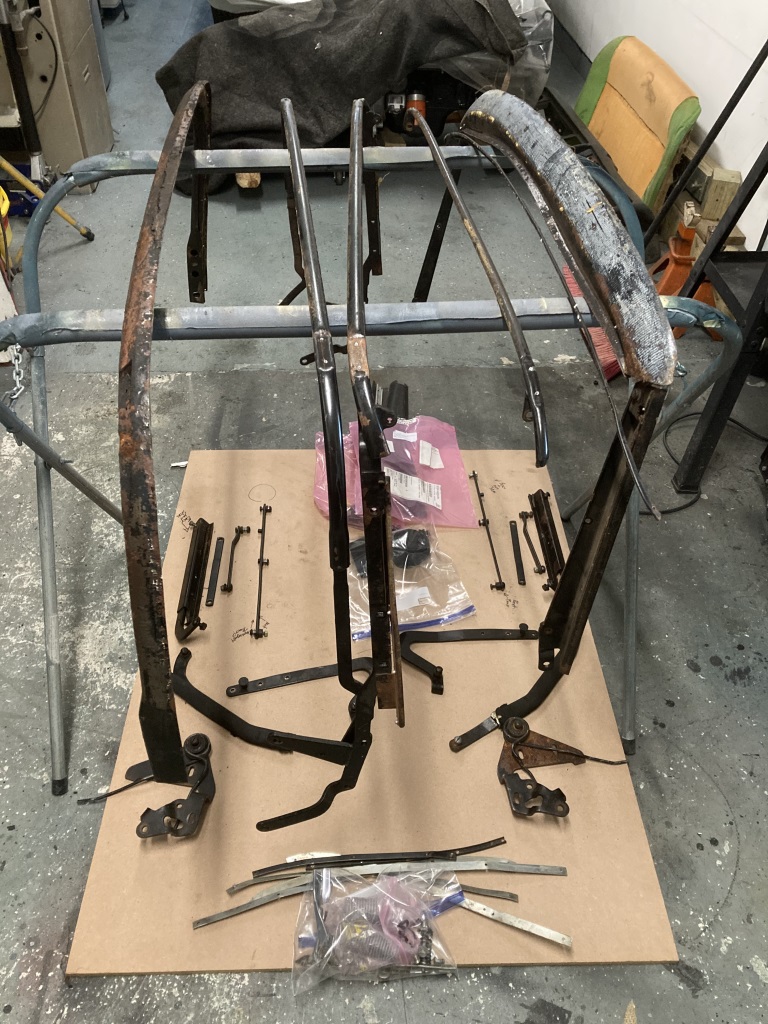
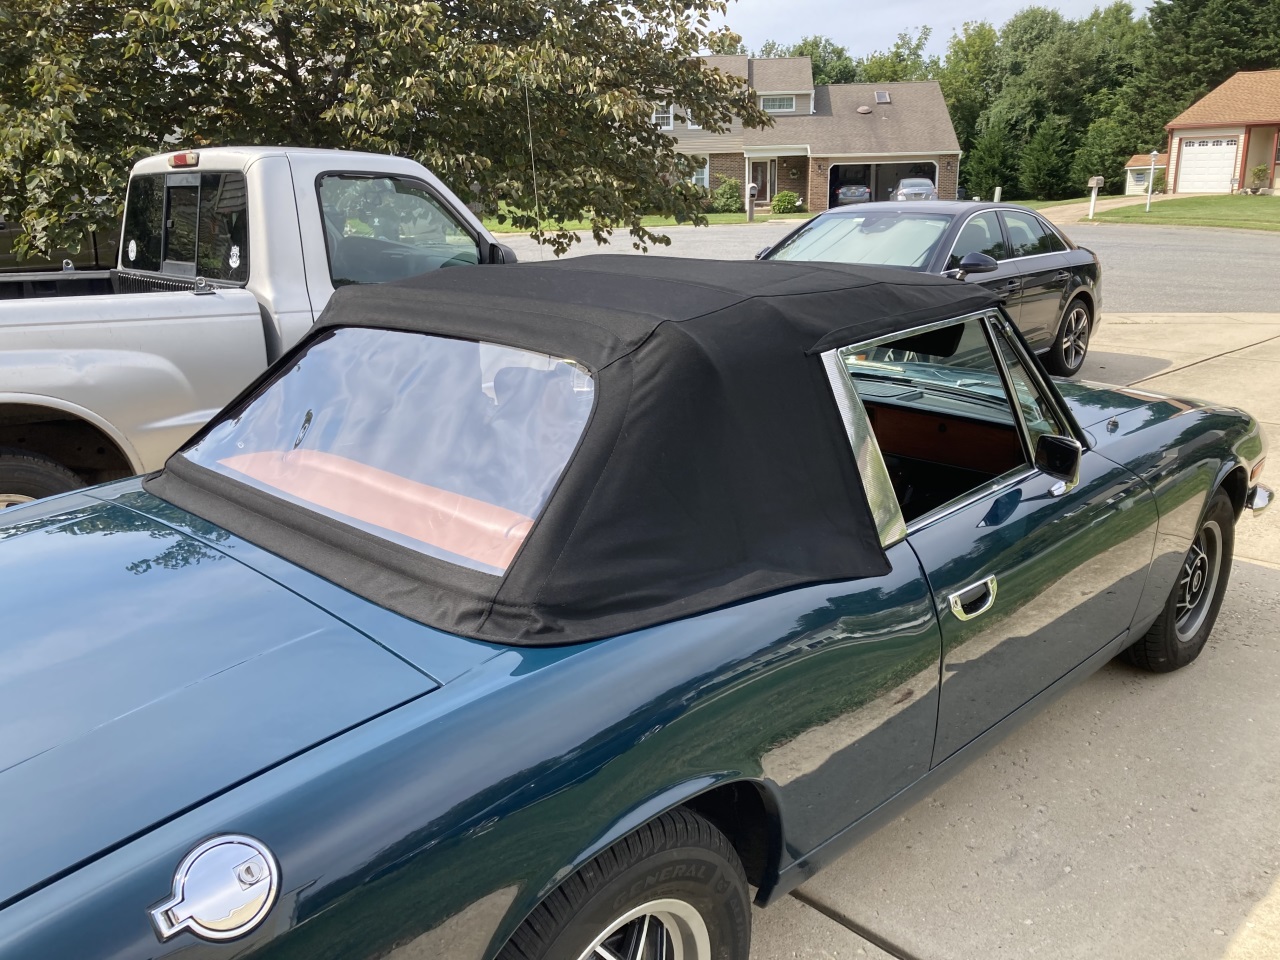
July 2020:
Time for the soft top. The frame was completely stripped, the bends and various issues were attended to and some new bolts and some 3/8 arbour shims
were obtained. Once the frame was glass beaded I covered it in a coat of epoxy primer followed by some enamel paint, which should not react to any
glue I use when fitting the hood. A very long story later and few pictures as I was so involved with it, the frame is installed. One tip is that
when trying to move the hood frame around it is essential to release all springs, otherwise its almost impossible to move things easily. The the
actual soft hood install was not as difficult as I imagined, just some problems with the rear hoop catch which took some fiddling to make it align
and work reliably. The rubber seals supplied wer pretty hard and once I replaced the B post ones with spongy ones from Bains it closed and latched
much better. In the end a nice fitting hood, but what a lot of work for something I will rarely use. (18 months later - I had that hood up once
in anger) I have decided to toss my 2 hard tops, neither are in any kind of decent shape and I just cannot see using them, I prefer the open top!
I have stripped them both, and will keep the glass and trim for possible ebay sales.
*Click on images for bigger version*
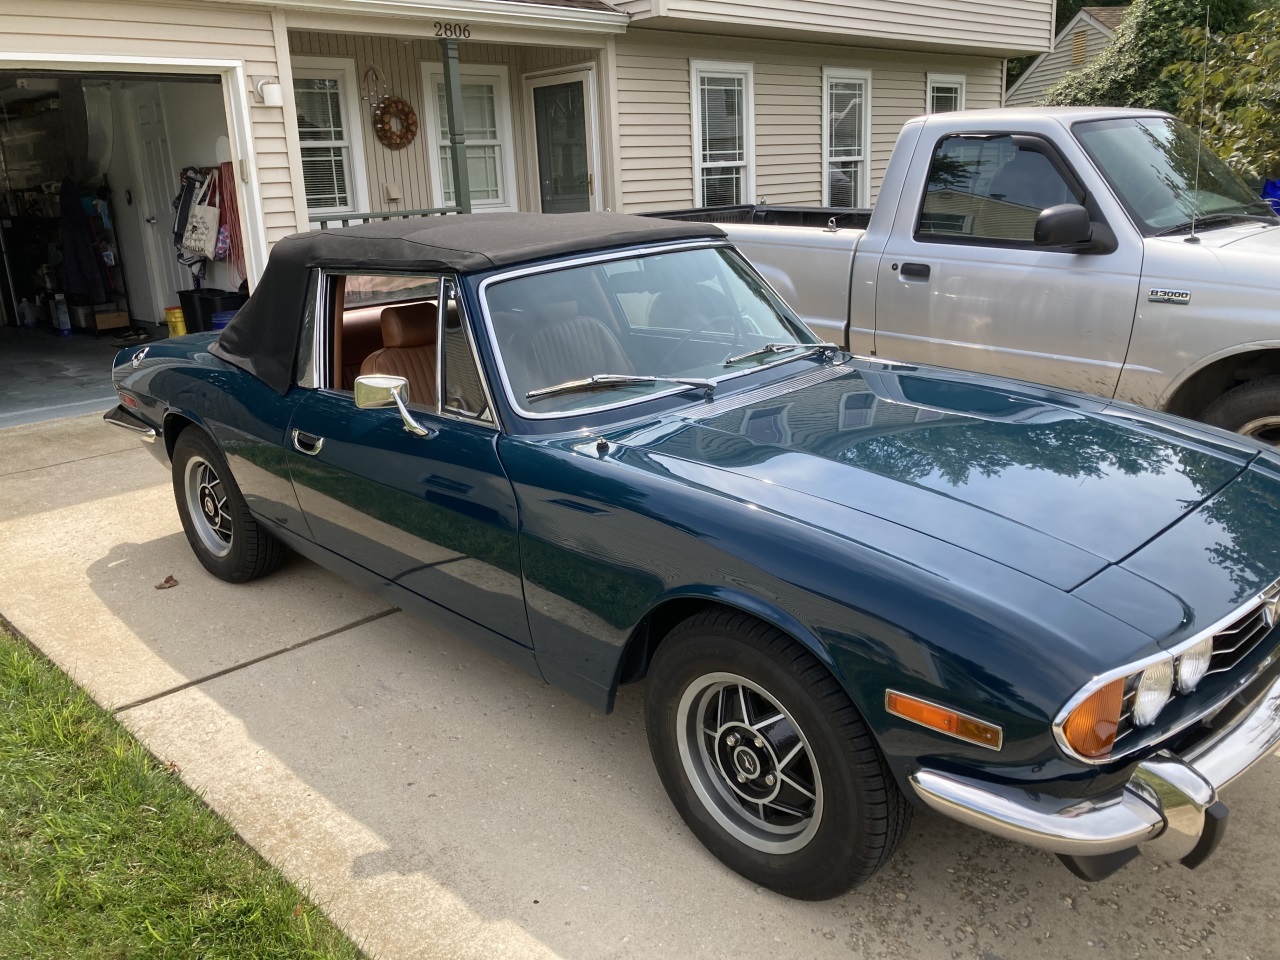
August 2020:
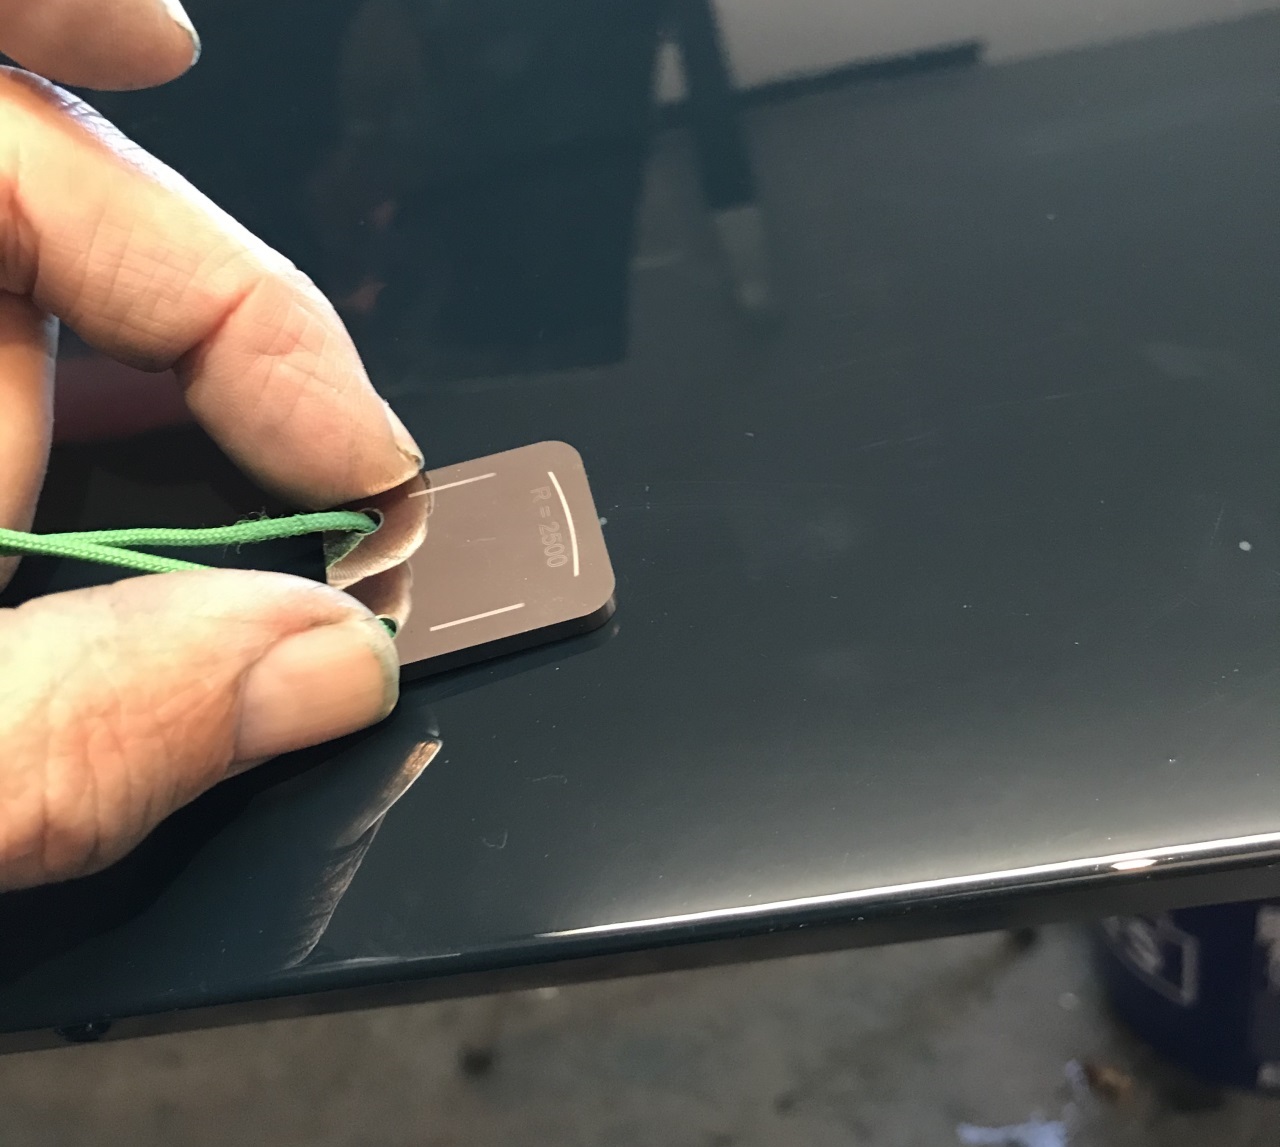
Final body work was installing the coach lines normal on a Mk2. The original would have been Gold but I preferred the look of the Silver lines,
to me they seem to work better with the chrome and dark paint. The single line over the rear arch was a bit of a challenge but it seems OK.
I'm still not keen on the shiny sill strips, so they are staying body colour for now. Thats about it for the bodywork.